
Introduction
Orchids are renowned for their elegance and complexity, but even these resilient plants can fall victim to issues like root rot, which can threaten their health and vitality. Root rot is often caused by overwatering, poor drainage, or fungal infections and can lead to severe damage if not addressed promptly. If your orchids are showing signs of rot, don’t despair. With the right approach, you can revive them and restore their beauty. This article provides a step-by-step guide to miraculously bringing back your rotting orchids to life.
Understanding Root Rot
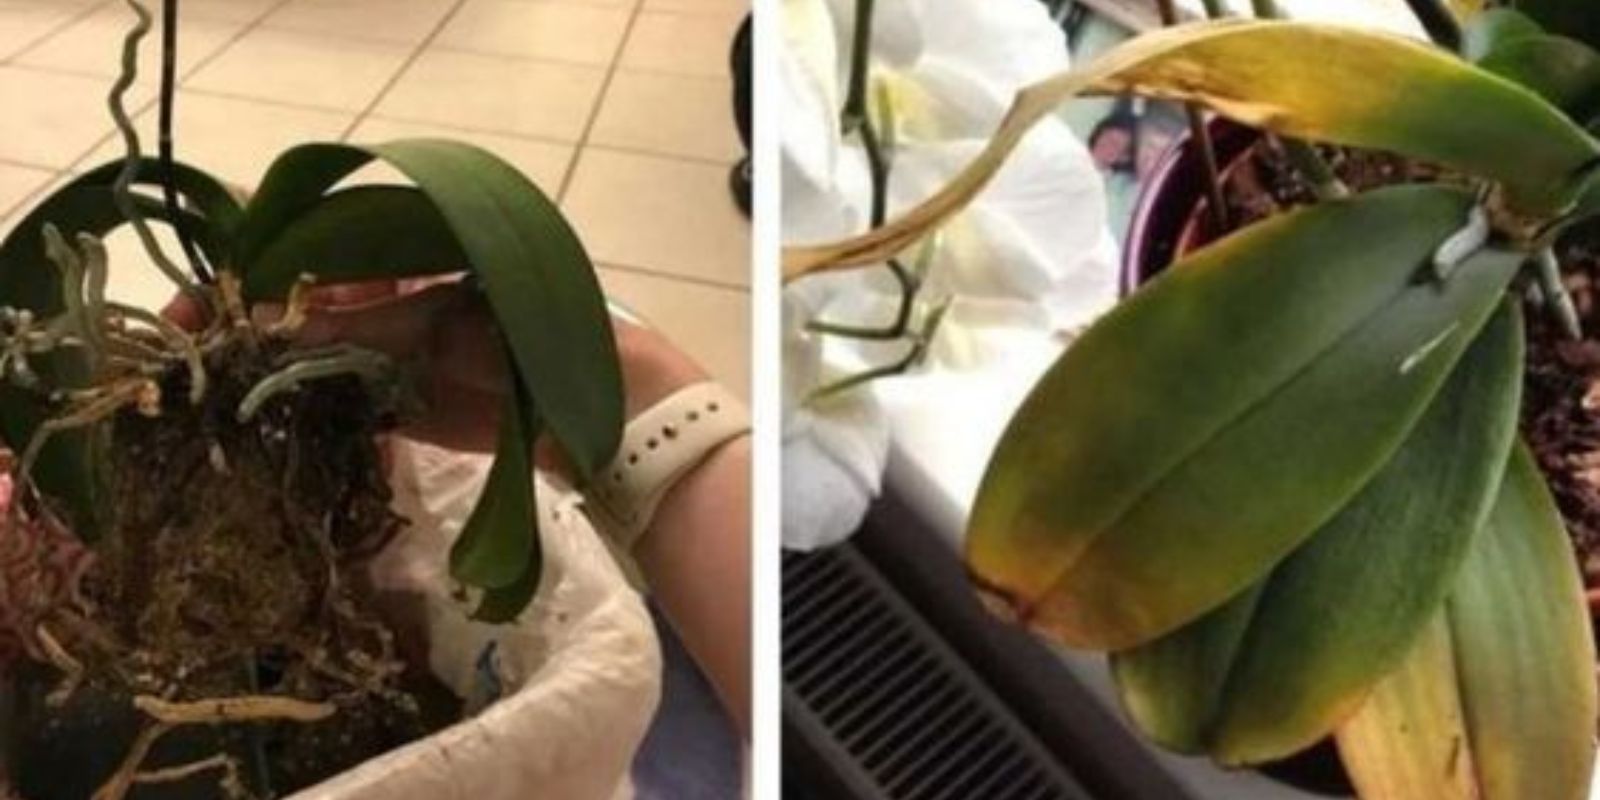
Symptoms of Root Rot: Root rot typically manifests as soft, mushy, or blackened roots. The leaves of the orchid might turn yellow or brown, and the plant may show signs of wilting or stunted growth. Often, the problem is exacerbated by poor air circulation and excessive moisture.
Causes: The most common causes of root rot include overwatering, inadequate drainage, and fungal infections. Orchids that are watered too frequently or planted in soil that retains excess moisture are particularly susceptible.
Steps to Revive Rotten Orchids
1. Assess the Damage
Examine the Orchid: Start by carefully examining your orchid to assess the extent of the damage. Look for signs of rot in the roots, leaves, and overall plant structure. Check the roots for softness, discoloration, or a foul odor, which are indicators of decay.
Identify Affected Areas: Focus on the most severely affected parts of the plant. Healthy roots should be firm and white or light tan in color, while rotting roots will appear dark, mushy, or shriveled.
2. Remove from Pot
Gently Take Out the Orchid: Carefully remove the orchid from its pot. This can be done by gently squeezing the sides of the pot or tapping it to loosen the plant. Avoid pulling on the plant as this can damage the roots further.
Inspect the Roots: Once removed, inspect the roots closely. Cut away any soft, mushy, or blackened roots using sterilized scissors or pruning shears. Make clean cuts to minimize damage and prevent the spread of disease.
3. Clean the Roots
Rinse the Roots: Rinse the healthy roots under lukewarm water to remove old potting mix and debris. This helps in assessing the extent of the rot and prepares the roots for treatment.
Avoid Excessive Moisture: Ensure that the roots are not left soaking wet after rinsing. Excess moisture can promote further fungal growth.
4. Treat with Fungicide
Soak in Fungicide Solution: Prepare a fungicide solution according to the manufacturer’s instructions. Soak the cleaned roots in this solution to combat any remaining fungal spores and prevent new infections.
Let Dry: After soaking, let the roots air-dry for about 30 minutes. This helps to prevent excessive moisture from being introduced into the new potting mix.
5. Repot the Orchid
Choose the Right Potting Mix: Use a fresh, well-draining orchid potting mix. Orchid mixes typically contain bark, perlite, and charcoal, which provide the necessary drainage and aeration for healthy root growth.
Prepare a Clean Pot: Select a pot with proper drainage holes to prevent water from accumulating at the bottom. Sterilize the pot if it was previously used to avoid introducing any pathogens.
Repot Carefully: Place the orchid in the new pot and spread the healthy roots out evenly. Add the new potting mix around the roots, gently pressing it down to eliminate air pockets. Be careful not to pack the mix too tightly.
6. Adjust Care
Light Conditions: Place the repotted orchid in a location with bright, indirect light. Orchids thrive in filtered light and can suffer from direct sunlight, which may cause additional stress.
Humidity Levels: Maintain proper humidity levels by using a humidity tray or room humidifier. Orchids typically require a humidity level between 40% and 60%.
Watering Schedule: Water sparingly until you see new growth. Avoid overwatering by allowing the top inch of the potting mix to dry out before watering again. Overwatering can lead to further rot and stress.
Monitor the Plant: Regularly check your orchid for signs of recovery. Look for new growth and improved leaf condition. Adjust care routines based on the plant’s response to the changes.
Additional Tips for Prevention
Proper Watering: Adopt a careful watering routine to avoid overwatering. Water the orchid thoroughly and ensure that the pot drains well. Allow the top of the potting mix to dry out between waterings.
Improve Air Circulation: Enhance air circulation around your orchid to reduce the risk of fungal infections. Avoid placing orchids in areas with stagnant air.
Regular Inspections: Regularly inspect your orchids for signs of stress, pests, or disease. Early detection can prevent more serious issues and promote better plant health.
Healthy Growing Conditions: Provide optimal growing conditions for your orchids, including the right light, temperature, and humidity. A well-maintained environment supports overall plant health and reduces the risk of problems like root rot.
Conclusion
Reviving a rotting orchid requires a careful, multi-step approach to address the underlying causes of stress and decay. By assessing the damage, removing affected parts, treating with fungicide, and repotting with fresh mix, you can give your orchid the best chance for recovery. Adjusting care practices and maintaining optimal growing conditions will further support your orchid’s rejuvenation.
Motivation
Facing a rotten orchid can be challenging, but with these steps, you can breathe new life into your plant. Share your success stories and connect with fellow orchid enthusiasts to exchange tips and celebrate the recovery of your beautiful orchids. Let’s work together to nurture and restore these remarkable plants!