
Grafting is one of the most effective horticultural techniques that allow gardeners and orchardists to propagate trees and improve their overall yield and health. For those looking to grow walnut trees, grafting offers numerous benefits. It can increase the tree’s resistance to diseases, improve fruit quality, and speed up the growth process, making it a popular choice among gardeners. In this article, we will provide a step-by-step guide to grafting walnut trees, ensuring you achieve 100% success. By following these proven methods, you can propagate strong, healthy walnut trees and enjoy a bountiful harvest in the years to come.
Why Graft Walnut Trees?
Before we dive into the grafting process, it’s essential to understand why grafting walnut trees is a valuable technique. Here are some of the key benefits:
- Faster Growth: Grafted walnut trees grow faster than seed-grown trees because they inherit the established root system of the rootstock, leading to quicker development.
- Disease Resistance: By grafting a healthy scion onto a resistant rootstock, you can reduce the tree’s vulnerability to diseases like walnut blight and root rot.
- Improved Fruit Quality: Grafting allows you to choose a specific walnut variety for the scion, ensuring higher-quality fruit production with desirable traits, such as better taste, size, and disease resistance.
- Consistency: Grafted trees produce fruit that is consistent in quality and yield, unlike seed-grown trees that may exhibit variations.
- Adaptability: Grafting can help you grow walnuts in soils or climates that would otherwise be unsuitable for certain varieties.
The Basics of Walnut Grafting
Grafting involves joining two different plant parts together: the rootstock and the scion. The rootstock is the lower portion, typically selected for its strong root system and disease resistance, while the scion is the upper part of the tree that will produce the desired walnuts. The goal is to get these two parts to grow together and form a healthy, productive tree.
There are several types of grafting techniques, but for walnut trees, the most common and successful method is the cleft grafting technique. This method involves cutting the rootstock and inserting a scion into the cut to allow the tissues to fuse and begin growing together.
Step-by-Step Guide to Grafting Walnut Trees
Follow these steps to successfully graft your walnut trees. With patience and attention to detail, you’ll soon have a thriving walnut orchard.
1. Select Your Rootstock and Scion
The first and most crucial step in grafting is selecting the right rootstock and scion. Here’s what you need to know:
- Rootstock: Choose a disease-resistant rootstock that is suited to your growing region and soil. Black walnut (Juglans nigra) and English walnut (Juglans regia) are common rootstocks. However, select the rootstock based on local climate conditions and the disease pressures in your area.
- Scion: The scion is the part of the tree that will produce the walnuts. Choose a healthy, young shoot from a desirable walnut variety. The scion should be about 6-8 inches long with several buds on it.
Both the rootstock and the scion should be taken from trees that are free from pests and diseases. Make sure they are healthy and vigorous, as this will increase the chances of a successful graft.
2. Prepare the Rootstock
The next step is to prepare the rootstock. Choose a rootstock that is at least one year old, with a trunk diameter of about 1-2 inches. The following steps will help ensure the graft is successful:
- Cut the Rootstock: Make a clean, straight cut on the rootstock using a sharp, clean knife or pruning saw. The cut should be made about 4-6 inches above the soil line.
- Create a Cleft: Using a grafting tool or a sharp knife, create a cleft (or slit) in the center of the cut rootstock. The cleft should be around 2-3 inches deep, and it should be wide enough to fit the scion.
3. Prepare the Scion
Next, prepare the scion that you’ll be grafting onto the rootstock:
- Trim the Scion: Cut the scion so that it’s about 6-8 inches long. Remove any leaves and buds that are too small or weak. The top of the scion should be cleanly cut at an angle.
- Shape the Scion: Trim the bottom of the scion into a wedge shape. This will allow the scion to fit snugly into the cleft of the rootstock. Ensure that the cambium layers (the thin green layer just beneath the bark) are exposed, as this is where the grafting tissues will fuse.
4. Insert the Scion into the Rootstock
Once the scion is prepared, it’s time to graft it onto the rootstock. Carefully follow these steps:
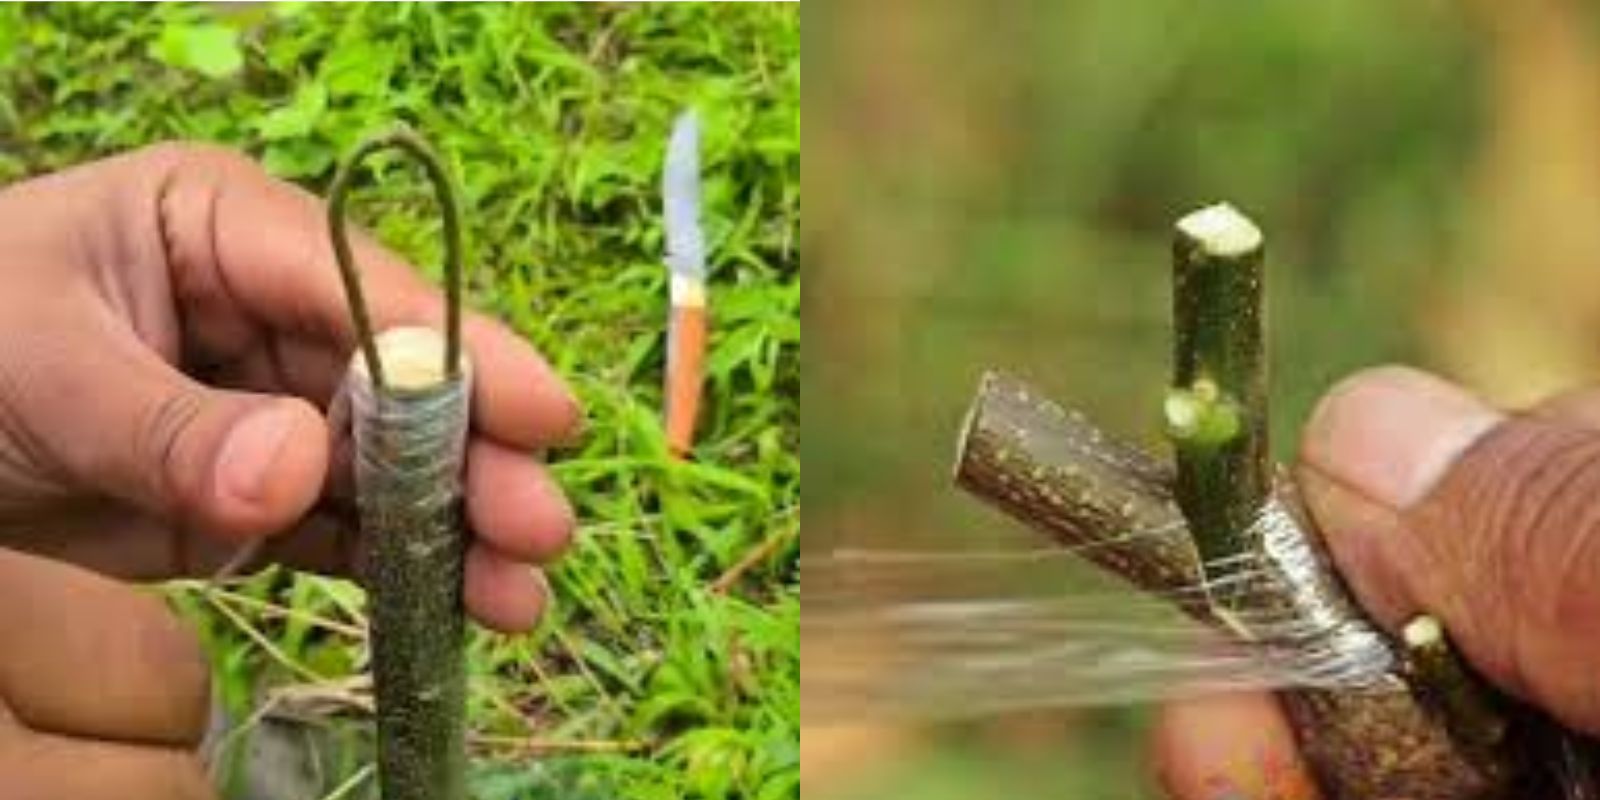
- Insert the Scion: Slide the wedge-shaped end of the scion into the cleft of the rootstock. Make sure that the cambium layers of both the scion and rootstock are aligned. This is crucial for the successful fusion of the tissues.
- Secure the Graft: Once the scion is securely in place, wrap the graft with grafting tape, parafilm, or rubber bands to hold it in position. This will help prevent the graft from moving and protect it from drying out.
5. Protect the Graft
After securing the graft, it’s important to protect it from the elements and encourage healing:
- Seal the Graft: Use grafting wax or tape to seal the edges of the grafting union. This will prevent moisture from escaping and protect the graft from infections.
- Shade the Graft: If you’re grafting outdoors, consider shading the graft site to reduce stress on the plant. A piece of cloth or a plastic bag can provide the necessary protection.
6. Care for the Grafted Tree
Now that your walnut graft is complete, it’s important to care for it properly to ensure a successful union:
- Water the Graft: Keep the rootstock and scion well-watered, but not waterlogged. The grafting site should remain moist, but excess water can cause rot.
- Monitor the Graft: Regularly check the graft for signs of growth. You should begin to see new buds sprouting from the scion within 2-3 weeks.
- Remove the Wrapping: Once the graft has taken and new growth is visible, you can slowly remove the grafting tape or parafilm. Be careful not to disturb the graft during this process.
7. Prune the Grafted Tree
As the tree grows, prune it to maintain its shape and encourage strong growth:
- Remove Suckers: Cut off any suckers or growth from the rootstock below the grafting site. This will direct the tree’s energy toward the scion.
- Shape the Tree: Trim any weak or diseased branches and encourage strong, healthy growth by removing any crowded or overlapping branches.
8. Monitor for Success
It may take a few months for the graft to fully integrate and show signs of growth. However, once the graft has healed and you see strong, healthy growth from the scion, you’ve successfully grafted your walnut tree.
Tips for Success in Walnut Grafting
- Choose the Right Time: Grafting is best done in the spring when both the rootstock and scion are actively growing. Avoid grafting during the hot summer months or when the plant is dormant.
- Clean Tools: Ensure that your grafting tools are clean and sharp. This will reduce the risk of infection and improve your chances of a successful graft.
- Practice Patience: Grafting can take time, so be patient and keep monitoring your graft regularly. Sometimes it may take several weeks before the graft begins to show signs of growth.
Conclusion
Grafting walnut trees is a highly rewarding process that allows you to grow healthy, productive trees in a shorter amount of time. By selecting the right rootstock, preparing the scion properly, and following the grafting steps carefully, you can achieve a high success rate. Whether you’re a seasoned gardener or a novice, grafting offers a reliable way to propagate walnut trees, and with practice, you can ensure that your orchard thrives for years to come. So, gather your tools, choose your rootstock and scion, and start grafting—your walnut trees are waiting to grow!