
Introduction
Grafting is an age-old horticultural technique that allows gardeners to combine the best qualities of two plants into one thriving tree. When it comes to papaya trees, grafting offers several advantages, including faster fruit production, improved disease resistance, and consistent fruit quality. Whether you’re a seasoned gardener or a beginner eager to try this fascinating method, this comprehensive guide will take you step-by-step through the process of propagating papaya trees through grafting.
Why Propagate Papaya Trees by Grafting?
Papaya trees grown from seeds often exhibit variability in fruit quality, size, and taste due to genetic differences. Grafting ensures that the scion (the plant part grafted onto the rootstock) retains the exact characteristics of the parent plant. Here’s why grafting is worth the effort:
- Faster Fruiting: Grafted papaya trees produce fruit much earlier than seed-grown trees.
- Disease Resistance: By choosing a hardy rootstock, you can enhance the plant’s ability to resist diseases.
- Uniform Quality: The fruit from grafted trees is more uniform in flavor, size, and sweetness.
- Space Efficiency: Grafting enables you to grow high-quality trees in smaller spaces, ideal for urban gardeners.
Essential Tools and Materials
Before diving into the process, gather the following tools:
- Sharp grafting knife or blade
- Grafting tape or plastic wrap
- Rootstock (a healthy papaya plant)
- Scion (a branch from a fruit-bearing papaya tree)
- Clean cloth or alcohol for sterilization
- Pruning shears
Step-by-Step Guide to Grafting Papaya Trees
1. Select the Right Plants
The success of grafting heavily depends on selecting the right rootstock and scion.
- Rootstock: Choose a vigorous and healthy papaya plant with a thick, strong stem. The rootstock should ideally be disease-free and well-established.
- Scion: Select a branch from a fruit-bearing papaya tree known for its desirable traits (e.g., sweet fruit, large yield). Ensure the scion is young, green, and healthy.
2. Sterilize Tools and Prepare the Plants
Clean all tools with rubbing alcohol or boiling water to minimize the risk of infections.
- Cut off any unnecessary leaves from the rootstock and scion to reduce water loss during the healing process.
3. Prepare the Rootstock
- Using a sharp grafting knife, cut the top of the rootstock stem at a diagonal angle (about 30–45 degrees). The cut should be smooth and clean for better contact with the scion.
4. Prepare the Scion
- Trim the base of the scion to form a wedge or V-shape. This shape allows the scion to fit snugly onto the rootstock.
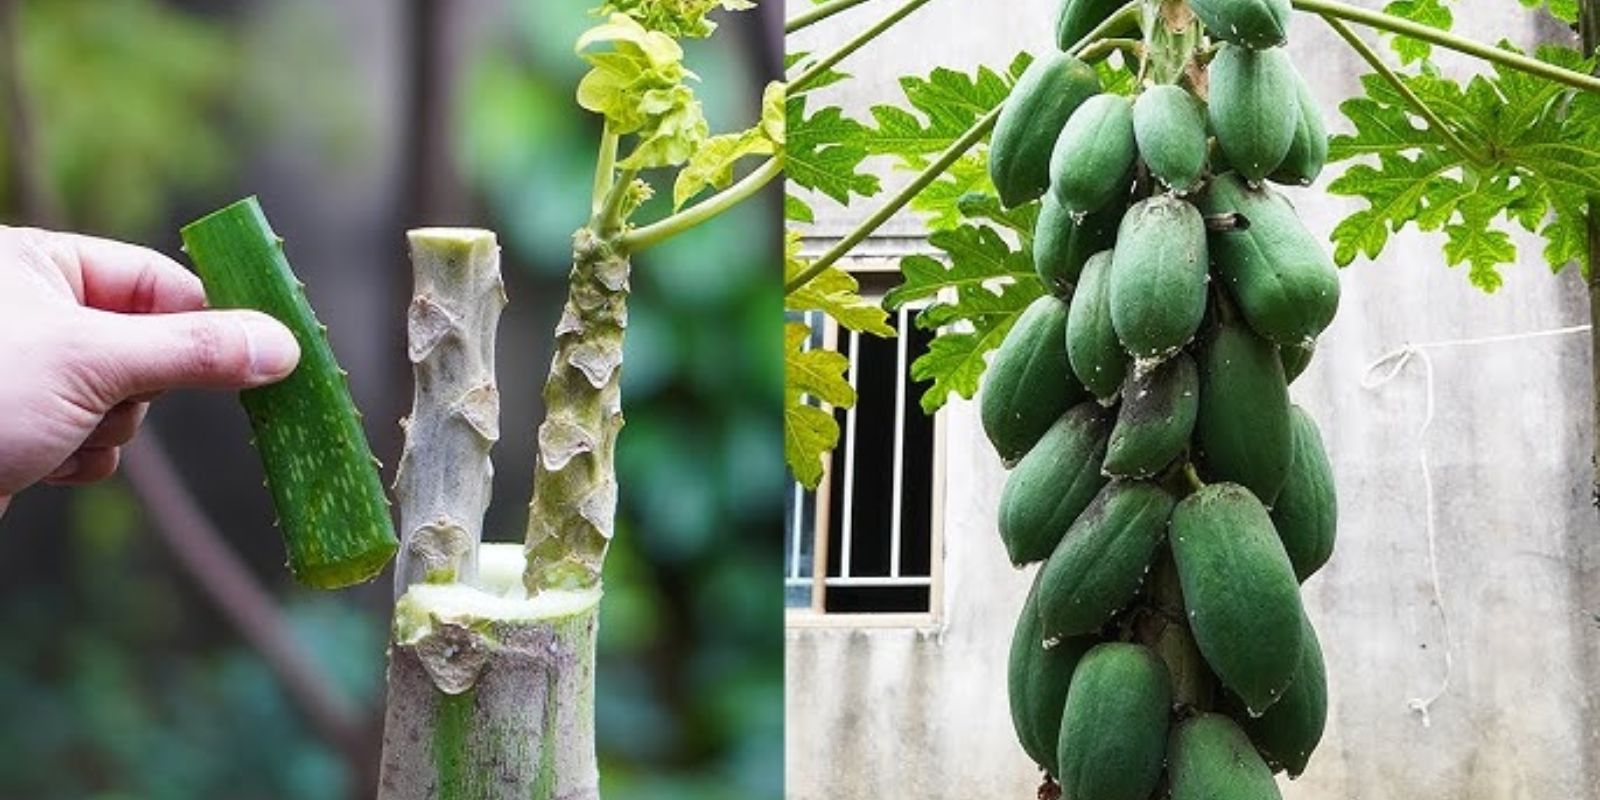
5. Align and Attach the Graft
- Carefully place the V-shaped scion onto the diagonal cut of the rootstock. The cambium layers (green inner bark) of both pieces must align perfectly to ensure nutrient transfer. Misalignment can result in graft failure.
6. Secure the Graft
- Wrap the graft union tightly with grafting tape or plastic wrap. Ensure the scion remains firmly in place without movement. Leave a small portion of the scion exposed at the top to allow new growth.
7. Provide Optimal Conditions
- Place the grafted plant in a shaded, well-ventilated area to prevent direct sunlight and heat from stressing the graft.
- Water the rootstock regularly but avoid overwatering, as excessive moisture can lead to rot.
8. Monitor and Remove the Tape
- After 2–4 weeks, check the graft for signs of success, such as new leaf growth on the scion. Once the graft has fully healed, gently remove the tape.
9. Transition to Full Sunlight
- Gradually introduce the grafted plant to sunlight over a week to prevent stress.
Common Challenges and Solutions
1. Graft Failure
- Cause: Misalignment of cambium layers or poor cutting technique.
- Solution: Ensure the cuts are clean and properly aligned during the grafting process.
2. Scion Drying Out
- Cause: Excessive exposure to sunlight or inadequate wrapping.
- Solution: Keep the plant in a shaded area and wrap the graft securely to retain moisture.
3. Rootstock Infection
- Cause: Use of unsterilized tools or overwatering.
- Solution: Sterilize tools before use and maintain proper watering practices.
Benefits of Grafted Papaya Trees
Grafted papaya trees not only save time but also improve the overall gardening experience. Here are some additional benefits:
- Longevity: Grafted papaya trees often have a longer productive lifespan.
- Enhanced Adaptability: The rootstock can be chosen to tolerate specific soil types or climatic conditions.
- Cost Efficiency: By propagating your own grafted trees, you save money on purchasing high-quality plants.
Tips for Success
- Always use healthy, disease-free rootstock and scion.
- Perform grafting during the early morning or late afternoon to minimize heat stress.
- Avoid overhandling the grafted plant during the healing process.
- Experiment with different rootstock-scion combinations to discover the best results for your garden.
Conclusion
Propagating papaya trees through grafting is a rewarding technique that allows gardeners to grow superior plants with minimal effort. By following the steps outlined in this guide, you can successfully graft your own papaya trees and enjoy delicious, high-quality fruits year after year.
What’s your experience with grafting? Share your tips and success stories in the comments below! Let’s grow together!
🌱✨ #PapayaTree #GraftingTips #FruitGardening #TropicalGardening #DIYPropagation #GrowYourOwnFruit #GardeningHacks #SustainableGardening