
Cloves are one of the most aromatic and versatile spices, used in cuisines and traditional medicine worldwide. The spice comes from the dried flower buds of the clove tree, Syzygium aromaticum, a tropical evergreen native to the Maluku Islands of Indonesia. Growing your own clove tree may seem like a complex task, but with the right guidance, patience, and care, it’s possible to cultivate this exotic spice at home.
In this detailed guide, we’ll walk you through everything you need to know about growing cloves from seed to spice, right in your backyard or garden. Whether you’re a beginner gardener or a seasoned pro, you’ll find useful tips to grow a healthy clove tree.
Introduction to Cloves
Cloves are one of the oldest spices known to humankind. Their sweet, pungent aroma has been prized in culinary arts for centuries. Not only do cloves elevate the flavor of dishes, but they also have numerous health benefits. They are known for their anti-inflammatory, antimicrobial, and digestive properties, and they are often used in traditional remedies for toothaches, nausea, and colds.
One of the great joys of growing clove trees is the satisfaction of harvesting your own cloves and using them fresh or dried in your kitchen. Clove trees, if properly nurtured, will reward you with fragrant flowers and a generous harvest of cloves every year.
Why Grow Your Own Cloves?
Here are a few reasons why growing cloves at home is a rewarding and practical endeavor:
- Organic and Pesticide-Free: By growing cloves yourself, you have control over the cultivation process, ensuring that your spice is free from harmful chemicals.
- Fresh Supply: There’s nothing better than having a fresh supply of cloves when you need them. Whether for cooking or medicinal uses, you’ll always have access to high-quality spices.
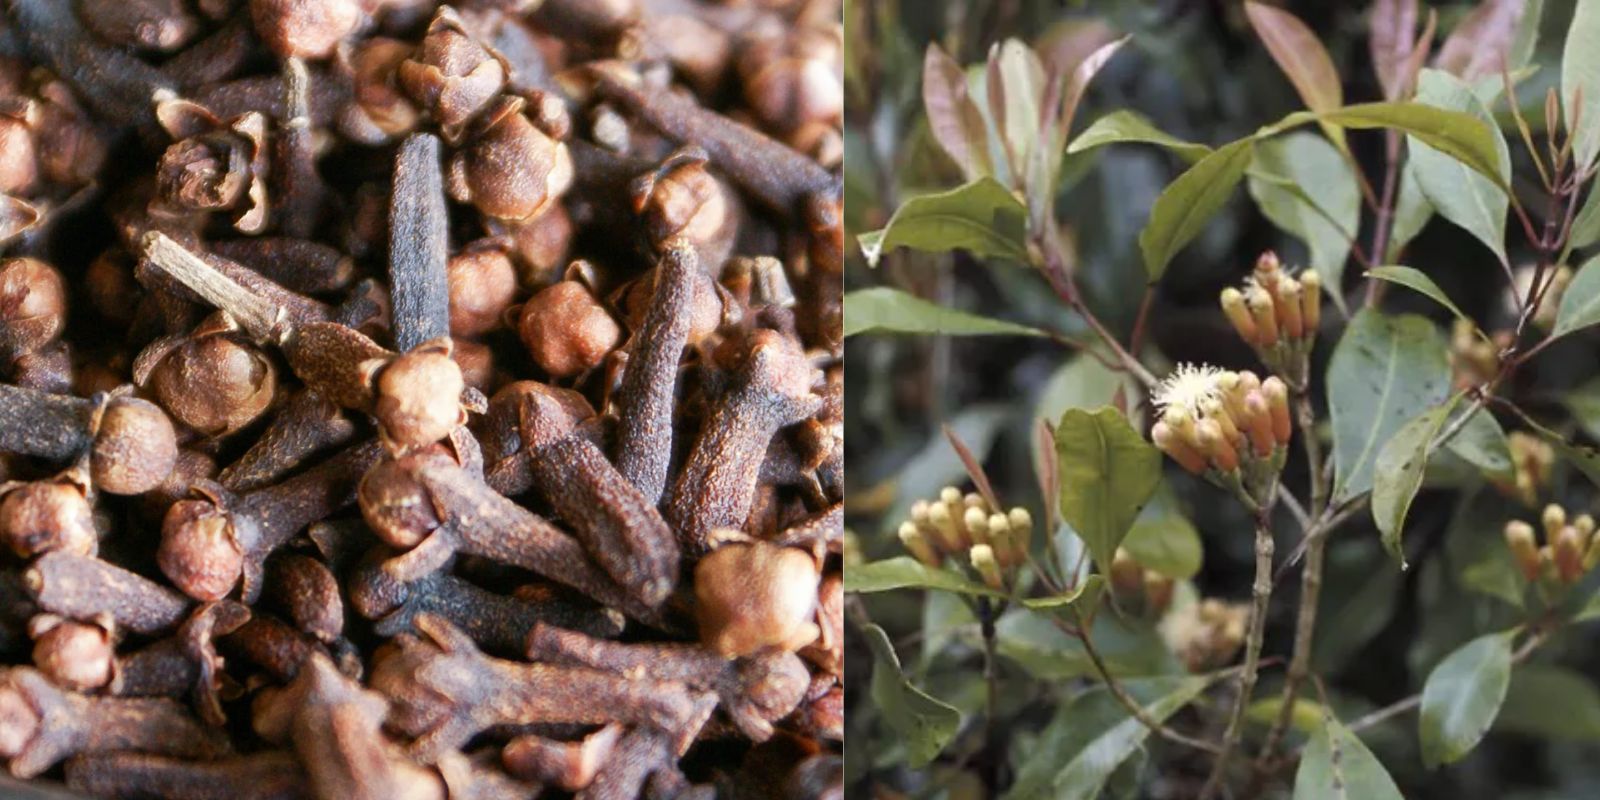
- Aesthetic Appeal: Clove trees are visually stunning, with glossy green leaves and clusters of beautiful pinkish buds that add an exotic touch to any garden.
- Sustainable Gardening: Growing your own spices contributes to a more sustainable and eco-friendly lifestyle. Clove trees can also attract beneficial pollinators to your garden.
Step-by-Step Guide to Growing Cloves
1. Acquiring Fresh Clove Seeds
The first step to growing cloves is obtaining fresh clove seeds. It’s important to use seeds from a fresh clove tree, as cloves purchased from the store are usually dried and will not germinate. You can either source clove seeds from a nursery specializing in tropical plants or from a fellow gardener who has a mature clove tree.
2. Soak the Seeds for Better Germination
Before planting, it’s crucial to soak the clove seeds in warm water for 24 hours. This softens the seed coat and encourages quicker germination. During the soaking process, ensure the water is kept at a warm temperature, mimicking the tropical conditions where clove trees naturally thrive.
3. Preparing the Potting Mix
Clove trees prefer well-draining, nutrient-rich soil. For optimal results, create a potting mix with equal parts organic compost, peat moss, and sandy soil. This will ensure that the young clove seedlings have access to the nutrients they need while avoiding waterlogging, which could lead to root rot.
Additionally, you can add a bit of perlite or vermiculite to the mix to further improve drainage. Cloves are sensitive to excessive moisture, so it’s important that the soil remains moist but not soggy.
4. Planting the Seeds
Once the seeds are ready, fill small pots with your prepared potting mix. Plant the seeds just below the surface of the soil, about 1 to 2 cm deep. Water the soil gently to avoid disturbing the seeds. If you’re planting multiple seeds, space them out evenly, as clove trees need room to grow.
Place the pots in a location that receives indirect sunlight. While clove trees love warmth, young seedlings are delicate and can suffer from too much direct heat.
5. Maintaining Optimal Conditions
Clove trees are tropical and require specific conditions to thrive. The ideal temperature for clove seedlings is between 70°F and 85°F (21°C to 29°C). Humidity is also essential, so if you’re growing cloves indoors or in a cooler climate, consider using a humidity tray or misting the plants regularly to maintain moisture levels.
Water the seedlings consistently, keeping the soil moist but never waterlogged. Overwatering can lead to fungal issues and root problems, so ensure the soil has proper drainage.
6. Patience and Care: Waiting for the Seedlings to Sprout
Clove seeds can take anywhere from 4 to 8 weeks to sprout, so patience is key. During this time, make sure the soil remains moist and the temperature is warm. After the seedlings emerge, continue to provide consistent water and light. You may want to rotate the pots occasionally to ensure even growth.
Once the seedlings have developed a few sets of leaves, you can consider transferring them to larger pots or a more permanent location.
7. Transplanting the Clove Tree
After about six months to a year, your clove seedlings will be strong enough to be transplanted into a larger container or directly into the ground if you live in a tropical or subtropical region. If you’re planting outdoors, choose a spot with well-draining soil and partial shade to protect the young tree from harsh sunlight.
If growing in containers, opt for a deep pot to allow the tree’s roots to develop fully. Make sure the pot has proper drainage holes, and continue using a nutrient-rich potting mix to support the tree’s growth.
8. Fertilization and Maintenance
Clove trees benefit from organic fertilizers, especially those rich in potassium and phosphorus, which support flower and bud development. Fertilize your clove tree every two to three months during the growing season, especially during its early years.
In addition to regular fertilization, prune your clove tree to encourage healthy branching and remove any dead or weak limbs. Clove trees can grow quite tall, so regular pruning will help keep the tree at a manageable size and improve airflow between the branches.
9. Protecting Your Clove Tree
Clove trees can be sensitive to changes in temperature and moisture, so it’s essential to protect them from frost and harsh weather conditions. If you live in an area with cold winters, consider moving container-grown clove trees indoors or into a greenhouse during colder months.
Cloves are relatively pest-resistant, but keep an eye out for common garden pests like aphids or spider mites. Neem oil or insecticidal soap can be used to manage any pest issues.
10. Harvesting the Cloves
One of the most exciting moments for any gardener is the harvest. Clove trees typically take 4 to 6 years to start producing flower buds, and the harvest season usually falls in late summer or early autumn.
The cloves are harvested when the buds turn from green to pink but before they open into full flowers. Once picked, the buds are dried in the sun for a few days until they harden and turn a deep brown color. These dried buds are the cloves that you can use in cooking, baking, or even for medicinal purposes.
Conclusion: Grow Your Own Aromatic Cloves at Home
Growing clove trees from seed is a rewarding and enjoyable experience, especially for those interested in sustainable gardening and self-sufficiency. Not only do clove trees provide a valuable spice, but they also add a touch of beauty and fragrance to your garden. While growing cloves requires patience, the results are well worth the wait.
Imagine being able to harvest your own cloves for spicing up dishes or brewing fragrant teas. With the right conditions and care, your clove tree will thrive and become a unique, aromatic addition to your garden. Start today and enjoy the fruits—or rather, the spices—of your labor!
Ready to grow your own clove tree? 🌿 Share your progress with us using these viral gardening hashtags!