
Introduction:
Figs are not only delicious fruits but also resilient and rewarding plants to grow in your garden. One of the easiest and most cost-effective ways to expand your fig collection is by propagating them from cuttings. Propagating fig trees allows you to grow new plants without the need to purchase additional trees, and it’s a simple process that can be incredibly rewarding. In this article, we will explore everything you need to know about propagating fig trees from cuttings, including step-by-step instructions, tips, and how to track progress to ensure success. By the end of this guide, you’ll have a better understanding of how to propagate figs and watch your new plants grow!
Why Propagate Fig Trees from Cuttings?
Before diving into the process of propagating fig trees, it’s essential to understand why this method is beneficial. Propagating figs through cuttings allows you to:
- Expand Your Garden: If you have a healthy fig tree, you can easily propagate new plants and expand your fig collection without spending money on buying new trees.
- Clone Your Favorite Varieties: By taking cuttings from an existing fig tree, you are essentially cloning that tree, ensuring the new plant will have the same characteristics as the original one.
- Root Faster: Fig trees tend to root relatively quickly from cuttings compared to other fruit trees, which makes the propagation process more accessible to beginner gardeners.
Best Time for Fig Cutting Propagation
Timing is crucial for successful fig propagation. The ideal time to take fig cuttings is in late winter to early spring, when the tree is dormant. During this period, fig trees are not actively growing, and the cuttings are more likely to survive and root successfully. Alternatively, you can also propagate fig cuttings in late summer after the tree has produced its fruit.
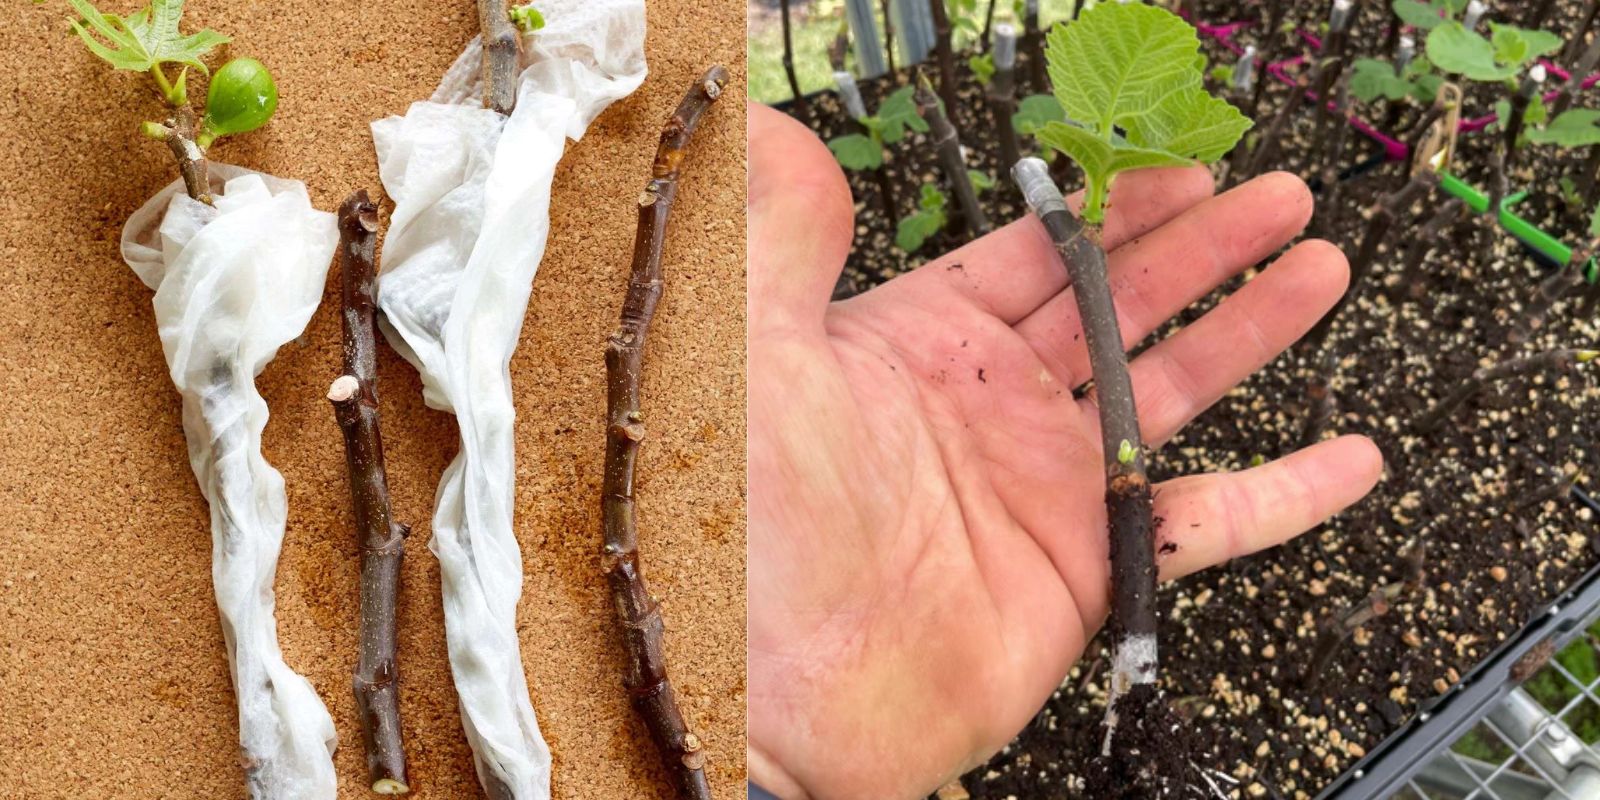
Selecting the Right Fig Cutting
The quality of your cutting plays a significant role in the success of the propagation process. Here’s how to select the best cutting:
- Choose Healthy Wood: Look for healthy, mature wood from a tree that is at least 2-3 years old. Select a branch that is not too thin or too thick. A cutting about 6-8 inches long with at least one node is ideal.
- Node Selection: A node is the point on the stem where a leaf is attached. This is where new roots will form. Be sure to choose a cutting that includes at least one or two nodes. The more nodes on the cutting, the better the chances of successful propagation.
- Avoid Diseased or Damaged Wood: Make sure the cutting is free of disease or damage, as this can affect the rooting process.
Preparing the Fig Cuttings
Once you’ve selected the right cutting, it’s time to prepare it for rooting. Here are the steps:
- Cutting the Fig Branch: Use a sharp, clean pair of pruning shears or a knife to cut the branch. Make the cut just below a node at a 45-degree angle. This will help with water drainage and improve the chances of rooting.
- Remove Excess Growth: Trim off any leaves or small branches around the base of the cutting to expose the nodes. This allows the cutting to focus on developing roots rather than maintaining foliage.
- Optional – Use Rooting Hormone: While not always necessary, applying a rooting hormone can help encourage quicker root development. Simply dip the cut end of the fig cutting into the rooting hormone powder before planting.
Planting Fig Cuttings
Now that your fig cutting is prepared, it’s time to plant it. Here’s how to do it:
- Choose the Right Pot and Soil: Select a small pot with drainage holes to prevent water from collecting at the bottom. Fill the pot with a well-draining, light potting mix. A mix of peat moss, perlite, and vermiculite works well for fig cuttings.
- Planting the Cutting: Insert the prepared cutting into the soil so that the cut end is buried about 2-3 inches deep. Make sure the node is below the soil line, as this is where roots will form.
- Watering: Water the cutting thoroughly after planting to ensure the soil is moist but not waterlogged. Keep the soil slightly damp during the rooting process, but avoid overwatering.
- Creating a Humid Environment: Figs require humidity to root effectively. To maintain humidity, you can place a clear plastic bag or a plastic dome over the cutting. This will help to trap moisture and create a mini greenhouse effect. Ensure there is enough airflow to prevent mold from forming.
Caring for Fig Cuttings
Fig cuttings need special care during the rooting process. Here are some tips for maintaining the right environment:
- Light: Place the cutting in a bright, indirect light location. Avoid direct sunlight, as it can dry out the cutting and hinder root development.
- Temperature: Figs thrive in temperatures between 65-75°F (18-24°C). Keep the cutting in a warm spot, but not too hot, as extreme temperatures can stress the cutting.
- Humidity: Regularly check the humidity level inside the plastic bag or dome. If the environment becomes too dry, lightly mist the cutting with water to maintain moisture.
Tracking Progress: How to Know if Your Fig Cutting Has Rooted
Tracking the progress of your fig cutting is essential to determine when it’s time to transplant the rooted cutting into a larger pot or the ground. Here’s how to know if your fig cutting has successfully rooted:
- Gentle Tug Test: After about 3-4 weeks, gently tug on the cutting. If you feel resistance, this means the cutting has developed roots. If it moves easily, give it more time to root.
- Look for New Growth: Once the cutting has rooted, you’ll notice new growth, such as small leaves or shoots emerging from the top of the cutting. This is a sign that the fig cutting is establishing itself and ready for transplanting.
- Root Development: You can also check the cutting by gently pulling it out of the pot. If you see a network of white, healthy roots, the cutting has successfully rooted.
Transplanting the Rooted Fig Cutting
Once your fig cutting has developed a strong root system, it’s time to transplant it into a larger pot or your garden. Here’s what to do:
- Choose a Larger Pot or Garden Location: If transplanting to a pot, select a container that is slightly larger than the current pot. If planting in the garden, choose a well-draining, sunny spot.
- Transplanting Process: Gently remove the rooted cutting from its pot and place it in the new container or hole in the garden. Ensure the root ball is intact and avoid damaging the roots during the transplant.
- Watering After Transplanting: Water the newly transplanted fig tree well to help it settle into its new environment.
Final Thoughts
Growing fig trees from cuttings is an incredibly fulfilling and accessible method for expanding your garden. Whether you’re looking to clone your favorite fig variety or simply want to grow more trees without spending money, propagation from cuttings is a fantastic option. By following the steps outlined above, you can ensure your fig cuttings take root successfully and grow into strong, healthy trees.
Remember to track the progress of your cuttings and be patient. In time, you’ll be rewarded with a bountiful harvest of figs from trees you’ve nurtured from the ground up.
Happy gardening, and may your fig propagation journey be fruitful! 🌱🍇 #FigPropagation #GrowYourOwnFood #GardenTips #PlantCare #FruitTreeLove #HealthyGardens #PlantGoals