
Growing an apple tree from seed is a fulfilling and educational journey, one that offers a deeper connection to nature and the satisfaction of nurturing life from a tiny seed. While it requires patience and dedication, the result can be a thriving apple tree that not only beautifies your space but also bears delicious fruit. This article delves into the step-by-step process, tips for success, and key considerations for cultivating an apple tree from seed.
The Appeal of Growing an Apple Tree from Seed
Planting an apple tree from seed is a unique opportunity to grow a tree that is truly one of a kind. Unlike grafted trees, which produce identical clones of the parent tree, trees grown from seed carry genetic diversity. This means the apples produced may differ from the original fruit—sometimes offering surprises in flavor and appearance. Whether you’re a seasoned gardener or a beginner, the process is a great way to enhance your skills and contribute to a greener world.
Materials Needed
Before starting, gather the following materials:
- Apple seeds (from your favorite apple variety)
- Paper towels
- Plastic bags
- Small pots or containers with drainage holes
- High-quality potting soil
- Spray bottle or watering can
- Clear plastic wrap or humidity dome
- Fertilizer
- Outdoor space or larger pots for transplanting
Step-by-Step Guide to Growing an Apple Tree from Seed
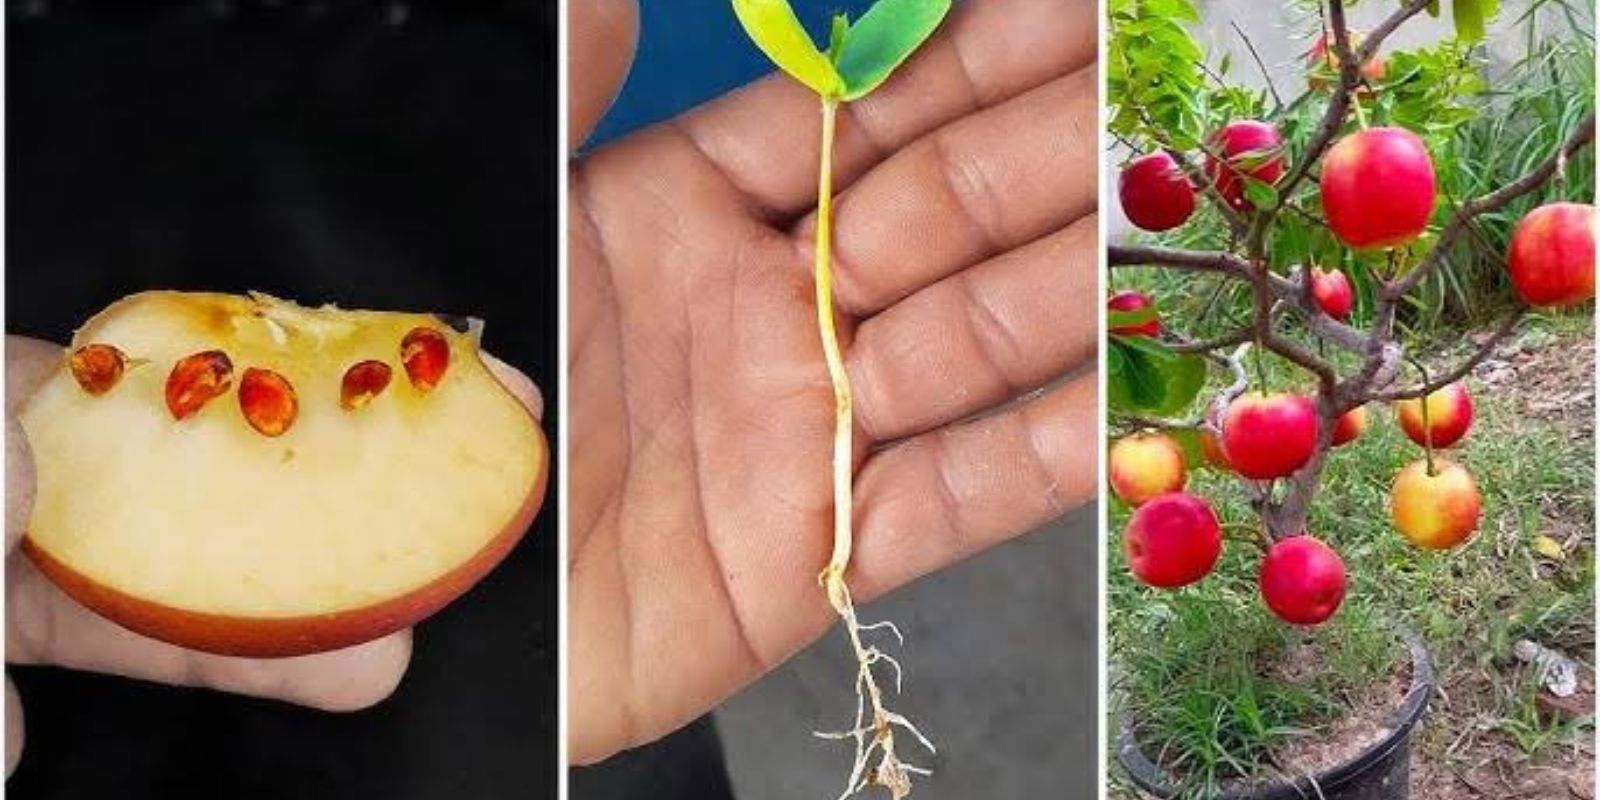
Step 1: Collect and Prepare the Seeds
Begin by collecting seeds from fresh, ripe apples. Wash the seeds thoroughly under running water to remove any fruit residue. This step is crucial, as leftover fruit can promote mold growth during the germination process.
Step 2: Stratification (Mimicking Winter Conditions)
Apple seeds require stratification, a process that mimics the cold conditions of winter to stimulate germination.
- Place the seeds in a damp paper towel and fold it over.
- Put the paper towel inside a resealable plastic bag.
- Store the bag in the refrigerator for 6-8 weeks, ensuring the paper towel remains moist throughout this period. Check periodically to prevent drying out or mold formation.
Step 3: Prepare the Pots and Soil
While the seeds undergo stratification, prepare the pots and soil for planting.
- Use small pots with drainage holes to prevent waterlogging.
- Fill the pots with high-quality potting soil that retains moisture but drains well.
- Lightly water the soil to moisten it before planting.
Step 4: Plant the Seeds
Once the seeds have completed stratification, it’s time to plant them.
- Place each seed about ½ inch deep into the soil.
- If planting multiple seeds in a single pot, space them 2-3 inches apart.
- Cover the seeds with soil and pat it down gently to ensure good contact.
Step 5: Create a Humid Environment
To encourage germination, create a warm and humid environment.
- Cover the pots with clear plastic wrap or use a humidity dome.
- This helps retain moisture and warmth, which are essential for seed germination.
Step 6: Germination
Place the pots in a warm location with bright, indirect sunlight.
- Maintain soil moisture by misting it lightly with water when needed. Avoid overwatering, as it can lead to seed rot.
- Seeds typically germinate within 2-3 weeks, but some may take longer.
Step 7: Monitor Growth
Once the seeds sprout, remove the plastic covering to allow air circulation.
- Position the pots in a sunny spot, gradually increasing their exposure to sunlight.
- Continue to water regularly to keep the soil consistently moist.
Step 8: Transplant the Seedlings
When the seedlings develop a few true leaves, it’s time to transplant them into larger pots or an outdoor space.
- Choose a sunny location with well-drained soil.
- Dig a hole slightly larger than the seedling’s root ball and plant it at the same depth it was in the pot.
- Space seedlings about 1-2 feet apart to give them room to grow.
Step 9: Outdoor Planting
Once the seedlings reach a height of 6-12 inches, transplant them into their permanent outdoor location.
- Select a site with full sun and good drainage.
- Prepare the soil by adding compost or organic matter to enrich it.
- Dig a hole twice as wide and as deep as the root ball, then carefully place the seedling.
Step 10: Watering and Mulching
Water the young tree regularly to keep the soil evenly moist, especially during dry spells.
- Apply a layer of mulch around the base of the tree to retain soil moisture, regulate temperature, and suppress weeds.
- Leave a small gap between the mulch and the trunk to prevent rot.
Step 11: Fertilizing
Feed the tree with a balanced, all-purpose fertilizer during the growing season.
- Apply fertilizer every 4-6 weeks, following the package instructions.
- Avoid over-fertilizing, as it can lead to weak growth and reduce fruit production.
Step 12: Pest and Disease Management
Inspect the tree regularly for signs of pests or diseases.
- Common pests include aphids, mites, and caterpillars. Use insecticidal soap or organic pest control methods as needed.
- Prevent fungal diseases by ensuring proper air circulation and avoiding overhead watering.
Step 13: Patience and Pruning
Growing an apple tree from seed is a long-term project that requires patience.
- It may take 6-10 years for your tree to produce fruit. In the meantime, focus on shaping it through regular pruning to promote a strong structure and healthy growth.
Tips for Success
- Select Climate-Appropriate Varieties
Choose seeds from apple varieties that thrive in your local climate for the best chance of success. - Consider Grafting
Since apple trees grown from seed may not produce the same quality of fruit as the parent tree, consider grafting branches from a known variety onto your seedling for predictable results. - Protect Young Trees
Guard young trees against harsh weather, pests, and animals like deer or rabbits. Use protective fencing if necessary. - Embrace Patience
Growing an apple tree from seed is a slow process, but the rewards are worth the wait. The tree you nurture will be unique and carry your care and effort in every branch and leaf.
The Joy of Growing Apple Trees from Seed
Planting an apple seed is more than just an act of gardening; it’s a promise to the future. Watching a tiny seed grow into a sturdy tree that provides shade, beauty, and potentially delicious fruit is an immensely satisfying experience.
So why not start today? Take that apple seed from your kitchen and begin this exciting journey. Share your progress, learn from fellow gardeners, and revel in the magic of nurturing life.