
Orchids are among the most beloved plants due to their delicate beauty and exotic flowers, but they also require special attention to thrive. One of the most crucial aspects of caring for an orchid is pruning. Pruning isn’t just about making your plant look neat; it plays a significant role in maintaining the plant’s health, encouraging growth, and ensuring that your orchid blooms beautifully season after season.
In this article, we will walk you through the importance of pruning, the techniques involved, and how to prune your orchids effectively. Whether you’re new to orchid care or an experienced grower, this guide will equip you with the knowledge needed to master the art of orchid pruning.
Why Prune Orchids?
Pruning is an essential practice for many types of plants, and orchids are no exception. There are several reasons why pruning your orchid is beneficial:
- Encouraging New Growth: By cutting back certain parts of the orchid, you direct the plant’s energy towards new growth and future blooms.
- Preventing Disease: Removing dead or unhealthy parts of the plant helps prevent the spread of disease and pests.
- Aesthetic Appeal: Regular pruning ensures that your orchid looks neat and attractive.
- Stimulating Re-blooming: Pruning can encourage your orchid to re-bloom, giving you more frequent and beautiful flower displays.
Understanding Orchid Anatomy
Before you start pruning, it’s important to understand the basic anatomy of an orchid. This will help you know where and what to cut.
- Flower Spike: This is the long stem that the flowers grow on. After the flowers fade, this spike can either be trimmed or left to re-bloom.
- Nodes: These are the small bumps or joints found on the flower spike. New flower spikes or leaves can emerge from nodes.
- Leaves: Orchid leaves are thick and fleshy, often used by the plant to store water and nutrients.
- Roots: Orchid roots are thick and aerial, meaning they sometimes grow above the soil to absorb moisture from the air.
When to Prune Orchids
Timing is everything when it comes to pruning orchids. Generally, the best time to prune your orchid is after it has finished blooming. You’ll know it’s time to prune when the flowers have withered and the flower spike has started to turn yellow or brown. If the flower spike is still green, you can decide whether to leave it for potential re-blooming or cut it back to promote new growth.
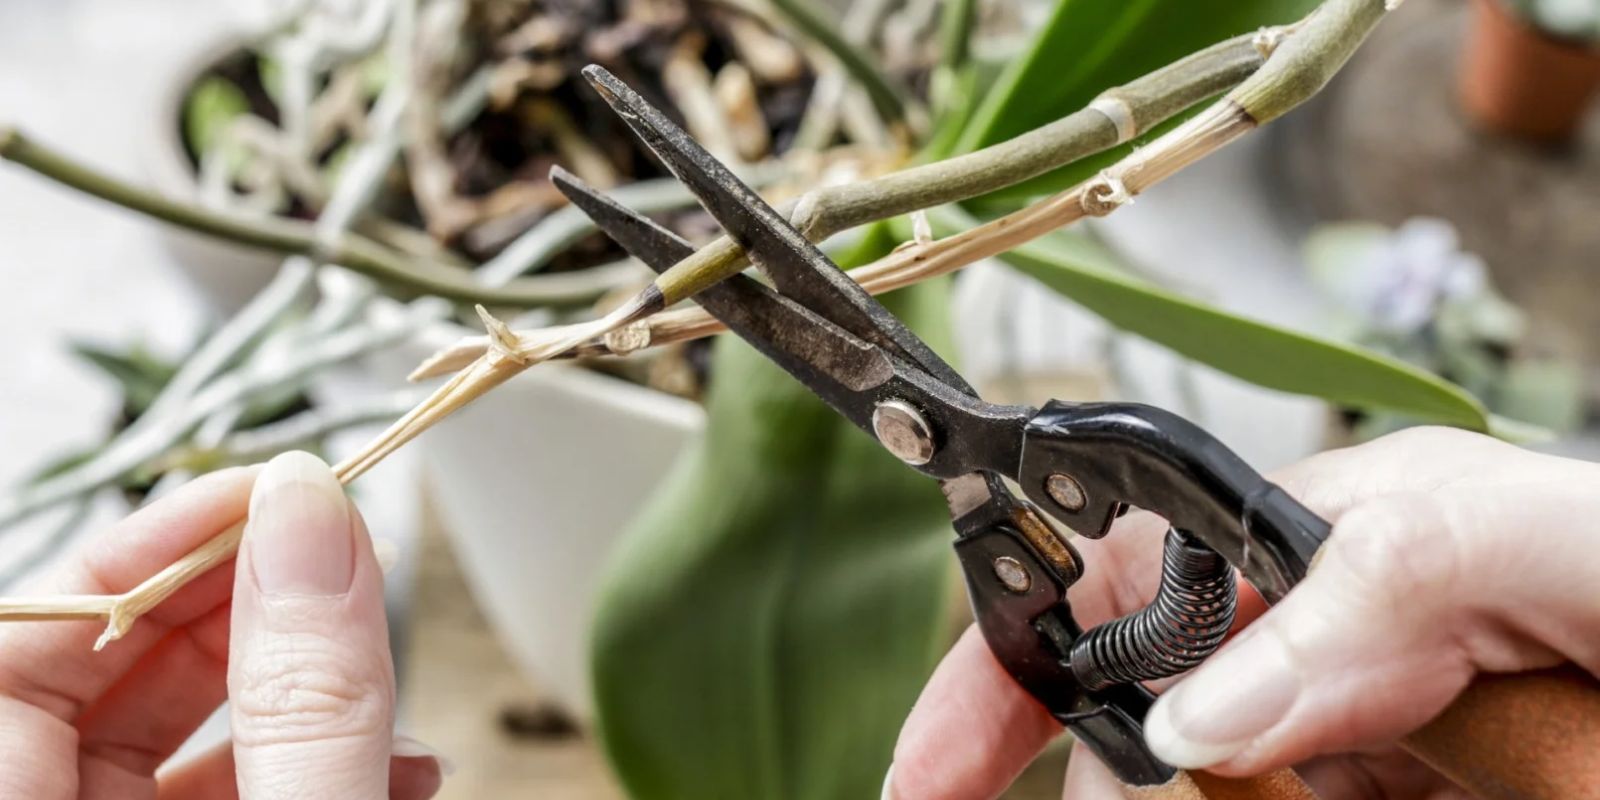
Tools You Will Need
Having the right tools is essential for effective pruning. Here’s what you’ll need:
- Sharp Scissors or Pruning Shears: These should be sterilized before use to avoid spreading disease.
- Rubbing Alcohol or Hydrogen Peroxide: Use this to clean your tools before and after pruning.
- Cinnamon or Fungicide: These can be applied to the cut areas to prevent infection.
Step-by-Step Guide to Pruning Orchids
1. Prune After Blooming
The first step in orchid pruning is to wait until the plant has finished blooming. This typically occurs when the last flower on the spike has wilted, and the spike itself begins to turn yellow or brown. It’s important not to prune too early, as cutting back a healthy flower spike can prevent re-blooming.
2. Inspect the Flower Spike
Once your orchid has finished blooming, examine the flower spike. If the spike is still green and healthy-looking, you have two options:
- Option 1: Prune the Spike Above a Node
Cut the flower spike about 1 inch above a node. This encourages the orchid to produce new flowers from that point. However, if the plant seems stressed or has weak growth, it might be best to remove the spike entirely. - Option 2: Remove the Entire Flower Spike
If the spike is turning brown or yellow, it’s a sign that it’s done blooming. In this case, you should trim the flower spike all the way down to the base of the plant. This will allow the orchid to focus its energy on growing new leaves and roots.
3. Cut Off Yellow or Damaged Leaves
Next, examine the leaves of your orchid. If you notice any yellow, brown, or damaged leaves, they should be removed. Use your sterilized scissors or shears to make a clean cut at the base of the affected leaf. Removing damaged leaves helps to improve the plant’s appearance and reduces the risk of disease.
4. Trim Dead or Rotting Roots
If you are repotting your orchid at the same time as pruning, take the opportunity to inspect the roots. Healthy orchid roots are firm and white, while dead or rotting roots appear brown or black and feel mushy. Use sterilized scissors to remove any dead or diseased roots, leaving only the healthy ones behind.
5. Apply Cinnamon or Fungicide
After you have made your cuts, it’s a good idea to treat the wounds with cinnamon or fungicide. Cinnamon is a natural fungicide that helps to prevent infections in the cut areas. Simply dab a small amount of cinnamon powder onto the freshly cut areas.
6. Regular Maintenance
After your initial pruning, continue to monitor your orchid for any dead leaves or flower spikes that need trimming. Pruning is not a one-time task; it’s an ongoing part of maintaining a healthy orchid.
How to Prune Orchids for Re-Blooming
Pruning for re-blooming is a special technique used to encourage your orchid to produce flowers again. If your orchid’s flower spike is still green and shows no signs of wilting, you can attempt to trigger a new bloom by cutting the spike just above the third node from the base. This can stimulate the plant to produce new buds.
Keep in mind that not all orchids will re-bloom from the same flower spike. Some varieties, like Phalaenopsis, are more likely to re-bloom, while others will require the spike to be fully removed before they can bloom again.
Common Pruning Mistakes to Avoid
While pruning orchids isn’t difficult, there are a few common mistakes that beginners should avoid:
- Pruning Too Early: Don’t be tempted to prune the flower spike while your orchid is still blooming. Wait until the flowers have fully faded.
- Not Sterilizing Your Tools: Using unclean scissors or shears can introduce bacteria or fungus to your plant. Always sterilize your tools before and after pruning.
- Removing Healthy Roots: It can be tricky to distinguish between healthy and unhealthy roots, but it’s essential not to cut off any healthy roots as they play a crucial role in the plant’s growth.
- Pruning Without Considering the Plant’s Health: If your orchid seems stressed or weak, focus on improving its overall care before doing any major pruning.
Conclusion
Pruning orchids may seem like a delicate task, but with the right techniques and timing, it’s an excellent way to promote growth, maintain plant health, and encourage future blooms. Regular pruning, combined with proper orchid care, will reward you with a thriving plant that blooms beautifully year after year.
Remember, patience is key when it comes to orchids. Give your plant time to recover after pruning, and soon enough, you’ll enjoy the fruits of your labor with a vibrant, blooming orchid.
Get involved in the orchid care community! Share your orchid pruning tips with us. 🌸💬 #OrchidCare #GardeningTips #PruneAndBloom #OrchidLovers #Houseplants #GardeningCommunity #GreenThumb #OrchidMagic