
Onions are a versatile and essential ingredient in countless recipes, from soups and stews to salads and sauces. Growing your own onions can be a rewarding experience, but knowing the right time to harvest them is crucial to ensure they are full of flavor, properly matured, and ready for long-term storage. Picking onions too early can result in small, underdeveloped bulbs, while waiting too long can lead to spoiled or split onions. In this article, we’ll guide you through the process of knowing when to pick onions, so you can enjoy the best possible harvest from your garden.
Understanding Onion Growth Stages
Before diving into the specifics of harvesting, it’s important to understand the growth stages of onions. Onions are typically grown from seeds, sets (small bulbs), or transplants. Regardless of the method, onions go through similar stages of growth:
- Seedling Stage: If growing from seed, the onion plant will start as a small, delicate sprout.
- Bulbing Stage: As the plant matures, it will begin to form a bulb at the base. This stage is crucial, as the size and quality of the bulb depend on proper care and growing conditions.
- Maturation Stage: The bulb continues to grow and mature, with the tops (green leaves) remaining upright and green.
- Dormancy Stage: As the onion reaches full maturity, the tops will begin to yellow and fall over, signaling that the bulb is ready to be harvested.
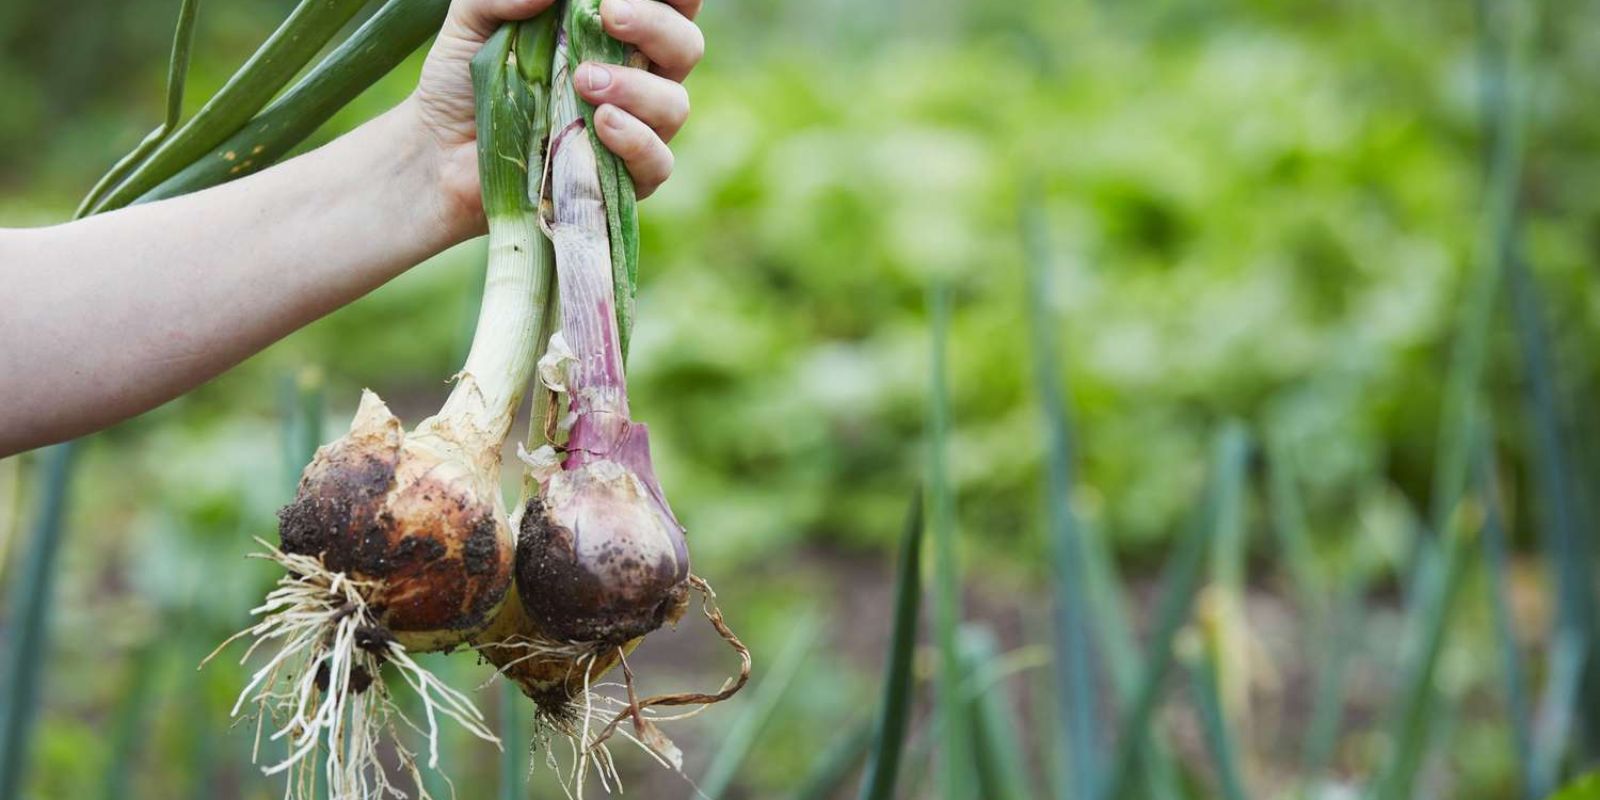
Step 1: Check the Tops
One of the most reliable indicators that onions are ready for harvest is the condition of the green tops. Onions are typically ready to be picked when the tops start to yellow and fall over naturally. This is a sign that the plant is beginning to enter dormancy and that the bulb has reached its full size.
It’s important to wait until at least half of the tops have fallen over before harvesting. If only a few tops have fallen, the onions may still be maturing, and it’s best to give them more time to grow. In some cases, you can gently bend over the tops of the remaining onions to encourage the maturation process, but be careful not to damage the bulbs in the process.
Step 2: Inspect the Bulb Size
In addition to checking the tops, it’s a good idea to inspect the size of the bulbs before harvesting. To do this, gently pull back the soil around a few onions to see how large the bulbs have become. The bulbs should be well-formed, firm, and at least 2-3 inches in diameter, depending on the variety.
If the bulbs are still small or not fully developed, it’s best to wait a bit longer before harvesting. Onions can continue to grow as long as the tops are still green and upright, so giving them a little extra time can result in larger, more mature bulbs.
Step 3: Harvest on a Dry Day
Timing the harvest is important, and the weather plays a significant role in ensuring a successful onion harvest. It’s best to pick onions on a dry, sunny day, as harvesting in wet or damp conditions can increase the risk of rot and disease.
To harvest the onions, use a garden fork or trowel to carefully loosen the soil around the bulbs. Avoid pulling the onions out by the tops, as this can cause the tops to break off, making it harder to cure the onions properly. Instead, gently lift the bulbs out of the soil, being careful not to bruise or damage them.
Once the onions are harvested, brush off any excess soil, but avoid washing them, as moisture can lead to rot. If the weather is dry, you can leave the onions in the garden for a few hours to allow the soil to dry and fall away more easily.
Step 4: Cure the Onions
Curing is an essential step in preparing onions for long-term storage. Curing allows the onions to develop a tough outer skin, which protects the bulb from moisture loss and extends its shelf life.
To cure onions, lay them out in a single layer in a warm, dry, and well-ventilated area. A shed, garage, or covered porch can work well for this purpose. Avoid direct sunlight, as it can cause the onions to sunburn. The ideal curing temperature is around 75-80°F (24-27°C), and the curing process typically takes 1-2 weeks.
During the curing process, the tops will dry out completely, and the outer layers of the bulbs will become papery and crisp. Once the onions are fully cured, the tops can be trimmed to about 1 inch above the bulb, and the roots can be clipped off.
Step 5: Store the Onions Properly
Proper storage is key to preserving your onions for as long as possible. After curing, store the onions in a cool, dry, and dark place, such as a basement, pantry, or root cellar. The ideal storage temperature is between 32-40°F (0-4°C), with low humidity to prevent sprouting or rot.
Place the onions in mesh bags, crates, or baskets that allow for good air circulation. Avoid storing onions in plastic bags, as they can trap moisture and lead to mold and rot. It’s also a good idea to check the onions periodically for any signs of spoilage and remove any that are soft or sprouting.
Properly stored onions can last for several months, providing you with a continuous supply of flavorful, homegrown onions throughout the winter and beyond.
Motivation: Perfect Your Onion Harvesting Skills
Harvesting onions at the right time is crucial to ensuring they are fully matured, flavorful, and ready for long-term storage. By following these steps and paying attention to the signs of maturity, you can enjoy a successful onion harvest and a pantry full of delicious onions that will last you for months.
Are you ready to put these tips into practice? Start monitoring your onion tops, inspect the bulb size, and get ready to harvest when the time is just right! We’d love to hear about your onion harvesting experience and any tips you have to share—connect with us and let’s grow together!