
Container gardening offers the perfect solution for those with limited outdoor space. Among the many fruits you can grow in pots, cantaloupe is a surprising yet rewarding choice. With its sweet, juicy flavor and rich aroma, cantaloupe brings a taste of summer to your table. Growing it in containers is easier than you might think, provided you follow a few key steps. Here’s a comprehensive guide to help you cultivate thriving cantaloupe plants in pots.
Why Grow Cantaloupe in Containers?
Cantaloupe, also known as muskmelon, typically requires ample space when grown traditionally. However, certain varieties and modern gardening techniques make container cultivation an attractive option. Container gardening allows you to control the growing environment, reduce pest problems, and even move plants to maximize sunlight. Plus, it’s a fantastic way to enjoy fresh produce in urban settings.
Step 1: Choose the Right Container
The success of container gardening starts with selecting the right pot.
- Size Matters: Use a container with a capacity of at least 5 gallons. Larger containers provide enough room for root growth and support the plant’s sprawling vines.
- Drainage is Key: Ensure the pot has multiple drainage holes at the bottom to prevent waterlogging, which can lead to root rot.
- Material: While plastic pots are lightweight and retain moisture well, terracotta pots are breathable and reduce the risk of overwatering.
Step 2: Pick the Perfect Variety
Not all cantaloupe varieties are suitable for container gardening. Look for compact or bush varieties that produce smaller fruits and require less space. Popular choices include:
- Minnesota Midget: This compact variety produces small, sweet melons.
- Sugar Cube: Known for its rich flavor and manageable vine growth.
- Honey Rock: A hardy variety that thrives in small spaces.
Selecting the right variety ensures your plant adapts well to confined growing conditions.
Step 3: Prepare the Perfect Soil Mix
Cantaloupe plants thrive in nutrient-rich, well-draining soil. Use a mix that retains moisture while preventing compaction.
- Combine equal parts of garden soil, compost, and coarse sand or perlite for optimal drainage.
- Adding a handful of organic matter like aged manure enriches the soil with essential nutrients.
- Test the soil’s pH and aim for a slightly acidic to neutral range (6.0–6.8) for the best results.
Step 4: Location: Sunlight is Non-Negotiable
Cantaloupe loves the sun, so placing your container in the right location is vital.
- Full Sunlight: Choose a spot that receives at least 6–8 hours of direct sunlight daily.
- Mobility: If sunlight is inconsistent in your area, consider using a container with wheels or a portable dolly to move it as needed.
Sunlight is crucial for photosynthesis, which fuels the plant’s growth and the development of sweet, juicy fruits.
Step 5: Master the Art of Watering
Cantaloupe plants require consistent moisture, but overwatering can be detrimental.
- Regular Watering: Water deeply but allow the top inch of soil to dry out between watering sessions.
- Avoid Wet Leaves: Water at the base of the plant to prevent fungal diseases.
- Mulching: Add a layer of organic mulch like straw or wood chips to retain soil moisture and regulate temperature.
Proper watering practices promote healthy root systems and prevent stress, which can impact fruit quality.
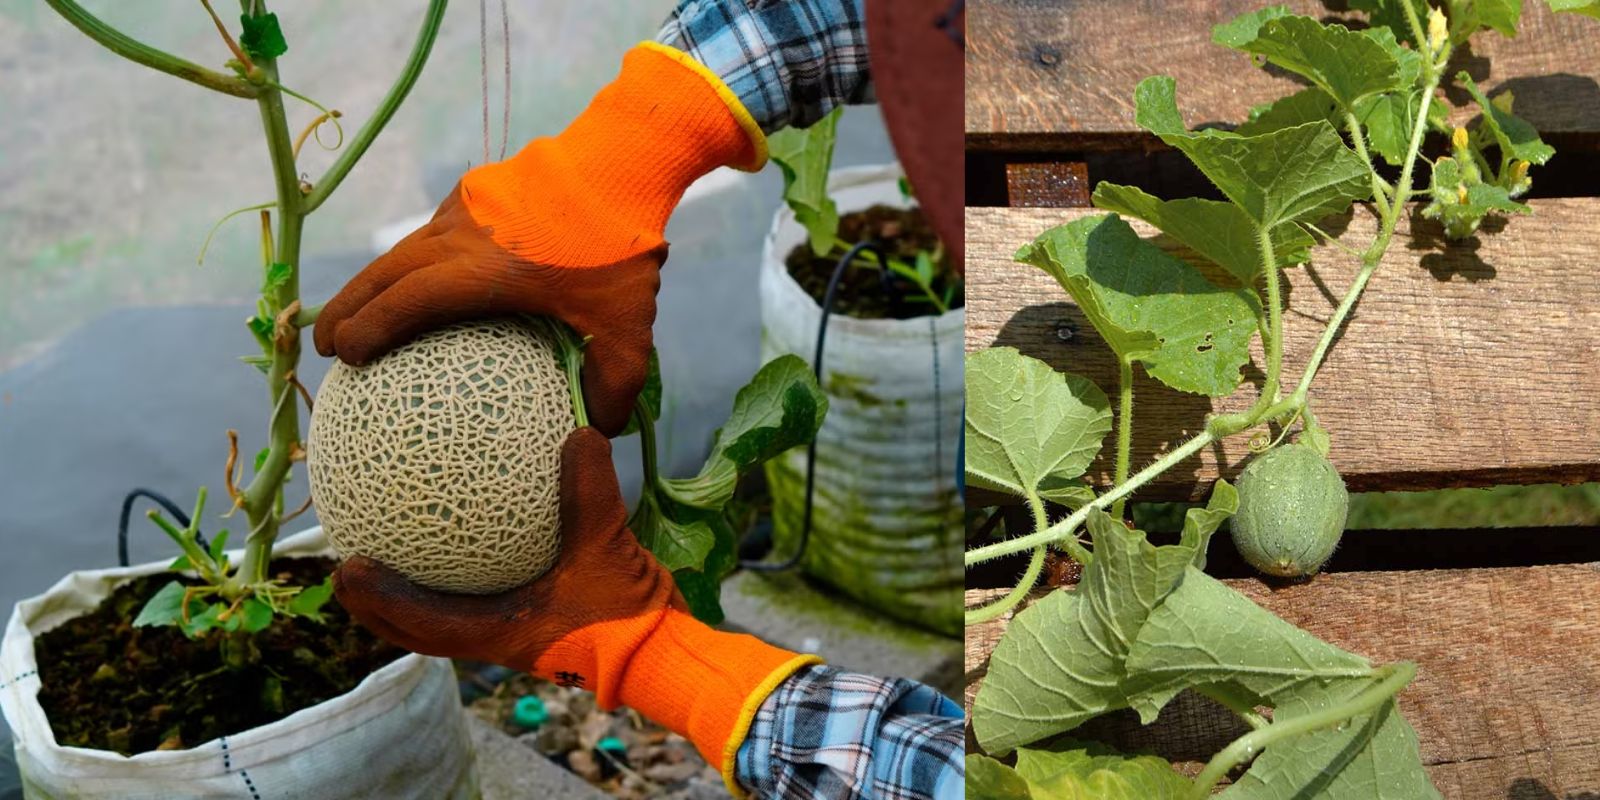
Step 6: Support and Train the Vines
While cantaloupe is a vining plant, letting the vines trail over the ground can take up space and attract pests. Supporting the vines in containers saves space and improves airflow.
- Add a Trellis or Cage: Install a sturdy trellis, cage, or stakes early on to train the vines upward.
- Secure the Fruits: As the melons grow, use slings made of soft fabric or netting to support their weight and prevent breakage.
This method not only saves space but also minimizes the risk of disease and helps the fruits ripen evenly.
Step 7: Fertilize for Bountiful Harvests
Container-grown plants rely heavily on you for nutrients. Fertilizing regularly ensures cantaloupe plants have what they need to thrive.
- Start with a Balanced Fertilizer: Use a fertilizer with equal parts nitrogen, phosphorus, and potassium during the early growth stages.
- Switch to Potassium-Rich Fertilizers: Once flowers and fruits appear, reduce nitrogen and increase potassium for better fruit quality.
- Frequency: Feed the plants every 2–3 weeks with liquid fertilizer or add slow-release granules to the soil mix.
Be cautious not to over-fertilize, as too much nitrogen can result in lush foliage but poor fruit production.
Common Challenges and Solutions
- Pests: Watch for aphids, spider mites, and cucumber beetles. Use organic insecticidal soap or neem oil to manage infestations.
- Diseases: Powdery mildew and fungal issues are common. Ensure good air circulation and avoid wetting the foliage.
- Fruit Development: If fruits fail to develop, hand-pollinate flowers using a small brush or cotton swab.
Harvesting Your Cantaloupe
After weeks of care, your cantaloupe will be ready for harvest! Signs of ripeness include:
- A sweet, musky aroma near the stem.
- A slight yellowing of the rind.
- The fruit easily detaches from the vine with a gentle tug.
Harvesting at the right time ensures maximum sweetness and flavor.
The Joy of Container Gardening
Growing cantaloupe in containers might sound ambitious, but with the right techniques, it’s an incredibly rewarding experience. This approach allows gardeners of all skill levels to enjoy fresh, homegrown melons, even in limited spaces.
Final Thoughts
By following these seven essential tips, you can transform any small patio, balcony, or backyard into a productive cantaloupe haven. Remember, patience and consistent care are key to a bountiful harvest.
💬 Join the conversation! Have you tried growing cantaloupe in containers? Share your experiences and tips below. Let’s grow together! 🍈🌿