
Asparagus is a wonderful addition to any garden, offering a perennial vegetable that keeps producing year after year once it’s established. Growing asparagus may take some patience at first, but with the right steps and care, you’ll be rewarded with fresh, tender spears each spring for up to 20 years. This guide covers everything you need to know about planting, maintaining, and harvesting asparagus for a healthy, productive garden bed.
Why Grow Asparagus in Your Garden?
Asparagus is a nutrient-dense vegetable, packed with vitamins A, C, E, and K, as well as fiber, folate, and antioxidants. Its unique flavor and texture make it a favorite in a wide range of dishes, from simple roasted spears to creamy asparagus soups. Plus, having a perennial vegetable like asparagus reduces the need for replanting, saving time and effort for years.
Step 1: Choosing the Right Location
Asparagus thrives in full sunlight, so select a sunny spot in your garden that will allow the plant to receive 6–8 hours of sunlight each day. Since asparagus is a long-lived crop, it’s crucial to choose a location that can remain undisturbed for years. Asparagus roots grow deep and wide, so avoid planting near trees or shrubs that could compete for nutrients and water.
Step 2: Preparing the Soil
Asparagus grows best in sandy, well-drained soil rich in organic matter. Begin by removing weeds, rocks, and debris from the planting area. Loosen the soil to a depth of about 12–18 inches to allow the roots to establish well. If your soil has a heavy clay texture, consider mixing in sand or grit to improve drainage. Adding aged compost or well-rotted manure will also enrich the soil, providing a fertile environment for your asparagus.
Soil pH and Testing:
Asparagus prefers a pH level of 6.5 to 7.5. It’s a good idea to test your soil’s pH and nutrient content before planting. If your soil is too acidic, add lime to raise the pH. Proper pH levels will help ensure that nutrients are available to the plants as they establish.
Step 3: Choosing the Right Varieties
There are two main types of asparagus to consider:
- Green Asparagus: The most commonly grown variety, with a mild and slightly sweet flavor.
- Purple Asparagus: Sweeter and more tender than green asparagus, often grown for its unique color and taste.
Look for disease-resistant varieties such as ‘Jersey Giant,’ ‘Jersey Knight,’ or ‘Mary Washington,’ which are known to be more productive and less susceptible to common asparagus diseases.
Step 4: Planting Asparagus Crowns
- Timing: Plant asparagus crowns in early spring, as soon as the soil is workable and the risk of frost has passed.
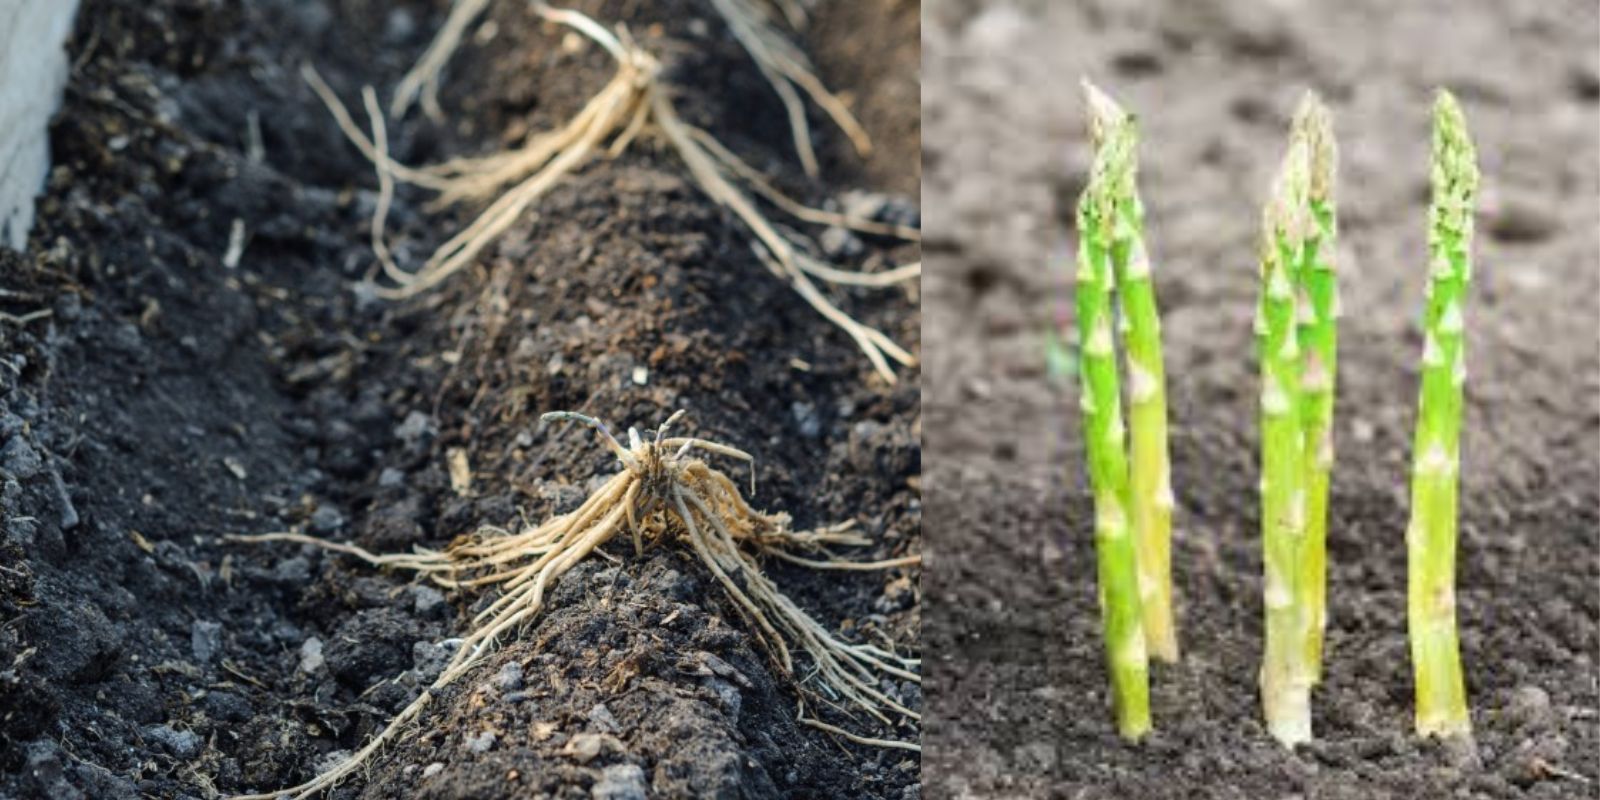
- Creating Trenches: Dig trenches 6–8 inches deep and about 12–18 inches apart. These trenches will house the asparagus crowns and give them enough space to develop.
- Placing Crowns: Place the asparagus crowns in the trench, spacing them about 12–18 inches apart. Spread the roots out gently and ensure the crown is facing upwards.
- Covering: Begin by covering the crowns with about 2 inches of soil. As the asparagus spears begin to grow, continue to add soil to the trench, gradually filling it in as the plants grow.
Step 5: Watering and Mulching
Keep the soil consistently moist but not waterlogged, especially during the first growing season as the plants establish. Water deeply once or twice a week, adjusting based on rainfall and temperature.
Adding a layer of mulch around the plants helps conserve moisture, suppress weeds, and maintain soil temperature. Choose organic mulches, such as straw, shredded leaves, or grass clippings, which will also break down and enrich the soil over time.
Step 6: Fertilizing and Feeding
Asparagus is a heavy feeder, and regular feeding helps promote strong growth. Each spring, apply a balanced organic fertilizer or compost around the plants. Asparagus also benefits from additional nitrogen during the growing season; you can use an organic nitrogen source like blood meal or fish emulsion for this purpose.
Step 7: Waiting to Harvest
One of the keys to a productive asparagus bed is patience. For the first two years, it’s essential to allow the asparagus plants to grow and establish their roots. Avoid harvesting spears during this period, as it can weaken the plants. Allow the spears to grow into ferns, which will feed the roots and help establish the plant’s energy reserves.
In the third year, you can begin a limited harvest. Cut spears that are about 6–8 inches tall, using a sharp knife or scissors. Harvest for about two weeks, then allow the remaining spears to grow into ferns.
Step 8: Maintaining Your Asparagus Bed
After the initial two years, asparagus care becomes much simpler. Here’s what you need to do each season:
- Late Fall: After the first frost, cut back the ferns to ground level. Removing these helps prevent disease and pests that may overwinter in the foliage.
- Winter: Add a layer of compost or aged manure over the bed to nourish the soil. This organic matter will enrich the soil as it breaks down over winter.
- Spring: As soon as new spears appear, begin harvesting. Continue harvesting for about 6–8 weeks, until the spears start to thin. Stop harvesting in early summer to allow the plants to regrow as ferns.
Common Issues and Troubleshooting
- Weeds: Asparagus beds are prone to weeds, which compete with plants for nutrients. Use mulch to help suppress weeds and hand-pull any that do appear.
- Pests: Watch out for asparagus beetles, which can damage spears and ferns. Hand-picking or using organic insecticidal soap can help control infestations.
- Diseases: Asparagus rust and root rot can affect plants, especially in poorly drained soil. Ensure good soil drainage, remove any infected plants, and avoid overhead watering.
Harvesting Tips for Maximum Yield
Once established, you can expect a healthy asparagus bed to produce for 15–20 years or more. During the harvest season, cut spears that are about 6–8 inches tall. Asparagus grows rapidly, so check your bed daily to avoid overgrown spears. Stopping the harvest after the season allows the plants to produce energy-storing ferns, which strengthens the root system for future production.
Cooking and Enjoying Homegrown Asparagus
The flavor of fresh asparagus is unmatched, and you’ll have countless ways to enjoy it! From simple grilled spears to asparagus stir-fries and creamy soups, your harvest can enhance your meals in many ways. Fresh asparagus can also be pickled or frozen to enjoy year-round.
Conclusion: The Rewards of Growing Asparagus
Growing asparagus requires some dedication, but the payoff is a crop that keeps on giving. With proper preparation, soil care, and regular maintenance, you’ll enjoy bountiful harvests of delicious, homegrown asparagus every spring. Not only is it a flavorful addition to your garden, but it’s also a nutrient-packed vegetable that supports overall health.
If you’re ready to commit to a long-term garden investment, give asparagus a try. You’ll be rewarded with fresh, tender spears for many seasons to come!
Get Started Today!
Try growing asparagus in your garden this season, and experience the unique satisfaction of nurturing a perennial crop. #AsparagusGrowing #VegetableGarden #SpringHarvest #GardeningTips #HealthyEating