
When it comes to propagating plants, there are a variety of methods available. For some plants, traditional rooting techniques like cuttings or seed sowing may not be enough to get them to root. That’s where air layering comes in—a technique that can help propagate plants that are known for being difficult to root. Whether you’re looking to clone a favorite tree, shrub, or houseplant, air layering offers a simple yet effective solution. In this guide, we’ll dive deep into the art of air layering, breaking down the steps and highlighting the benefits of using this method to propagate your plants.
What is Air Layering?
Air layering is a propagation technique that involves encouraging roots to grow from a branch or stem while it’s still attached to the parent plant. Unlike cuttings, which are separated from the parent plant, air layering allows a branch to continue receiving nutrients and moisture while it develops its root system. Once the roots have established, the newly rooted plant can be severed from the parent plant and transplanted into the soil.
This method is particularly useful for plants that don’t root easily from cuttings or require a longer time to root, such as magnolias, figs, rubber trees, and citrus plants.
Why Should You Use Air Layering?
There are several reasons why gardeners choose air layering as a propagation technique:
- Ideal for Difficult-to-Root Plants
Some plants, especially woody shrubs and trees, resist traditional rooting methods like stem cuttings. Air layering bypasses these issues by allowing the plant to root while still attached to the parent plant. - Produces Stronger Plants
Since the branch is still receiving nutrients from the parent plant, the new roots grow in a strong and healthy environment, leading to a robust and well-established new plant. - Faster Results Than Cuttings
Air layering typically results in a rooted plant much faster than waiting for cuttings to establish roots. This is especially helpful when you want to propagate larger, more mature plants. - Preserves the Parent Plant
Unlike other methods of propagation, air layering doesn’t involve removing the stem or cutting back the plant. This ensures that the parent plant remains intact while you propagate new growth. - Ideal for Rare or Expensive Plants
If you have a rare, hard-to-find, or expensive plant, air layering allows you to propagate it without taking a cutting that could harm the plant. It also ensures that you get a genetically identical plant.
How to Successfully Propagate Plants Using Air Layering
Air layering might sound complicated at first, but it’s actually quite simple once you understand the process. Here’s a step-by-step guide to help you get started:
Step 1: Select the Right Plant and Branch
Not all plants are suited for air layering. It works best on woody plants that have thicker stems, such as citrus trees, magnolias, figs, and rubber plants. Choose a healthy, mature branch that is about the thickness of a pencil or larger. Ideally, the branch should be at least 6 to 12 inches long and should have no signs of disease or pests.
For best results, choose a branch that is close to the main trunk, as this will allow the new plant to get plenty of nutrients during the rooting process.
Step 2: Prepare the Branch for Layering
Once you’ve chosen the branch, it’s time to prepare it for the air layering process. Begin by using a sharp knife to make a small upward incision about one-third of the way through the branch. This cut should be around 1 to 2 inches long. Next, carefully remove a small ring of bark from the branch, exposing the inner cambium layer.
The exposed area should be about 1 inch wide. Be careful not to cut too deeply into the branch, as this could damage it and affect the rooting process. If the branch is too thick, you may need to make a second cut just below the first to ensure the inner cambium layer is fully exposed.
Step 3: Apply Rooting Hormone (Optional)
While not strictly necessary, applying rooting hormone to the exposed cambium layer can speed up the rooting process and help the roots form more effectively. Rooting hormone is available in gel or powder form, and it contains plant growth regulators that stimulate root development. Simply dip the exposed part of the branch into the rooting hormone, ensuring that it’s well-coated.
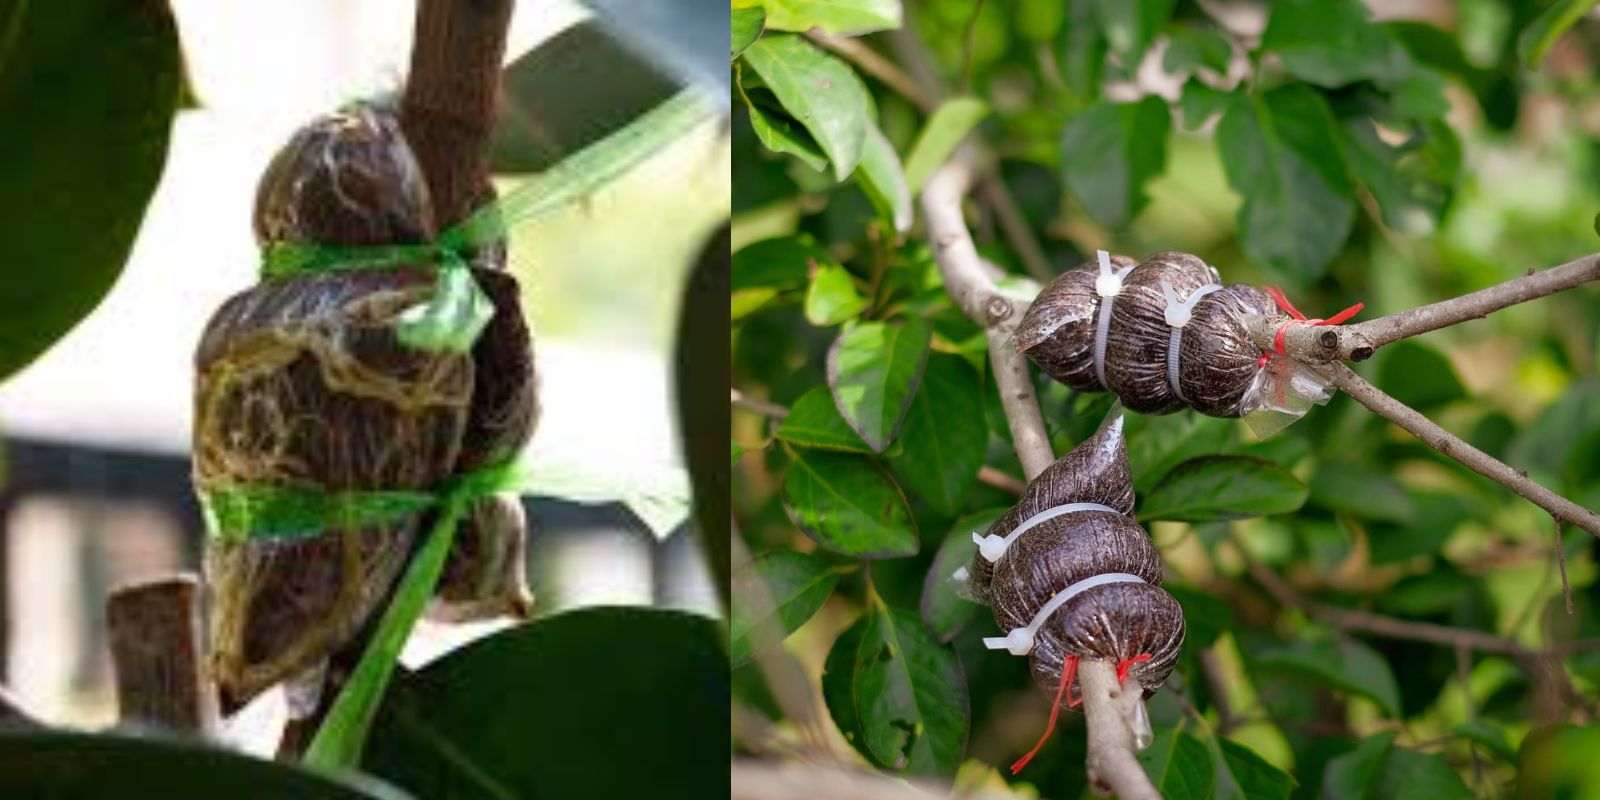
Step 4: Wrap the Branch with Moist Growing Medium
To encourage root development, you’ll need to provide a moist environment around the exposed branch. This is where the air layering process differs from other forms of propagation. Take a handful of sphagnum moss, coco peat, or any moisture-retaining material and soak it in water. Once it’s fully saturated, squeeze out any excess water and wrap it around the exposed section of the branch.
After applying the moss, wrap it tightly with plastic wrap to hold the moisture in place. You can also use a plastic bag or plastic cling film to wrap the moss around the branch. Secure the ends of the plastic tightly using tape or twist ties.
Step 5: Maintain Moisture and Monitor the Rooting Process
For air layering to be successful, the growing medium must stay moist at all times. Check on it periodically, and if the moss appears to be drying out, carefully remove the plastic and re-soak it before re-wrapping. It’s also a good idea to monitor the branch for signs of new root growth, which can take anywhere from 4 to 8 weeks depending on the plant species and environmental conditions.
If you notice roots beginning to form through the plastic, this is a sign that the air layering process is working.
Step 6: Sever the New Plant and Transplant
Once the new roots are established, it’s time to sever the new plant from the parent. Use a clean, sharp knife or pruning shears to cut the branch just below the newly formed roots. At this point, you now have a fully rooted plant that can be transplanted into a pot or directly into the ground.
Be sure to handle the new plant carefully, as the roots are still tender. Plant it in well-draining soil and keep it moist while it acclimates to its new environment.
Additional Tips for Successful Air Layering
- Choose the Right Time of Year:
Air layering works best during the growing season, typically in spring or early summer, when the plant is actively growing. Avoid air layering in winter when plants are dormant. - Use the Right Tools:
Make sure you use a sharp knife or pruning shears to make clean cuts that won’t damage the branch. Dull tools can crush the bark and make the process less effective. - Be Patient:
Air layering can take time, so be patient and check the progress regularly. It may take several weeks for the roots to fully develop. - Protect the New Plant:
After transplanting, keep the new plant in a shaded area for a few days to reduce stress and prevent sunburn. Gradually introduce it to more sunlight as it adjusts.
Conclusion
Air layering is an incredibly effective and straightforward method for propagating difficult-to-root plants. Whether you want to clone a prized tree, shrub, or houseplant, air layering allows you to propagate healthy, strong plants without needing to remove them from their parent. By following the simple steps outlined in this guide, you can master this technique and enjoy the satisfaction of successfully propagating your favorite plants.
Ready to try air layering in your garden? Let us know which plants you’re planning to propagate and share your experiences with us! 🌱
Viral Gardening Hashtags:
#AirLayering #PlantPropagation #GardeningTips #RootingPlants #GardenersOfInstagram #PropagationSuccess #GreenThumb #GardeningHacks #SustainableGardening #DIYPlantPropagation