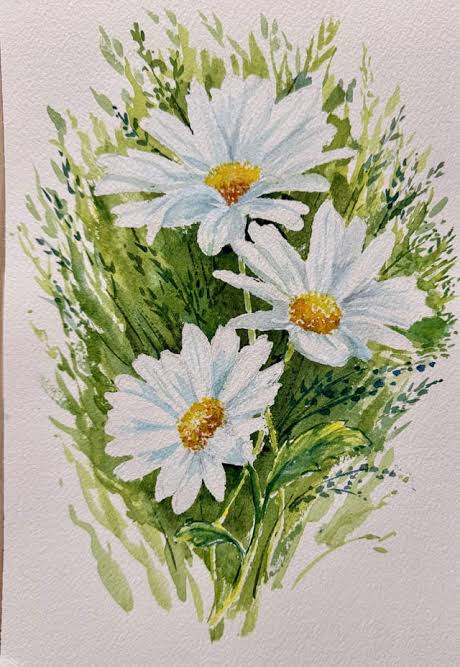
A Complete Guide for Beginners and Creative Artists**Watercolour painting has long been admired for its soft edges, dreamy blends, and expressive movement. Among all its subjects, watercolour flowers remain the most popular—and for good reason. Their natural elegance, fluid shapes, and vibrant hues make them perfect for this medium. If you want to Learn the secret to Watercolour flowers!, you’re in the right place. This guide will walk you through the essential techniques, tools, and creative methods that bring floral art to life, whether you paint from your kitchen table in the United States, a cosy studio in the United Kingdom, or a sunny balcony in Canada.Why Watercolour Flowers Are So CaptivatingWatercolour flowers combine freedom and precision, allowing painters to explore gentle gradients and expressive strokes. This subject also suits every skill level—from beginners who want simple petals to advanced artists who enjoy complex botanical illustrations. When you Learn the secret to Watercolour flowers!, you’ll discover how small techniques dramatically impact your artwork’s realism, mood, and style.The Essential Tools for Painting Watercolour FlowersBefore diving into techniques, it’s important to gather the right materials. Quality tools enhance colour flow, blending, and detail—three essential elements of floral watercolour art.1. Watercolour PaintsChoose artist-grade or high-quality student-grade paints. Look for brands known for strong pigmentation and smooth blending. Floral painting benefits from a palette that includes:Permanent RoseQuinacridone MagentaLemon YellowHansa/Transparent YellowSap GreenHooker’s GreenUltramarine BlueBurnt SiennaThese hues allow you to mix soft petal shades, vibrant blossoms, and realistic foliage.2. BrushesTo Learn the secret to Watercolour flowers!, you must understand brush behaviour. Floral painting relies on:Round brushes (sizes 2–12): Ideal for petals and thin stems.Liner brushes: Perfect for delicate veins or fine leaf details.Mop brushes: Excellent for creating loose, expressive blooms.3. PaperWatercolour flowers look best on 100% cotton, cold-pressed paper (140 lb/300 gsm). This paper absorbs water evenly, preventing patchy blooms and helping colours glide smoothly.4. Additional SuppliesA paletteTwo jars of water (one for rinsing, one for clean mixing)Paper towelsA pencil for light sketchingLearn the Secret to Watercolour Flowers! Key Techniques ExplainedMastering watercolour flowers depends on understanding the essential techniques behind the medium. Here are the core methods artists rely on when creating stunning florals.H2: Technique 1 — Wet-on-Wet for Soft, Dreamy PetalsThe wet-on-wet technique is the foundation of expressive watercolour flowers. It creates soft edges and gentle colour transitions—perfect for petals like peonies, roses, magnolias, and cherry blossoms.How to Use Wet-on-WetLightly sketch your flower.Wet a petal shape with clean water using a round brush.Drop pigment into the wet area and let it spread naturally.Add darker tones while the surface is still damp for added depth.This method creates natural blooming effects that mimic real petals. When you Learn the secret to Watercolour flowers!, mastering wet-on-wet is often the first breakthrough.H2: Technique 2 — Wet-on-Dry for Sharp, Defined DetailsWhile wet-on-wet gives softness, wet-on-dry creates crisp, controlled edges. This is necessary for:Petal outlinesLeaf veinsStemsStamen detailsBotanical-style precisionPro TipUse less water and a steady hand. If your brush is too wet, you’ll lose the controlled linework that makes your flower look polished.H2: Technique 3 — Colour Layering (Glazing)Glazing is the secret behind depth in watercolour. After your first layer dries, apply thin washes of new colour over it. This allows you to:Add dimension to petalsBuild shadowsIntensify coloursCreate realistic floral structuresFor example, a rose petal may start with a pale pink wash. Once dry, you add deeper pink along the folds, and finally, soft purples for shadowing. You’ll quickly see why glazing is central when learning the secret to watercolour flowers.H2: Technique 4 — Negative PaintingNegative painting involves painting around a shape rather than painting the shape itself. This technique is excellent for:Highlighting thin petalsDefining overlapping leavesCreating depth between layers of foliageIt’s a powerful technique that separates beginners from more experienced floral artists.H2: Step-by-Step: Paint Your First Watercolour FlowerNow that you know the essentials, here’s a practical lesson to help you Learn the secret to Watercolour flowers! through a simple project.H3: Step 1 — Light SketchingDraw a loose outline of a flower such as a poppy, daisy, or rose. Keep the sketch light—watercolour is transparent, so dark lines will show through.H3: Step 2 — Start with Wet-on-Wet PetalsWet each petal individually and drop in colour. Let the pigment spread naturally. Don’t try to control everything; embrace the medium’s fluid character.H3: Step 3 — Add Shadows and DepthOnce dry, apply a second layer. Focus on areas closer to the centre of the flower or where petals overlap.H3: Step 4 — Paint Leaves and StemsUse greens mixed with blues or yellows for natural variations. Leaves look more realistic with uneven edges and gradient tones.H3: Step 5 — Add Details LastWhen your base layers are completely dry, use a fine brush to add:Stamen linesTextureDarker shadowsPetal veinsFinish with a few expressive strokes for movement.H2: Practical Tips for Perfect Watercolour FlowersTo truly Learn the secret to Watercolour flowers!, keep these expert tips in mind:1. Use the Right Amount of WaterBalance is everything. Too much water causes puddling; too little prevents smooth blending.2. Mix Colours on the PaperInstead of overmixing on the palette, allow colours to merge directly on the page for natural, organic gradients.3. Practice Petals IndividuallyBefore attempting full flowers, practice petal shapes repeatedly. Each attempt teaches you something new about flow and saturation.4. Don’t Overwork the PaintingOne of the biggest beginner mistakes is trying to “fix” mistakes while the paper is still wet. Allow drying time between layers.5. Experiment with Loose vs. Detailed StylesLoose florals are expressive and artistic, while botanical-style flowers are structured and precise. Try both to find your personal style.6. Use Reference PhotosReal flowers provide essential guidance for shape, shading, and color. Observe how light hits the petals and where shadows appear.H2: Common Mistakes and How to Avoid ThemMistake 1 — Muddy ColoursThis happens when mixing too many pigments together. Stick to two colours per mix.Mistake 2 — Harsh EdgesUnwanted sharp lines appear if a drying area meets fresh water. Re-wet the edge to soften.Mistake 3 — Over-SketchingHeavy pencil lines distract from the transparency of the paint.Mistake 4 — Skipping Test SwatchesAlways test colours on scrap paper before committing them to your artwork.Conclusion: Learn the Secret to Watercolour Flowers! and Create Stunning ArtWhether you’re brand new to painting or looking to refine your technique, exploring watercolour florals is one of the most rewarding creative journeys. With the right tools, foundational techniques, and practice, you can transform simple brushstrokes into breathtaking blossoms. As you continue to Learn the secret to Watercolour flowers!, you’ll discover your unique artistic voice—whether soft and dreamy, bold and expressive, or delicate and botanical.Embrace experimentation, trust the natural flow of the paint, and enjoy the process. Your floral masterpieces await!