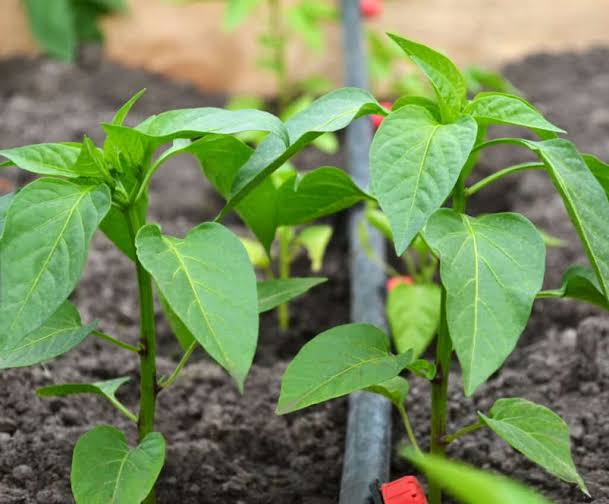
If you’ve ever dreamed of harvesting colorful, crisp, and flavorful bell peppers straight from your garden, you’re in the right place. Bell peppers — also known as sweet peppers or capsicums — are one of the most rewarding vegetables to grow at home. Whether you love them green, red, yellow, or orange, these vibrant veggies add both nutrition and beauty to your garden.In this guide, you’ll learn the secret to how to plant bell pepper seeds! From choosing the right seeds and preparing the soil to caring for your seedlings and harvesting at the perfect time, we’ll walk you through each step. Whether you live in the United States, the United Kingdom, or Canada, these practical tips will help you grow healthy, productive pepper plants that thrive in your climate.Why Grow Bell Peppers from Seed?Bell peppers are not only delicious but also highly versatile. They’re rich in vitamin C, antioxidants, and fiber, making them a great addition to any diet. Growing bell peppers from seeds offers several benefits:More variety: You can choose from a wide range of colors and flavors not always available in stores.Cost-effective: A single packet of seeds can yield dozens of plants.Satisfaction: Watching your plants grow from seed to harvest is incredibly rewarding.So, if you’re eager to learn the secret to how to plant bell pepper seeds, keep reading — your garden adventure starts here!H2: Step 1 – Choose the Right Bell Pepper SeedsThe first secret to successful pepper growing begins with choosing the right variety. Bell peppers come in many types, including sweet, mild, and even mini-sized versions.H3: Popular Varieties to TryCalifornia Wonder: A classic green pepper that matures into a sweet red.Golden Bell: Produces bright yellow fruits with a mild flavor.Purple Beauty: Unique and colorful, perfect for adding variety to your garden.Chocolate Beauty: Turns a rich brown when ripe with a surprisingly sweet taste.When you learn the secret to how to plant bell pepper seeds, remember that the variety you choose can affect your growing timeline, flavor, and yield. Pick varieties that suit your local climate and your cooking preferences.H2: Step 2 – Prepare the Seeds for GerminationBell pepper seeds need a warm environment to sprout. Since peppers originate from tropical regions, they prefer temperatures between 75°F and 85°F (24°C–29°C) for optimal germination.H3: Soaking the SeedsBefore planting, soak your seeds in warm water for about 8–12 hours. This softens the seed coat and speeds up germination.H3: Use a Seed Starting MixPlant your seeds in a light, well-draining seed-starting mix — not regular garden soil. Use seed trays or small pots, filling them about three-quarters full. Place one or two seeds per cell and cover lightly with soil (about ¼ inch deep).H3: Provide Warmth and MoistureTo learn the secret to how to plant bell pepper seeds successfully, keep your seeds warm and moist but not soggy. Cover your tray with plastic wrap or a humidity dome to retain moisture, and place it in a warm spot. A heating mat can help maintain consistent temperature if your home is cool.Germination usually takes 7–14 days. Be patient — bell peppers are slow starters but worth the wait!H2: Step 3 – Care for Your SeedlingsOnce your seeds sprout, it’s time to give them plenty of light and care.H3: Provide Adequate LightMove your seedlings to a bright window or use a grow light for 12–16 hours a day. Insufficient light can cause leggy, weak plants.H3: Water CorrectlyWater your seedlings gently and regularly. Keep the soil moist but not waterlogged. Overwatering can lead to root rot, one of the most common mistakes new gardeners make.H3: Thin Out SeedlingsWhen your seedlings have two sets of true leaves, thin them out by cutting weaker ones at the base. This allows the strongest plant to thrive.H2: Step 4 – Transplanting Bell Pepper SeedlingsAfter 8–10 weeks, your seedlings should be ready for transplanting. But don’t rush — peppers are sensitive to cold.H3: Hardening OffTo learn the secret to how to plant bell pepper seeds properly, always harden off your seedlings before transplanting. This means gradually exposing them to outdoor conditions over 7–10 days.Start by placing them outside in a shaded area for a few hours each day, slowly increasing sunlight and time outdoors.H3: Choosing the Right LocationBell peppers love full sun — at least 6–8 hours of direct sunlight per day. Choose a garden spot with fertile, well-draining soil that’s rich in organic matter.H3: Soil PreparationMix compost or aged manure into the soil before planting. Bell peppers prefer a soil pH between 6.0 and 6.8. You can use a soil test kit to ensure optimal conditions.When transplanting, space the plants about 18–24 inches apart in rows 24–30 inches apart. Water them thoroughly after planting to help establish strong roots.H2: Step 5 – Caring for Mature PlantsH3: Watering and MulchingPeppers need consistent moisture. Water deeply once or twice a week, depending on weather conditions. Use mulch (like straw or shredded leaves) around the base to retain moisture and keep weeds away.H3: Feeding Your PlantsOnce the first flowers appear, feed your bell peppers every two weeks with a balanced fertilizer or organic compost tea. Too much nitrogen can lead to lush leaves but fewer fruits, so use a fertilizer with balanced nutrients (e.g., 10-10-10).H3: Supporting the PlantsAs your peppers grow, they may become heavy with fruit. Use stakes or cages to keep the plants upright and prevent branches from breaking.H2: Step 6 – Dealing with Common ProblemsEven with the best care, pepper plants can face challenges. Here’s how to handle them.H3: PestsAphids, spider mites, and cutworms are common. Use insecticidal soap or neem oil to control infestations naturally.H3: DiseasesOverwatering and poor air circulation can cause fungal diseases like root rot or powdery mildew. Ensure your plants have enough space to breathe and avoid watering the leaves directly.H3: Temperature StressBell peppers are sensitive to temperature changes. If nights are still cool, cover plants with row covers to keep them warm.Knowing how to prevent and manage these issues is part of learning the secret to how to plant bell pepper seeds effectively.H2: Step 7 – Harvesting Your Bell PeppersH3: When to HarvestBell peppers can be harvested when they’re firm and green, or you can wait for them to change color — red, yellow, orange, or purple — for a sweeter flavor. The longer they stay on the plant, the richer their color and taste.H3: How to HarvestUse a sharp knife or garden shears to cut peppers off the plant, leaving a small piece of stem attached. Avoid pulling or twisting the fruit, as this can damage the plant.Practical Tips for SuccessHere are a few bonus secrets to help you grow your best bell peppers yet:Start seeds early indoors (8–10 weeks before the last frost).Keep soil temperatures warm for faster germination.Avoid over-fertilizing with nitrogen — it reduces fruit production.Prune lower leaves to improve air circulation.Harvest regularly to encourage more fruiting.Rotate crops yearly to prevent soil-borne diseases.Use mulch to maintain even soil moisture.Each of these steps contributes to mastering the process of how to plant bell pepper seeds successfully.ConclusionGrowing bell peppers from seed might seem challenging at first, but once you understand the process, it becomes a deeply satisfying experience. By following this complete guide and truly learning the secret to how to plant bell pepper seeds, you can enjoy abundant, flavorful harvests season after season.From selecting the best seeds to providing proper care, each step builds the foundation for healthy, vibrant plants. Whether you’re gardening in the sunny backyards of the U.S., the mild climates of the U.K., or the cool regions of Canada, these techniques will help your bell peppers thrive.So grab your seed tray, roll up your sleeves, and start planting — your garden will thank you with a burst of color and flavor!