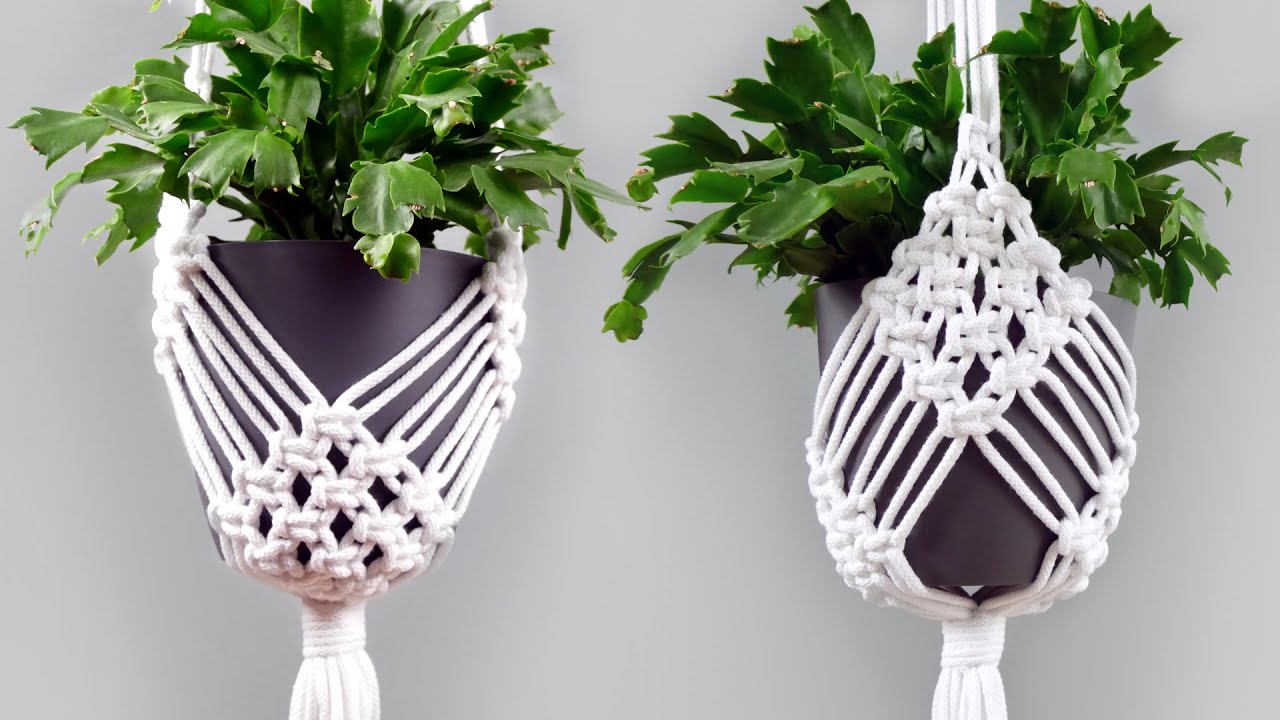
Macramé has made a major comeback in modern homes across the United States, United Kingdom, and Canada—and for good reason. This age-old fiber-art technique brings texture, warmth, and personality to any living space. Among the most beloved macramé projects is the plant hanger, a practical yet decorative piece that elevates your greenery and adds a bohemian charm. If you’ve been wanting to master the art of how to make macrame plant hanger, this comprehensive guide will walk you through everything you need: materials, knots, steps, tips, and creative variations.Whether you’re a complete beginner or someone who has dabbled with crafts before, you’ll soon have the confidence to create a beautiful, handmade macramé plant hanger of your own.Why Learn Macramé? The Appeal of Handmade Plant HangersMacramé is more than a craft; it’s a relaxing, hands-on activity that allows you to focus, unwind, and express creativity. Handmade plant hangers also bring character to indoor and outdoor spaces. They’re perfect for apartments, homes with limited floor space, or anyone looking to showcase plants in a stylish way.By learning to master the art of how to make macrame plant hanger, you’re not just following a trend—you’re developing a lifelong crafting skill that can be expanded into wall hangings, keychains, shelves, and more.Materials You Need to Make a Macramé Plant HangerBefore starting, gather these essential tools and materials. Most are inexpensive and widely available in North America and the UK.Macramé CordChoose cotton cord between 3 mm and 5 mm thick. It’s sturdy, soft, and easy to knot—ideal for beginners.ScissorsUse sharp scissors to get clean cuts when trimming cords.Wooden or Metal RingThis is the anchor point where your plant hanger begins. Rings range from 1 to 3 inches.Measuring TapeAccurate measurements ensure even strands.Plant PotSelect a pot first, so you can scale your hanger to fit it well.Optional:Beads (wooden or acrylic)Fabric glue (to prevent fraying)A hanging hook for easier knot tyingWith these materials ready, you can now begin to master the art of how to make macrame plant hanger.Essential Macramé Knots to LearnBefore diving into the full project, familiarize yourself with the foundational knots. Most plant hangers use just two: the Lark’s Head Knot and the Square Knot.Lark’s Head KnotThis knot attaches each cord to the ring.How to tie it:Fold your cord in half.Place the loop behind the ring.Pull the ends of the cord through the loop.Pull tight.Square KnotThis is the core knot used in macramé plant hangers.To tie a Square Knot:Separate four cords—two in the middle, two on the sides.Cross the left cord over the middle cords, forming a “4” shape.Bring the right cord over the tail of the left cord, behind the middle cords, and through the loop.Pull tight.Repeat the steps starting with the opposite side.Once you’ve learned these two knots, you’re ready to build your plant hanger.Step-By-Step Guide to Master the Art of How to Make Macrame Plant HangerBelow is a simple yet elegant pattern perfect for beginners.Step 1: Measure and Cut Your CordsCut eight cords, each about 8 feet long. This length gives you room for knots and trimming.Fold each cord in half, giving you 16 working strands.Step 2: Attach Cords to the RingUse Lark’s Head Knots to attach all cords to your wooden or metal ring. Once complete, you’ll have a thick bundle of cords hanging evenly from the ring.Step 3: Tie Square Knots Below the RingMeasure about 4 inches below the ring.Divide cords into groups of four and tie a Square Knot in each group. Repeat the Square Knot twice to form a “Square Knot Set.”Step 4: Create the Basket for the PotMove down 3–4 inches and switch the grouping of cords by pairing two cords from one knot with two from the next. Tie another round of Square Knots.Move down another 3–4 inches and repeat the alternating knot pattern. This creates the diamond-shaped netting that cradles your pot.Step 5: Close the HangerOnce your cords reach the length needed to hold the pot, gather all strands together.Tie a large Overhand Knot (one big simple knot) to secure the bottom.Step 6: Trim the EndsEven out the tail of your macramé plant hanger, trimming excess cord to your preferred length. Add beads or fray the ends for a decorative finish.You’ve now completed your first macramé plant hanger—and you’ve officially begun to master the art of how to make macrame plant hanger from scratch!Creative Variations to TryOnce you get comfortable with the basic pattern, try these variations to elevate your designs.Add Wooden BeadsSlide beads onto the cords before tying knots for an earthy, boho look.Use Colored CordNeutral cotton is classic, but adding color—like mustard, sage green, or navy—gives your hanger personality.Try Spiral KnotsA spiral knot is simply a Square Knot repeated without alternating sides. It creates a beautiful twisted pattern.Mix Cord ThicknessThicker cords add bold texture, while thinner cords are perfect for delicate designs.Experimenting with these ideas helps you further master the art of how to make macrame plant hanger in your personal style.Practical Tips for SuccessTo make your crafting process smoother, keep the following helpful tips in mind:1. Hang the Project While You WorkUse a wall hook, doorknob, or garment rack. Having the hanger suspended makes knotting easier and keeps cords from tangling.2. Keep Your Cords OrganizedTape ends together, or gently comb out tangles as you go.3. Measure Twice, Cut OnceMacramé uses more cord than you might expect. When in doubt, cut longer strands—you can always trim later.4. Practice Knots FirstBefore starting the main project, practice Square Knots and Lark’s Head Knots on scrap cord. Muscle memory makes crafting smoother.5. Choose the Right PotRound pots fit best, and lightweight materials (like terracotta or plastic) are easier for beginners to work with.6. Adjust Spacing as NeededNo two plant pots are the same, so you may need to adjust the distance between knots for a snug, secure fit.7. Don’t RushMacramé is relaxing and meditative. Take your time to enjoy each step.These beginner-friendly strategies help ensure that each attempt takes you closer to truly mastering the art of how to make macrame plant hanger.How to Style Your Macramé Plant HangerOnce completed, your macramé hanger can enhance many spaces:Living rooms: Frame a window with a hanging pothos.Bedrooms: Add cozy, soft vibes with trailing ivy.Kitchens: Hang herbs like mint or basil within reach.Balconies: Display succulents or hardy plants.Bathrooms: Add greenery with ferns that love humidity.Because macramé is lightweight and versatile, you can effortlessly incorporate it into any aesthetic—from rustic farmhouse to modern minimalism.Conclusion: Start Creating Beautiful Macramé TodayLearning to master the art of how to make macrame plant hanger is an enjoyable and rewarding experience. This simple craft blends creativity, functionality, and relaxation while giving you beautiful décor for your home. With just a few basic knots and inexpensive materials, you can make stunning plant hangers that reflect your personality and elevate your space.Whether you want a calming new hobby, a handmade gift idea, or a way to display your plants stylishly, macramé is a timeless craft worth exploring. So gather your cord, find your favorite pot, and begin your journey into the art of macramé—one knot at a time.If you’d like, I can also create a PDF version, shorter blog version, or Pinterest-optimized description for this article!