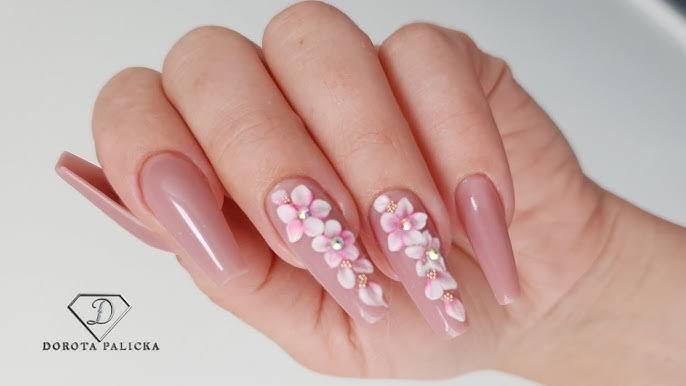
Acrylic flower nail art has become one of the most elegant and eye-catching trends in the beauty world. From bridal manicures to everyday glam, 3D acrylic flowers add texture, creativity, and luxury to any nail set. If you’ve ever wondered how nail artists create those delicate, lifelike floral designs, you’re in the right place. This guide will help you learn the secret to acrylic flowers on nails and understand the techniques that turn simple acrylic into stunning floral art.Whether you’re a beginner nail enthusiast or a professional nail technician looking to refine your skills, this article breaks down everything you need to know—tools, techniques, common mistakes, and expert tips—using clear, easy-to-follow guidance suitable for readers in the United States, United Kingdom, and Canada.What Are Acrylic Flowers on Nails?Acrylic flowers on nails are 3D nail art designs created using acrylic powder and liquid monomer. Unlike painted flowers, these designs are sculpted directly onto the nail, giving them depth, realism, and a luxurious finish.They are commonly used for:Weddings and special eventsAccent nailsHigh-fashion or editorial nail setsInstagram and portfolio designsTo truly learn the secret to acrylic flowers on nails, it’s important to understand that success lies in timing, consistency, and control.Why Acrylic Flowers Are So PopularTimeless EleganceFloral designs never go out of style. Acrylic flowers add a soft, feminine touch that works across seasons and trends.Customizable DesignsFrom roses and daisies to abstract florals, acrylic flowers can be customized in:SizeColorShapeLayering styleProfessional Appeal3D acrylic nail art instantly elevates your manicure, making it a favorite among professional nail artists and clients alike.Tools You Need to Create Acrylic FlowersBefore diving into technique, having the right tools is essential.Basic SuppliesAcrylic powder (white or colored)Liquid monomerDappen dishNail brush (size 6–10 recommended)Lint-free wipesPractice nail tips or nail formsOptional but Helpful ToolsDetail brush for shaping petalsSilicone nail art toolCuticle pusher (for petal definition)Using quality products makes it much easier to learn the secret to acrylic flowers on nails.The Real Secret: Perfect Acrylic ConsistencyWhy Consistency Matters MostThe biggest secret to beautiful acrylic flowers is bead consistency. If your acrylic is too wet, it will spread and lose shape. If it’s too dry, it will harden too fast and crack.The Ideal BeadSoft but not runnyHolds shape when placedCan be gently molded for a few secondsMastering this balance is the foundation of all successful acrylic flower designs.Step-by-Step: How to Create Acrylic Flowers on NailsStep 1: Prep the NailA smooth base ensures your flower adheres properly.Finish the acrylic or gel nail baseLightly buff the surfaceRemove dust and oilsStep 2: Pick Up the Acrylic BeadDip your brush into monomer, wipe off excess, then dip into acrylic powder to form a small bead. Wait 1–2 seconds for the bead to settle.👉 This waiting moment is crucial when you learn the secret to acrylic flowers on nails.Step 3: Place and Shape the PetalPlace the bead where the petal will goGently press and flattenUse the tip of your brush to fan and shape the petalRepeat this process to form multiple petals around a center point.Step 4: Build the FlowerLayer petals carefully, working from the center outward. Rotate the nail to keep symmetry.Step 5: Add DetailsCreate a small bead for the flower centerAdd crystals, glitter, or paint if desiredSeal with a top coat (optional, depending on texture preference)Common Mistakes and How to Avoid ThemUsing Too Much AcrylicLarge beads make flowers bulky and uneven. Start small—you can always add more.Rushing the ProcessTiming is everything. Allow the bead to set slightly before shaping.Overworking the AcrylicToo much brushing can ruin texture and cause cracking.Avoiding these mistakes helps you master and truly learn the secret to acrylic flowers on nails.Color Tips for Stunning Floral DesignsClassic ChoicesWhite and nude for bridal looksSoft pinks and pastels for eleganceBold StylesRed, purple, or black for statement nailsOmbre acrylic powders for depthNatural LookUse translucent or milky acrylic for realistic petals.Practice Tips for BeginnersIf you’re new, practice is key.Start on nail tips or practice matsPractice single-petal techniques firstWatch how acrylic behaves as it setsTake photos to track progressConsistency comes with repetition.Acrylic Flowers vs. Gel FlowersWhile both are popular, acrylic flowers offer:More structureLonger working timeBetter 3D definitionGel flowers are softer and flatter, making acrylic ideal for dramatic designs.When to Use Acrylic FlowersAcrylic flowers are perfect for:Weddings and engagementsPhoto shootsNail competitionsSpecial occasionsThey may not be ideal for everyday wear due to their raised texture.ConclusionLearning how to create acrylic flowers is both an art and a skill—and now you know the real secret. It’s not just talent, but acrylic consistency, timing, and gentle control that make all the difference. With the right tools, proper technique, and consistent practice, anyone can master this beautiful nail art style.If you truly want to learn the secret to acrylic flowers on nails, start slow, focus on bead control, and let your creativity bloom. With patience and practice, your acrylic floral designs can look just as stunning as those created by top nail professionals.