
Seed saving is a gardening tradition that has been passed down through generations. It offers an invaluable way to preserve plant varieties, save money, and create a more sustainable gardening practice. Whether you’re a beginner or an experienced gardener, knowing how to save seeds from your vegetable garden can greatly improve the quality of your crops year after year. In this guide, we’ll walk you through everything you need to know to master the art of seed saving and boost the health and productivity of your garden.
Why Save Seeds?
Saving seeds is an important practice for several reasons. First, it allows you to perpetuate your favorite vegetable varieties, especially heirloom plants, which are known for their unique flavors, resilience, and adaptability to local conditions. By saving seeds from your healthiest and most productive plants, you can also naturally select for the best traits, leading to stronger crops in the future.
Additionally, seed saving is a sustainable and cost-effective practice. Instead of buying new seeds every season, you can harvest seeds from your current plants, ensuring a continuous supply. Finally, by saving seeds, you’re participating in a time-honored tradition that helps protect biodiversity and the genetic diversity of our food supply.
Step 1: Choose the Right Plants for Seed Saving
The first step to successful seed saving is selecting the right plants. Not all plants are ideal for seed saving, especially if you’re working with hybrids. Hybrid plants, often marked as “F1” on seed packets, are bred for specific characteristics, but their seeds may not produce true-to-type offspring. Instead, look for open-pollinated or heirloom varieties, which will reliably produce plants that are similar to their parents.
When choosing which plants to save seeds from, select healthy, vigorous specimens. Look for plants that display desirable traits such as disease resistance, strong growth, and high productivity. These are the plants that are most likely to pass on beneficial characteristics to the next generation.
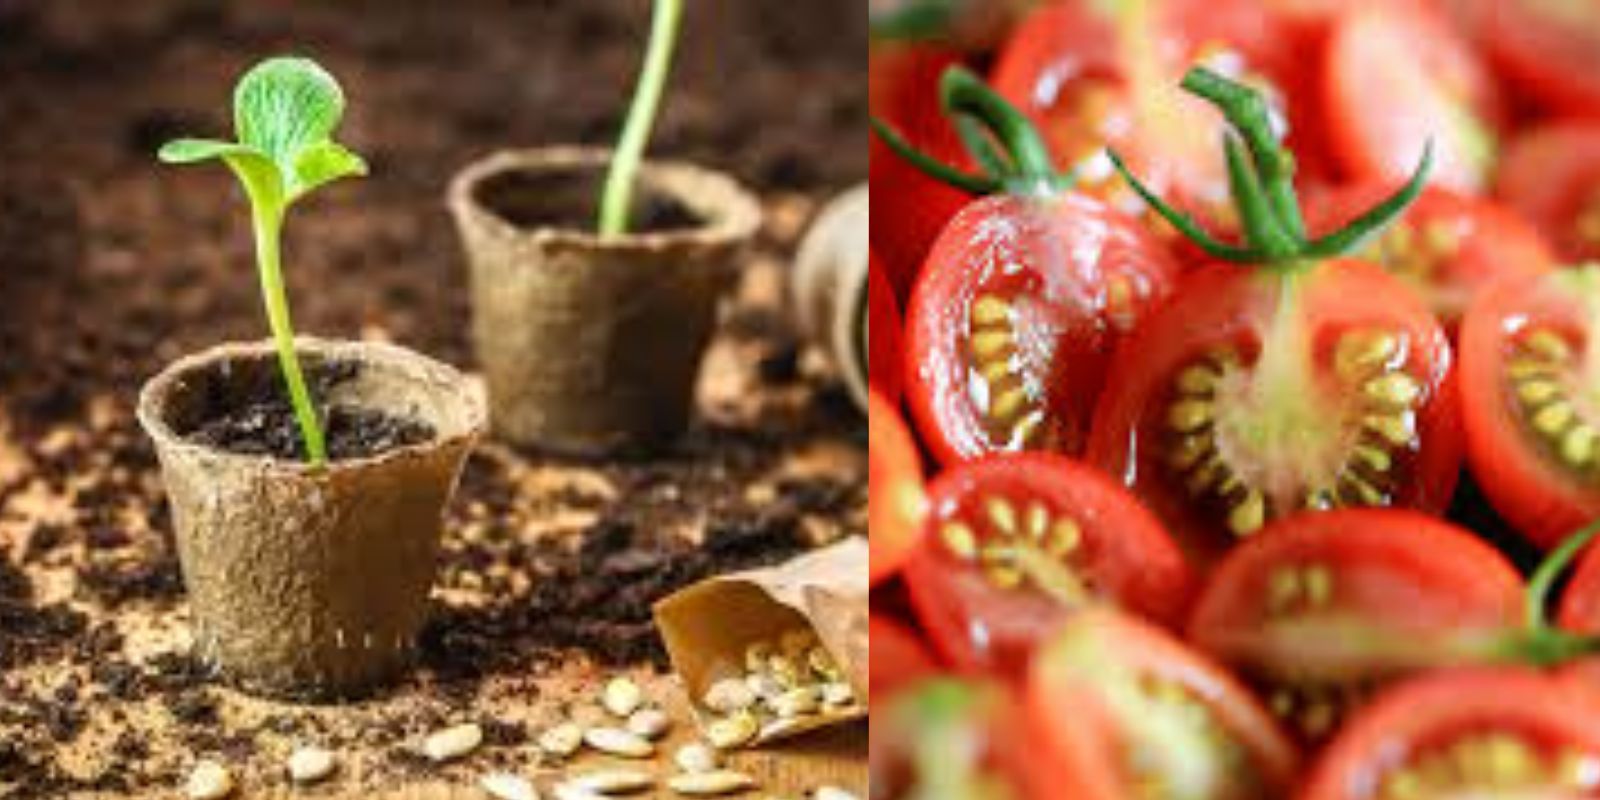
Step 2: Timing Your Seed Harvest
Timing is crucial when it comes to harvesting seeds. You need to allow the vegetables or fruits to fully mature on the plant before harvesting seeds. For example, tomatoes, peppers, cucumbers, and squash should be left on the vine until they are overripe before collecting their seeds.
For plants that produce pods, like beans and peas, wait until the pods are dry and brittle. This indicates that the seeds inside have fully developed. If you pick seeds too early, they may not have the energy reserves needed to sprout and grow into healthy plants.
Step 3: Cleaning and Preparing Seeds
Once you’ve harvested the seeds, it’s time to clean them. Some seeds, such as beans and peas, can be harvested and stored with minimal cleaning. However, others, particularly seeds from fruits like tomatoes and cucumbers, need to be thoroughly cleaned to remove any flesh or pulp.
For wet seeds (those found in the flesh of fruits or vegetables), place the seeds in a container of water and allow them to ferment for a few days. This process helps break down the gelatinous coating that surrounds the seeds. Once the seeds have settled to the bottom, carefully pour off the water, along with any floating debris. Rinse the seeds well and spread them out on a paper towel or screen to dry.
Dry seeds, like those from lettuce, carrots, and onions, can be cleaned by gently rubbing them between your fingers to remove any chaff or husks.
Step 4: Drying and Storing Seeds
Proper drying is essential to preserving the viability of your seeds. Once you’ve cleaned your seeds, spread them out on a paper towel, screen, or plate in a cool, dry place. Seeds should be dried for at least a week to ensure they are fully dry. If seeds are stored while still damp, they can rot or become moldy, rendering them unusable.
After your seeds are dry, it’s important to store them correctly. Place the seeds in airtight containers, such as glass jars or paper envelopes, to protect them from moisture and pests. Label the containers with the plant variety and the date the seeds were harvested. Store your seeds in a cool, dark, and dry location, such as a pantry or refrigerator, to prolong their shelf life.
Step 5: Avoiding Cross-Pollination
Cross-pollination can be a concern when saving seeds, especially for plants that rely on wind or insects for pollination, such as cucumbers, squash, and corn. Cross-pollination occurs when pollen from one plant variety fertilizes the flowers of another, resulting in seeds that may produce unpredictable offspring.
To avoid cross-pollination, it’s best to grow only one variety of each plant species if you plan to save seeds. Alternatively, you can separate different varieties by a considerable distance or use physical barriers like mesh bags or cages to prevent pollinators from transferring pollen between plants.
Step 6: Testing Seed Viability
Before you plant your saved seeds, it’s a good idea to test their viability. This step ensures that the seeds are still capable of germinating and producing healthy plants. To test your seeds, place a small number of them on a damp paper towel, fold it, and place it inside a plastic bag or container. Leave the bag in a warm spot, such as on top of the refrigerator, and check the seeds after a few days to see if they have sprouted.
If most of the seeds germinate, you can feel confident that your saved seeds are viable and ready for planting. If only a few seeds germinate, it may be best to plant extra seeds to compensate for the lower germination rate.
Step 7: Labeling and Organizing Seeds
As you begin to collect seeds from various plants, it’s essential to keep them organized. Proper labeling is critical for identifying different varieties and knowing when the seeds were harvested. Include the plant name, variety, and harvest date on each seed packet or container.
Creating a seed catalog or organizing system can help you keep track of your saved seeds, ensuring that you plant them within their optimal lifespan. Most seeds remain viable for several years when stored correctly, but the germination rate may decline over time.
Step 8: Understanding Seed Longevity
Different seeds have different shelf lives, so it’s important to know how long your saved seeds will remain viable. Some seeds, like beans and peas, can remain viable for up to five years if stored correctly. Others, such as onions and carrots, may only last one to two years.
Understanding seed longevity can help you plan your planting schedule and ensure that you use your seeds while they’re still viable. If you have older seeds, consider testing their germination rate before planting them to ensure success.
Step 9: Preserving Heirloom Varieties
One of the most rewarding aspects of seed saving is the opportunity to preserve heirloom varieties. These plants are often passed down through generations and are prized for their unique flavors, colors, and adaptability. By saving seeds from heirloom plants, you’re helping to protect biodiversity and keep these valuable varieties alive.
When saving heirloom seeds, it’s important to follow the same steps for selecting, cleaning, drying, and storing seeds. Many gardeners take pride in sharing their heirloom seeds with others, contributing to a vibrant community of gardeners who are passionate about preserving plant diversity.
Conclusion
Seed saving is a rewarding practice that not only saves you money but also helps improve the quality of your vegetable crops over time. By carefully selecting, harvesting, and storing seeds, you can ensure a healthy and productive garden for years to come. Whether you’re interested in preserving heirloom varieties or simply want to grow strong, resilient plants, seed saving is an essential skill for any gardener.
Engage with us! What seeds are you saving from your garden this year? Share your tips below!
Hashtags: