
Introduction
Winter doesn’t have to mean an end to your gardening activities. With winter sowing, you can start your seeds outdoors during the colder months and prepare for a thriving garden come spring. This low-maintenance, eco-friendly method mimics nature’s process of germination and helps you grow healthy, robust plants. Plus, it saves space indoors and eliminates the need for grow lights or heated seed trays. In this article, we’ll walk you through how to winter sow seeds in 7 easy steps, ensuring gardening success even in the chill of winter.
What is Winter Sowing?
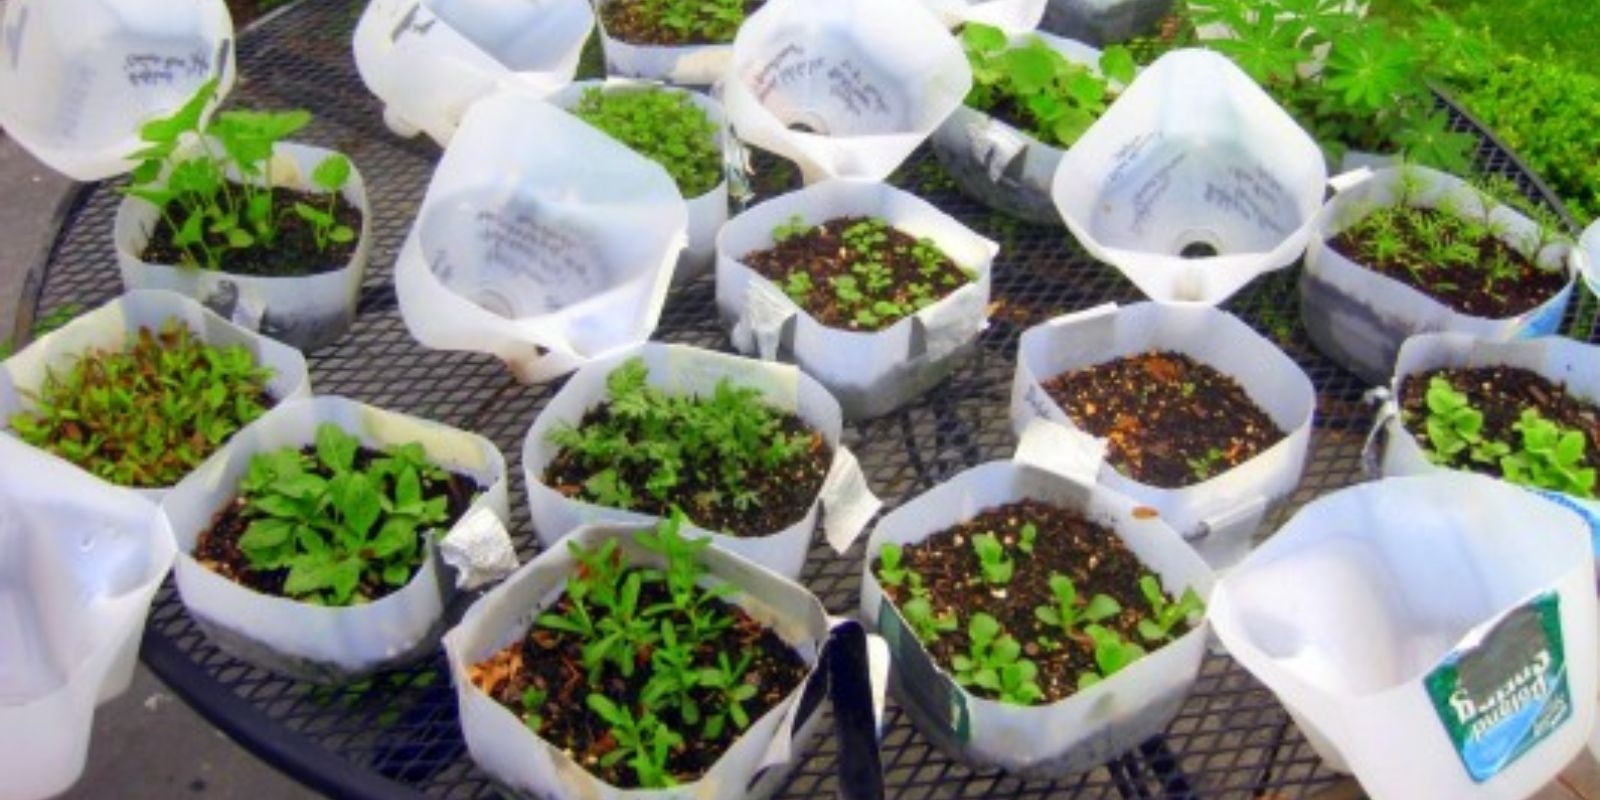
Winter sowing is a seed-starting technique that involves planting seeds in mini-greenhouses made from recyclable containers, which are then placed outdoors during the winter months. The seeds remain dormant until the temperature and conditions are right for germination. This method is ideal for cold-hardy and native plants that naturally experience winter conditions before sprouting in spring.
Why Choose Winter Sowing?
- Cost-Effective: It uses recycled containers and eliminates the need for expensive indoor growing setups.
- Space-Saving: No need to clutter your home with seed trays and lights.
- Stronger Plants: Seeds germinate in their natural environment, producing hardier plants better adapted to outdoor conditions.
- Eco-Friendly: It encourages recycling and reduces the energy consumption associated with indoor seed starting.
- Simplifies Gardening: There’s no need to harden off seedlings, as they’re already acclimated to outdoor conditions.
Materials Needed for Winter Sowing
Before diving into the steps, gather the following materials:
- Clear, Recyclable Containers: Milk jugs, soda bottles, or salad containers work well.
- Seed-Starting Soil Mix: Lightweight and well-draining soil is essential.
- Seeds: Choose cold-hardy varieties like lettuce, spinach, kale, or perennial flowers.
- Sharp Knife or Scissors: For cutting the containers.
- Waterproof Marker: To label the containers.
- Tape or Zip Ties: To seal the containers.
Step-by-Step Guide to Winter Sowing
Follow these 7 simple steps to get started with winter sowing:
Step 1: Choose Your Containers
Select clear, recyclable containers that can serve as mini-greenhouses. Milk jugs, soda bottles, or takeout containers are excellent options. Ensure they’re transparent or semi-transparent to allow sunlight to reach the seeds.
Step 2: Prepare Drainage and Ventilation
Use a sharp knife or scissors to poke several holes in the bottom of each container for drainage. Make additional small holes in the top or lid to allow air circulation. Proper drainage and ventilation are crucial to prevent waterlogging and mold growth.
Step 3: Add Soil
Fill each container with 2-3 inches of moist, seed-starting soil mix. Avoid regular garden soil, as it’s too heavy and can hinder seed germination.
Step 4: Sow Your Seeds
Sprinkle seeds on the soil surface, following the spacing recommendations on the seed packet. Gently press the seeds into the soil and cover them lightly with a thin layer of soil if needed. Mist the soil lightly with water to ensure it stays moist.
Step 5: Label the Containers
Use a waterproof marker to label each container with the seed variety and planting date. This step is essential for keeping track of what you’ve planted, especially if you’re sowing multiple types of seeds.
Step 6: Close and Seal the Containers
Close the container, using tape or zip ties to secure it shut. Leave the top slightly open or cut a small flap to allow air circulation. This helps regulate temperature and prevents the buildup of excess moisture.
Step 7: Place the Containers Outside
Position the containers in a sunny, sheltered spot outdoors. They should receive natural sunlight and be exposed to rain and snow. Don’t worry about freezing temperatures—the seeds will remain dormant until conditions are right for germination.
What Happens Next?
Once the containers are outside, nature takes over. The seeds will experience the freeze-thaw cycles of winter, breaking their dormancy naturally. As temperatures warm in late winter or early spring, the seeds will begin to germinate. When seedlings are large enough to handle, you can transplant them directly into your garden.
Tips for Winter Sowing Success
- Start with Cold-Hardy Seeds: Choose plants that thrive in cooler weather, such as broccoli, cabbage, parsley, and native perennials.
- Avoid Overcrowding: Sow seeds sparingly to give seedlings enough space to grow.
- Monitor Moisture Levels: Check the soil periodically to ensure it remains moist but not waterlogged.
- Protect Against Harsh Conditions: If extreme cold or heavy snow is expected, move the containers to a slightly more sheltered spot.
- Label Clearly: Use waterproof markers or write on duct tape to avoid losing track of your plants.
- Recycle and Reuse: Save containers for future winter sowing projects to reduce waste.
Benefits of Winter Sowing
Winter sowing offers numerous advantages over traditional seed-starting methods:
- Saves Time: No need to harden off seedlings, as they’re already acclimated to outdoor conditions.
- Encourages Natural Growth: Seeds germinate at their own pace, resulting in healthier, more resilient plants.
- Minimal Maintenance: Once the containers are set up, they require very little attention.
- Extends the Growing Season: You can get a head start on planting and enjoy an earlier harvest.
- Promotes Sustainability: By reusing materials, you reduce waste and contribute to an eco-friendly gardening practice.
Common Questions About Winter Sowing
1. Can I winter sow all types of seeds?
No, winter sowing is best suited for cold-hardy and native plants. Warm-season crops like tomatoes and peppers are better started indoors.
2. When should I start winter sowing?
You can start as early as mid-winter, typically between December and February, depending on your local climate.
3. How do I transplant seedlings from winter sowing?
When the seedlings are a few inches tall and the weather is consistently warm, gently separate them from the container and plant them in your garden.
4. What if the seeds germinate too early?
If this happens, keep the containers in a sheltered spot to protect the seedlings from frost.
Final Thoughts
Winter sowing is a simple, effective way to start your garden early while embracing sustainable practices. It’s an excellent project for gardeners of all experience levels, offering the joy of gardening even during the colder months. By following these 7 easy steps, you can create a thriving garden that’s ready to bloom as soon as spring arrives.
So, why not give winter sowing a try this season? Share your experience, photos, and tips with fellow gardeners—your success might inspire someone else to get started!
Hashtags
#WinterSowing #GardeningDIY #EcoFriendlyGardening #SeedStarting #GrowYourOwnFood #WinterGardening #GardeningMadeEasy