
Keeping your plants properly watered is essential for maintaining a thriving garden. However, life sometimes gets busy, or you may need to leave town for an extended period, leaving you wondering how to ensure your plants stay hydrated. Instead of relying on expensive irrigation systems or asking someone to care for your garden, you can use several clever, cost-free methods to water your plants for up to a month without any fuss.
In this article, we’ll explore various DIY solutions that make it possible to water your plants for a month at no cost. With simple items commonly found around the house, you can create effective self-watering systems that will keep your plants healthy and hydrated, saving you time, money, and effort.
Why You Need a Self-Watering Solution
Watering your plants regularly can be tricky, especially if you’re going on vacation or you have a busy schedule. Inconsistent watering can cause plants to become stressed, leading to stunted growth, wilting, and sometimes even death. While overwatering can drown the roots, underwatering can lead to dry, brittle plants that struggle to recover.
Self-watering systems ensure that plants receive a steady, consistent supply of moisture. Whether you have indoor houseplants or a thriving outdoor garden, these simple systems allow your plants to absorb the right amount of water when needed.
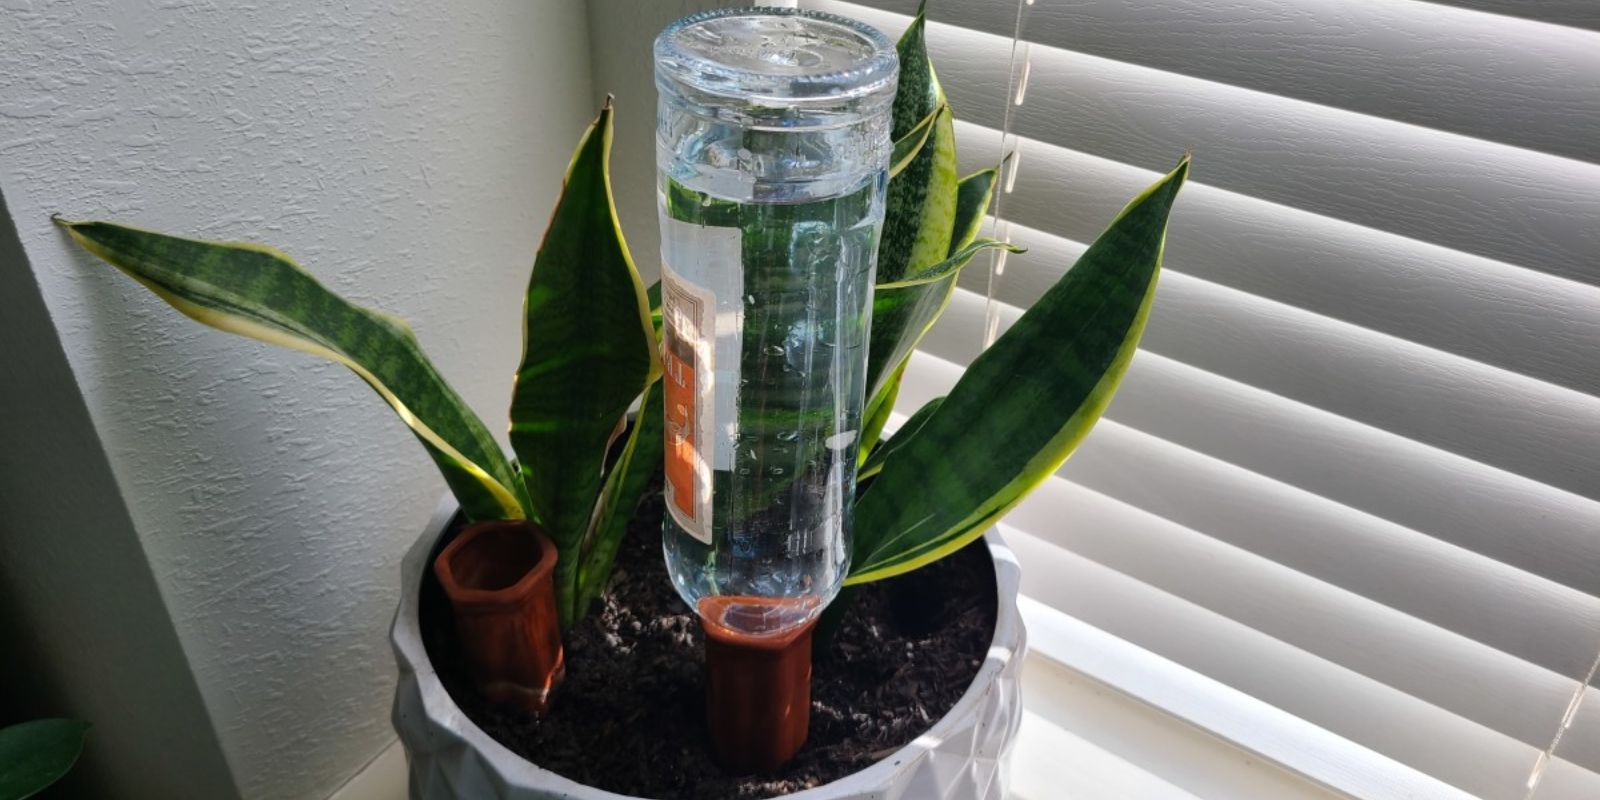
Step 1: Reuse Plastic Bottles for Slow Drip Irrigation
One of the most popular and easiest methods for keeping plants watered for an extended period is using old plastic bottles to create a slow drip irrigation system. This simple setup allows water to gradually seep into the soil, ensuring that the plants have consistent access to moisture without becoming waterlogged.
How to Create a Slow Drip System with Plastic Bottles:
- Gather several empty plastic bottles, such as 1-liter or 2-liter soda bottles, depending on the size of your plant.
- Poke small holes in the bottle caps using a needle or sharp pin. Make sure the holes are small enough to let water drip slowly.
- Fill the bottles with water and tightly screw the caps back on.
- Dig small holes next to your plants and bury the bottles upside down, with the cap just under the surface of the soil.
- As the water slowly drips from the bottle, it will provide continuous hydration to the roots of the plant.
This system can last for several days or even weeks, depending on the size of the bottle and the water needs of your plants. The larger the bottle, the longer the plants will stay hydrated.
Step 2: Create a DIY Wick Watering System
Another cost-free solution to watering your plants over an extended period is the wick watering system. This method is ideal for both indoor and outdoor plants and works by using a wick to transport water from a container to the soil, keeping the plants consistently hydrated.
How to Set Up a Wick Watering System:
- Find a large container, such as a bucket or old plastic tub, and fill it with water. This will serve as your water reservoir.
- Cut pieces of cotton fabric, old shoelaces, or strips of cloth to use as wicks.
- Place one end of the wick in the water reservoir and the other end in the soil near the base of the plant.
- As the soil dries out, the wick will draw water from the container, providing a continuous source of moisture to the plant.
The beauty of this system is that it can last for weeks, as long as there’s enough water in the reservoir. It’s a great solution for anyone who wants to avoid overwatering or underwatering their plants while away.
Step 3: Use a Water-Filled Tray for Bottom-Up Hydration
For smaller indoor plants or container gardens, using a water-filled tray is an effective and easy way to ensure plants receive the water they need. This method relies on bottom watering, where the plants’ roots pull water from the tray, promoting stronger root systems and preventing the soil surface from drying out too quickly.
How to Set Up Bottom-Up Hydration:
- Place your potted plants in a shallow tray or dish large enough to hold several inches of water.
- Fill the tray with water until the pots are sitting in about an inch of water.
- The water will gradually be absorbed by the soil through the drainage holes at the bottom of the pots, allowing the plants to take up water as needed.
This method prevents overwatering since the plants only absorb the amount of water they require. Be sure to refill the tray periodically to ensure a continuous supply of water.
Step 4: Mulch to Retain Moisture
Mulching is an excellent, cost-free way to conserve water and extend the time between waterings, especially in outdoor gardens. A thick layer of mulch helps reduce evaporation, keeps the soil cool, and prevents weed growth, all of which contribute to maintaining consistent moisture levels in the soil.
How to Apply Mulch Effectively:
- Collect organic materials like grass clippings, shredded leaves, straw, or wood chips. These materials are often readily available at no cost.
- Spread a 2-3 inch thick layer of mulch around the base of your plants, making sure to leave a small gap around the stems to prevent rot.
- The mulch will act as a barrier, reducing evaporation from the soil and keeping the roots cool and moist.
Mulching not only helps retain moisture but also improves soil health as it decomposes, adding valuable nutrients to the soil.
Step 5: Recycle Water from Household Sources
Why waste water when you can reuse it to keep your plants hydrated? Recycling water from everyday household activities is a sustainable and cost-free way to water your garden without increasing your water bill.
Sources of Recyclable Water:
- Rainwater: Collect rainwater using a rain barrel or containers placed outside during storms. This natural, chemical-free water is excellent for plants.
- Used Kitchen Water: After boiling vegetables or washing produce, save the cooled water for your plants. Just make sure it’s free of salt or chemicals.
- Aquarium Water: If you have a fish tank, the nutrient-rich water can be a great fertilizer for your plants. Just be sure to avoid using water that contains harmful chemicals.
Recycling water helps reduce waste and keeps your plants hydrated without any additional cost.
Step 6: Install a DIY Gravity-Fed Watering System
A gravity-fed watering system is another efficient way to water your plants for weeks at a time. This system relies on gravity to distribute water from a raised container down to your plants.
How to Set Up a Gravity-Fed Watering System:
- Use a large water container, such as a 5-gallon bucket, and place it on an elevated surface, like a table or shelf.
- Attach a length of tubing to the bottom of the container, using a valve to control water flow.
- Place the other end of the tubing near your plants, ensuring that the water slowly trickles out.
- Adjust the valve to release water at a steady pace, keeping your plants hydrated without the risk of overwatering.
This method works well for larger gardens and can be customized based on the number of plants you need to water.
Step 7: Try the Ollas Method for Watering
An ancient and highly effective watering technique, ollas are unglazed clay pots that are buried in the soil and filled with water. The porous material allows water to slowly seep into the soil, keeping your plants hydrated for extended periods.
How to Use the Ollas Method:
- Acquire or make clay pots with no drainage holes. Old terracotta pots work well.
- Bury the pot in your garden with only the neck and opening above the soil.
- Fill the pot with water and cover the top to prevent evaporation.
- The water will gradually seep through the walls of the pot, providing consistent moisture to the surrounding plants.
Ollas can keep plants watered for up to a month, making them an ideal solution for busy gardeners.
Conclusion: Keep Your Plants Watered at No Cost
Keeping your plants watered for an extended period doesn’t have to be expensive or complicated. By using these cost-free methods like plastic bottle irrigation, wick systems, and mulch, you can ensure your plants receive the hydration they need to thrive while you’re away or during busy periods. These DIY solutions are not only practical but also environmentally friendly, making them perfect for sustainable gardening.
Try one or a combination of these methods to keep your garden flourishing for weeks without any effort! Have any DIY watering tips of your own? Share them below!
#GardeningHacks #SustainableGardening #WaterSaving #PlantCareTips #DIYGardenProjects #NoCostGardening