
Orchids are among the most stunning and beloved houseplants, admired for their vibrant blooms and elegant appearance. However, while orchids are relatively easy to care for once you know the basics, they do require specific attention to detail—especially when it comes to watering. Improper watering is one of the leading causes of orchid stress and even death. Fortunately, by learning how to water your orchid correctly, you can ensure that it thrives, produces abundant flowers, and remains healthy year-round.
This comprehensive guide will help you understand the ins and outs of watering your orchid. We’ll go over essential tips, how often to water, and the signs of overwatering and underwatering. With the right knowledge and care, you can enjoy a beautiful, flourishing orchid for years to come!
The Importance of Proper Watering for Orchids
Watering orchids is one of the most critical aspects of orchid care. Orchids are epiphytes, meaning they typically grow on trees in the wild, where their roots are exposed to air and occasional rainfall. This unique growing habit means that orchids need a watering regimen that mimics their natural environment. Overwatering or underwatering can lead to root rot, wilting, and poor growth. On the other hand, proper watering encourages healthy roots, strong leaves, and the creation of spectacular flowers.
Understanding the balance between too much and too little water is key to helping your orchid thrive. To keep your orchid healthy and happy, it’s important to know when and how to water it, the best type of water to use, and how to ensure the plant has the right environment for watering.
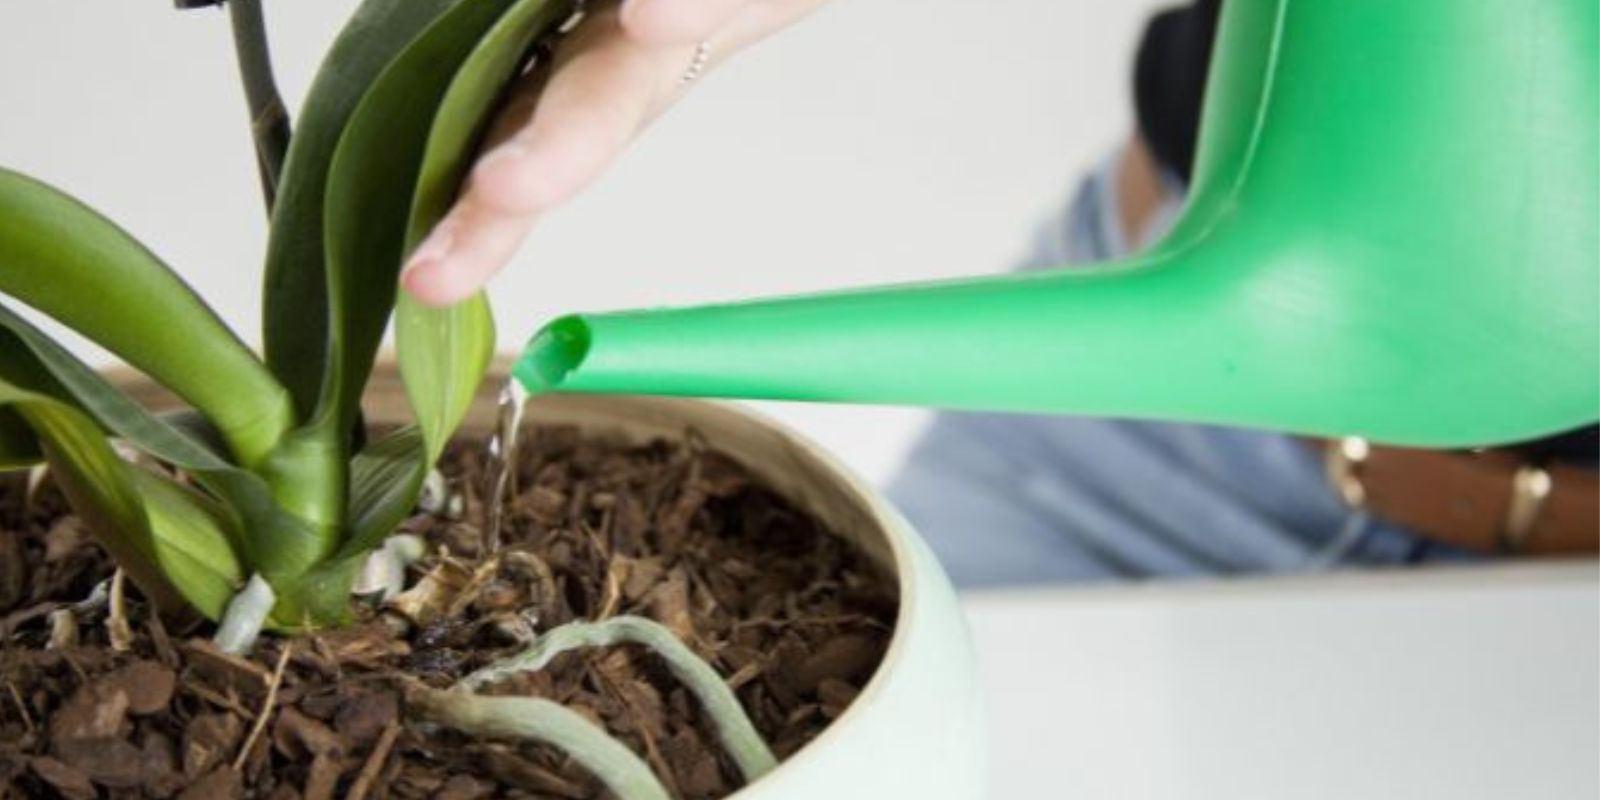
How to Water Your Orchid: Step-by-Step
1. Check the Potting Medium
The first step in watering your orchid is to check the moisture level of the potting medium. Orchids are typically grown in a mix of bark, moss, and other materials that allow for excellent drainage. Unlike other plants that grow in soil, orchids need their roots to dry out slightly between waterings to avoid rot.
To determine if your orchid needs watering, simply stick your finger about an inch into the potting medium. If it feels dry at this depth, it’s time to water. If it still feels moist, wait another day or two before checking again.
2. Watering Frequency
Orchids need water, but not too often. The general rule of thumb is to water your orchid once a week during the growing season (spring and summer) and every 10 to 14 days during the dormant period (fall and winter). However, this can vary based on environmental factors such as humidity, temperature, and the type of orchid you have.
In warmer months, when your orchid is actively growing, it will need more frequent watering. Conversely, in cooler months when the plant is resting, it needs less water. Overwatering during the winter months can lead to root rot because the plant is not actively growing, and excess moisture can cause the roots to suffocate.
3. Use Room-Temperature Water
When watering your orchid, always use room-temperature water. Cold water can shock the plant, leading to stress, while hot water can burn the roots. Ideally, water should be at the same temperature as the room where your orchid is placed.
If you use tap water, let it sit for a few hours to allow the chlorine to dissipate. Alternatively, you can use filtered or distilled water, which is free from harsh chemicals and minerals that might build up in the potting medium over time.
4. Water Thoroughly
When it’s time to water your orchid, be sure to water thoroughly, allowing the water to flow out of the bottom of the pot. This ensures that the entire root system is hydrated and that any excess salts or minerals that have built up in the potting medium are flushed away. Watering thoroughly also helps prevent dry patches, which can stress the plant.
Water until you see water draining out of the pot’s drainage holes. The roots of orchids are designed to absorb water quickly, so it’s essential to allow the water to pass through the pot to ensure all of the roots receive hydration. Avoid letting the pot sit in standing water, as this can cause the roots to rot.
5. Avoid Watering the Crown
When watering your orchid, it’s important to avoid getting water in the crown of the plant, which is where the leaves meet the stem. Water sitting in this area can lead to rot and fungal infections, which can be detrimental to the orchid’s health. Instead, focus on watering the potting medium, ensuring the roots are adequately hydrated without getting water on the plant itself.
If any water accumulates in the crown or on the leaves, gently wipe it off with a soft cloth to prevent water damage. Be mindful of the weather, as humidity can also affect the amount of moisture your orchid needs.
6. Ensure Proper Drainage
Proper drainage is crucial to healthy orchid care. Orchids should be grown in pots that have drainage holes to allow excess water to escape. Without proper drainage, the roots can become waterlogged, leading to root rot.
If your orchid is in a decorative pot without drainage, consider placing the pot inside a larger container that does have drainage holes, or use a pot specifically designed for orchids. This will allow excess water to escape and prevent water from accumulating at the bottom, which can damage the roots.
7. Humidity and Air Circulation
Orchids thrive in a humid environment, but it’s essential that they also have good air circulation. In dry indoor environments, especially during the winter months, you may need to increase the humidity around your orchid. You can do this by placing a humidity tray under the orchid pot (a shallow tray filled with pebbles and water) or by using a room humidifier.
However, avoid letting the orchid sit in water or a completely sealed environment, as stagnant air can cause mold or fungus to develop on the plant. Proper airflow is key to preventing these issues.
Signs of Overwatering and Underwatering
Knowing when your orchid needs water is important, but it’s also crucial to recognize the signs of overwatering and underwatering so you can adjust your care routine accordingly.
Signs of Overwatering:
- Yellowing leaves: If your orchid’s leaves begin to turn yellow, this may indicate that it’s receiving too much water.
- Wilting: Overwatered orchids can exhibit wilting leaves, despite the excess moisture.
- Root rot: In severe cases, overwatering leads to root rot, which causes the roots to turn brown or black and become mushy.
- Foul odor: A rotting smell coming from the roots or the soil is a strong indicator that overwatering is occurring.
Signs of Underwatering:
- Wrinkled or shriveled leaves: If the leaves of your orchid become shriveled or wrinkled, it’s a sign that the plant isn’t getting enough water.
- Dry potting medium: If the potting medium feels dry and crumbly, it’s time to water your orchid.
- Drooping flowers: While orchids may naturally drop flowers, drooping flowers caused by dehydration can also be a sign of underwatering.
Additional Tips for Orchid Care
- Fertilize your orchid: During the growing season, feed your orchid with a balanced orchid fertilizer every 2-4 weeks. Avoid fertilizing during the dormant period.
- Repotting: Orchids should be repotted every 1-2 years, depending on their growth. Repot when the potting medium begins to break down or when the roots outgrow their pot.
- Provide indirect light: Orchids prefer bright but indirect light. Too much direct sunlight can scorch their leaves, while too little light can stunt growth.
Conclusion
Watering your orchid correctly is essential to maintaining its health, ensuring it produces abundant flowers, and allowing it to thrive for years. By following the steps outlined in this guide, you can create the ideal environment for your orchid to grow and bloom beautifully.
Remember that each orchid is different, so pay attention to its unique needs. With patience and the right care, your orchid will reward you with stunning blooms that will brighten up your home.
#OrchidCare #HealthyOrchids #FloweringOrchids #GardeningTips #IndoorPlants #HouseplantGoals #BloomingBeauty #GreenThumb #PlantLovers