
Gardening is not only a fulfilling hobby but also a way to nurture the environment. As we strive to make our gardening practices more eco-friendly, using items that are typically discarded in our daily lives is a great solution. One such common item is the humble eggshell. Most people don’t think twice before tossing out their eggshells, but they can be incredibly useful in the garden. In fact, they can be turned into excellent, sustainable seed starters that offer multiple benefits. This article will walk you through the steps of using eggshells to start your seeds, explain the advantages of doing so, and share tips to make your gardening experience even better.
The Benefits of Using Eggshells as Seed Starters
Before diving into the step-by-step process, let’s first explore why eggshells make such great seed starters:
- Eco-Friendly: Instead of throwing away eggshells, you can recycle them in your garden, reducing waste and contributing to a healthier environment.
- Natural Fertilizer: Eggshells are packed with calcium, which is a vital nutrient for plant growth. The calcium helps strengthen the cell walls of plants and reduces the risk of blossom end rot in fruits like tomatoes and peppers. As the eggshells break down in the soil, they release this valuable nutrient.
- Great Drainage: Eggshells naturally have a porous texture, making them perfect for improving drainage in your seed-starting containers. This helps prevent waterlogging, which can lead to root rot.
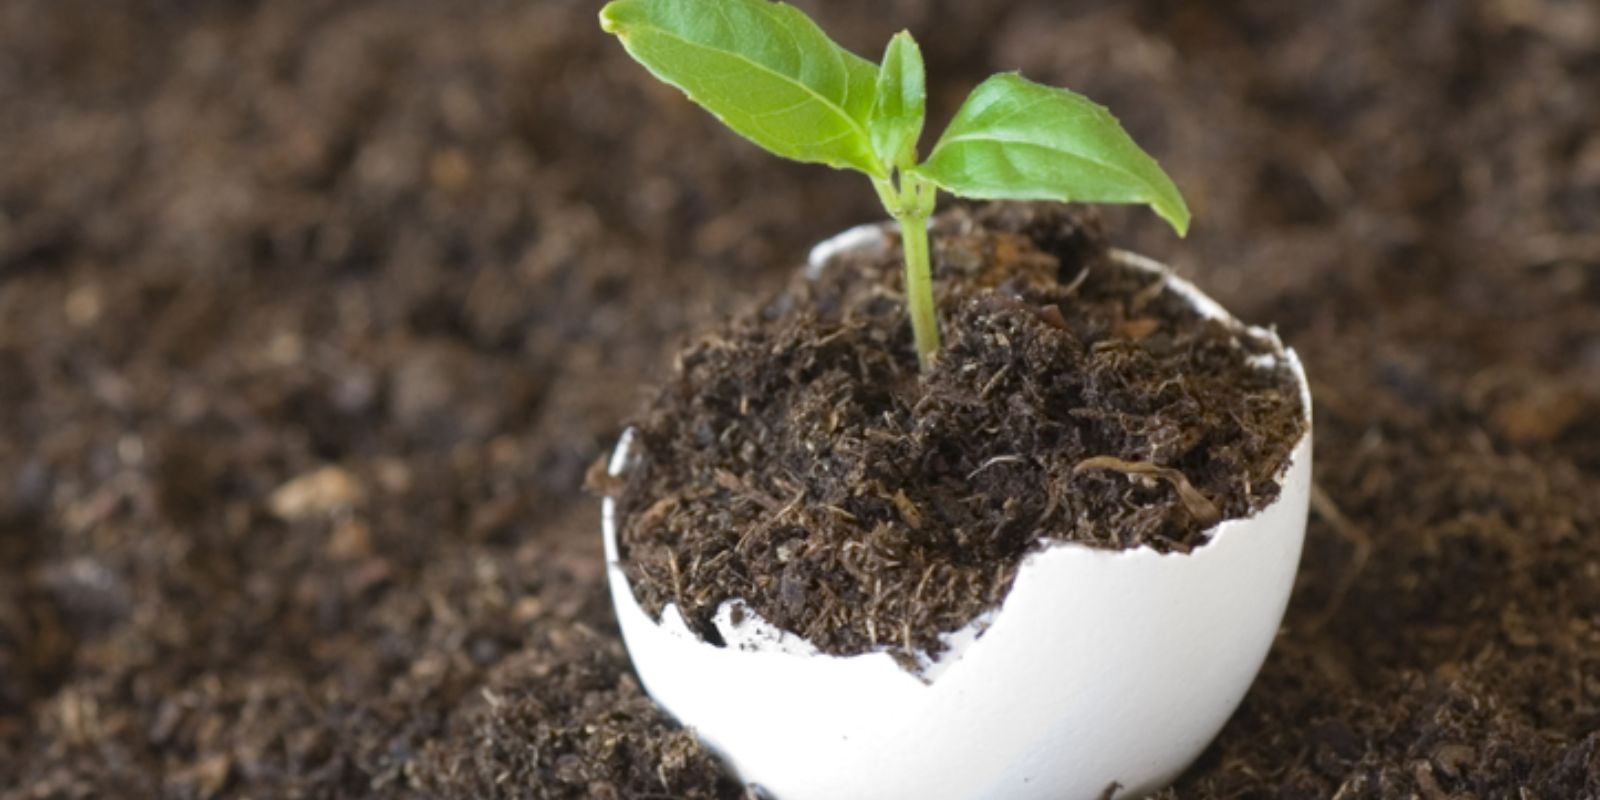
- Strong Roots: Starting seeds in eggshells promotes healthy root development. The shells offer a sturdy yet gentle environment for roots to develop. When you’re ready to transplant, you don’t need to disturb the roots, as you can plant the entire eggshell in the ground.
- Cost-Effective: Instead of buying plastic pots or seed trays, you can use something you already have around the house. It’s a free and easy way to start seeds without investing in additional materials.
- Perfect for Small Seedlings: Eggshells are small and compact, which is ideal for starting individual seeds or small seedlings. This makes them perfect for plants that don’t require much space to begin their growth.
Step-by-Step Guide to Using Eggshells as Seed Starters
Now that you know the benefits, let’s walk through the process of using eggshells to start your seeds. It’s a simple process that anyone can do, even if you’re new to gardening!
Step 1: Gather Your Materials
To start, you’ll need the following items:
- Empty eggshells (make sure to save the shells after using the eggs for cooking)
- Potting soil or seed-starting mix
- A seed tray or carton to hold the eggshells
- A small spoon or scoop for filling the eggshells with soil
- A small gardening watering can or spray bottle for watering
- Your seeds of choice (herbs, vegetables, or flowers)
Step 2: Clean and Dry the Eggshells
Before using your eggshells, clean them thoroughly. Rinse the inside of the shell with warm water to remove any leftover egg residue. You can use a gentle brush or sponge to scrub the inside lightly. After rinsing, set the eggshells aside to dry completely. This can take a day or two, depending on the humidity in your home. Dry eggshells are easier to handle and won’t attract any unwanted mold or bacteria.
Step 3: Prepare the Eggshells
Once the eggshells are dry, carefully break each one in half. You can also leave them intact if you prefer to use the entire shell. Gently make a small hole at the bottom of each eggshell. This hole will serve as a drainage point for excess water, preventing your seedlings from drowning in standing water. If you’re using the eggshell halves, ensure each half has a hole at the bottom for proper drainage.
Step 4: Fill the Eggshells with Soil
Using a small spoon or scoop, fill each eggshell with potting soil or a seed-starting mix. It’s important to use a light, well-draining mix, as this will give your seeds the best chance for growth. Don’t fill the eggshells to the top; leave about a quarter-inch of space. Gently pat the soil down to remove any air pockets and create a firm surface for the seed. However, don’t compact the soil too much, as your seeds will need room to grow and expand.
Step 5: Plant Your Seeds
Now that your eggshells are filled with soil, it’s time to plant your seeds. Follow the specific instructions on your seed packet for planting depth, as different seeds require different depths to germinate. Generally, most seeds need to be buried about two to three times the size of the seed itself. For smaller seeds, just sprinkle a few on top of the soil and gently press them down. Once you’ve planted your seeds, cover them lightly with more soil, and press down gently to ensure good seed-to-soil contact.
Step 6: Water the Seeds
After planting, it’s time to water your seeds. Use a small watering can or a spray bottle to water the seeds gently. Be careful not to overwater, as this can lead to waterlogging, which can drown the seeds. Keep the soil moist, but not soaking wet. You can also cover the eggshells with a clear plastic cover or plastic wrap to create a mini greenhouse effect. This will help retain moisture and warmth, encouraging seed germination.
Step 7: Place the Eggshells in a Tray or Carton
To make handling easier, place your eggshells in a seed tray or a carton. This will help keep them upright and stable while they’re growing. Ensure the tray has a shallow dish beneath it to catch any water that drains from the eggshells. Keep the tray in a warm, sunny spot, such as a windowsill or under grow lights, until your seeds germinate. Most seeds will sprout within a week or two, but this can vary depending on the type of plant you’re growing.
Step 8: Transplant Your Seedlings
Once your seeds have sprouted and developed strong roots, it’s time to transplant them into your garden or larger containers. The great thing about using eggshells is that you can plant the entire eggshell directly into the ground. The eggshell will naturally break down over time, adding nutrients to the soil. Be sure to plant the seedling in a hole large enough to accommodate the eggshell, and cover the shell lightly with soil.
If you’re planting in a garden, space your seedlings out according to the recommended spacing on your seed packet. If you’re transplanting into a larger container, make sure the pot has sufficient drainage to prevent root rot. Water the seedlings well after transplanting and continue to care for them as they grow.
Additional Tips for Success
- Choose the Right Seeds: Eggshells work best for smaller plants, such as herbs, leafy greens, flowers, and small vegetables like tomatoes, peppers, and lettuce. Larger plants with extensive root systems may not fare as well in eggshells, as they can outgrow the shell too quickly.
- Fertilize the Soil: While eggshells provide calcium, your seedlings will also need other nutrients to thrive. Consider mixing in an organic fertilizer or compost with your seed-starting mix to give your plants a well-rounded nutrient base.
- Monitor for Pests: Keep an eye out for pests such as aphids or fungus gnats, especially in the early stages of growth. You can use organic pest control methods like neem oil or insecticidal soap to manage pest problems.
- Repurpose Egg Cartons: If you’re planting multiple seeds, you can use egg cartons to hold several eggshells. Just be sure to keep the carton in a place where it can drain properly.
Conclusion
Using eggshells as seed starters is an easy, cost-effective, and eco-friendly method that not only helps you grow healthy plants but also reduces waste. By following the simple steps outlined in this article, you can turn your kitchen scraps into valuable tools for your garden. Whether you’re a beginner or a seasoned gardener, eggshell seed starters offer a great way to promote strong, thriving seedlings without spending a lot of money. Give it a try, and watch your garden grow with ease!
Hashtags:
#EcoFriendlyGardening #SeedStarting #SustainableGardening #EggshellGardening #ZeroWasteGardening #PlantStarter #GardeningTips #GreenThumb #GardeningHacks #GrowYourOwnFood