
Introduction
If you’re a gardener, you already know how satisfying it is to grow your own fruits, especially berries. Among the most rewarding fruits to grow are raspberries. Not only are they delicious and healthy, but they also thrive in many climates and are relatively easy to grow. One of the best times to propagate raspberries is in October, when the plant is preparing for its dormant season. By taking cuttings now, you can start new raspberry plants for next season’s harvest. This guide will walk you through the step-by-step process of taking raspberry cuttings, including the best methods, tips, and things you need to know to successfully propagate raspberries.
Why October is the Best Time to Take Raspberry Cuttings
Raspberries are perennials, meaning they come back every year. However, their best growth occurs during certain times of the year, and October is one of those optimal periods. During the fall, raspberry plants are entering a natural dormancy phase, and their energy is focused on preparing for the next season. This makes October the perfect time for taking cuttings. The cooler temperatures and reduced sap flow help the cuttings establish roots without the competition from the parent plant. Additionally, propagating in fall gives you enough time to root the cuttings before spring, so you’ll have strong, healthy plants ready to grow when the weather warms up.
What You Need to Know Before Taking Raspberry Cuttings
Before diving into the cutting process, it’s important to understand a few key points about raspberries:
- Types of Raspberry Plants: There are two main types of raspberries: summer-bearing and everbearing. Summer-bearing raspberries bear fruit in the early summer, while everbearing (or fall-bearing) raspberries fruit both in summer and fall. Knowing which type you have is crucial because it determines the ideal time for taking cuttings and how the plant will behave the following season.
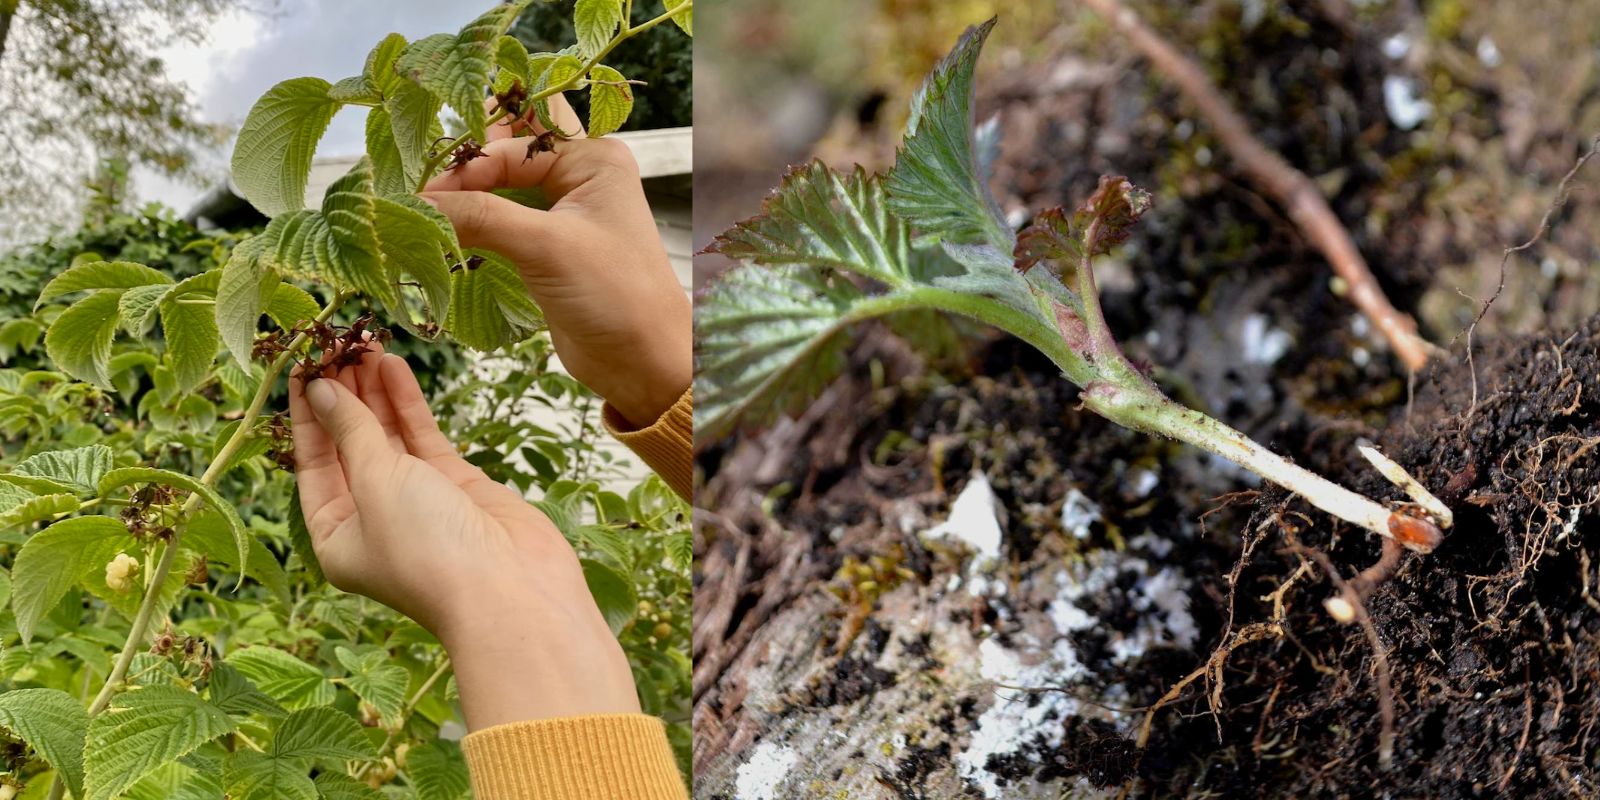
- Choosing the Right Canes: Not all raspberry canes are suitable for propagation. You’ll need to select healthy, strong canes. If you’re growing raspberries in your garden, these will typically be the current year’s growth, often identified as the green canes (they’re flexible and vigorous). Avoid using weak or diseased canes, as these will not produce healthy new plants.
- Where to Take the Cuttings: It’s important to ensure that the canes you choose for cuttings are neither too old nor too young. You want the cuttings to have sufficient vigor but not be too woody or too soft. A healthy cane that has grown well over the summer should be your best option.
Step-by-Step Guide to Taking Raspberry Cuttings
Now that you understand the basics, it’s time to learn how to take raspberry cuttings. Follow these simple steps to ensure success:
1. Select Healthy, Vigorous Canes
The first step in the propagation process is to choose the right canes. Look for healthy, disease-free canes that are about 1-year-old. These canes will have strong growth, and they should still be green but sturdy enough to withstand being cut. If you’re unsure, select canes that are between the size of a pencil and a thick marker. Avoid using canes that are too old (woody) or those that have been damaged.
2. Take the Cuttings
Using a clean, sharp pair of pruning shears, cut 6-8 inch sections from the selected canes. Make sure each cutting has at least one or two buds (nodes) on it, as these will be the spots where the roots will emerge. Be sure to cut just below a node. Cutting below the node helps the plant to root more effectively. Don’t worry if your cuttings are not perfectly straight; they will still root as long as they are healthy.
3. Remove the Lower Leaves
Once you’ve cut your sections, remove the lower leaves from each cutting. You should strip off the leaves about 3-4 inches from the bottom, leaving the top part of the cutting with a few leaves. This ensures that the cutting has fewer areas that can lose moisture while it roots, which helps it focus on developing new roots.
4. Optional: Use Rooting Hormone
While raspberries are relatively easy to propagate, using rooting hormone can help speed up the rooting process and increase the chances of success. Simply dip the bottom of each cutting into a rooting hormone powder or gel, shaking off any excess. While this step is optional, it can help create a more robust root system, especially if you are new to propagating plants.
5. Prepare Your Potting Mix
Next, prepare a potting mix for your cuttings. A well-draining soil is crucial for healthy root development. You can use a commercial potting mix or create your own mix using equal parts of perlite, vermiculite, and peat moss. The goal is to have a loose, airy mix that won’t retain too much moisture and lead to rot. Fill small pots with this mix, leaving some space at the top.
6. Plant the Cuttings
Make a hole in the center of the potting mix with your finger or a stick. Insert the bottom of the cutting into the hole, burying it about 3-4 inches deep. Make sure that the cut end is facing down. Press the soil around the cutting to secure it in place.
7. Water the Cuttings
After planting your cuttings, water them thoroughly. However, make sure the soil is not soggy, as excess moisture can lead to rot. You want the soil to be moist but not soaking wet. If you’re unsure, allow excess water to drain away from the pot. It’s essential to keep the soil moist while the cuttings are rooting.
8. Create a Humid Environment
To encourage root development, you’ll need to create a humid environment for the cuttings. You can cover the pots with a clear plastic bag or a plastic dome, which helps retain moisture and keeps the cuttings from drying out. Make sure the plastic doesn’t touch the cutting itself, as this can cause mold or rot. You can also use a misting system to keep the humidity levels high.
9. Place the Cuttings in a Cool, Shady Spot
Now that your cuttings are in their pots, place them in a cool, shaded area. A location with indirect sunlight works best. Direct sunlight can dry out the cuttings and hinder the rooting process. Temperatures around 60-70°F (15-21°C) are ideal for rooting. Keep the cuttings in this spot for several weeks, checking regularly for signs of root growth.
10. Transplanting Your Rooted Cuttings
After about 4-6 weeks, the cuttings should have developed roots. You can gently pull the cutting from the soil to check for roots. If you see roots emerging from the bottom of the pot, your cuttings are ready for transplanting. When transplanting, choose a location in your garden that receives full sun, and prepare the soil by mixing in compost for added nutrients.
Additional Tips for Success
- Watering: Keep an eye on the moisture level of the soil. Too much water can cause the cuttings to rot, while too little can dry them out. Consistency is key.
- Patience: Rooting can take time, so be patient. Some cuttings might take longer than others to establish roots.
- Protect Your Cuttings: If you’re propagating during the fall, be mindful of the cooler temperatures. You may want to keep your cuttings inside until they are well-established before planting them outside in the spring.
Conclusion
October is the perfect time to take raspberry cuttings and propagate new plants. With the right steps and a little care, you can quickly grow a new batch of healthy raspberry plants that will bear fruit in the coming seasons. By following these steps and being patient, you’ll be able to enjoy a bountiful harvest of raspberries for years to come. Propagating raspberries is a simple yet rewarding gardening activity that helps you expand your fruit garden while saving money. So grab your pruning shears and get started—you’ll be one step closer to having your own raspberry patch!
Happy gardening, and here’s to a fruitful future!