
Growing tomatoes at home has never been more accessible. Whether you’re looking to add some fresh, homegrown tomatoes to your kitchen or you want to start your gardening journey with a simple and rewarding plant, sprouting tomatoes is an excellent place to start. In this guide, we will show you how to sprout tomatoes at home in just five days using a few simple steps. This method is perfect for beginners and seasoned gardeners alike, allowing you to grow fresh tomatoes with minimal effort and in the comfort of your own home.
Why Grow Tomatoes at Home?
Tomatoes are one of the most popular fruits to grow at home, and for good reason. They’re versatile in the kitchen, packed with nutrients, and relatively easy to cultivate. With a little patience and care, you can have a steady supply of fresh tomatoes all year round. Growing them from seeds allows you to select varieties that are best suited to your taste and climate.
In addition to the satisfaction of growing your own food, sprouting tomatoes indoors can also save you money on store-bought produce. Homegrown tomatoes are not only tastier but also healthier since you can control the growing conditions and avoid harmful pesticides.
Step-by-Step Guide: Sprouting Tomatoes in Just 5 Days
The process of sprouting tomatoes in a short time frame is simple and can be done in just a few easy steps. In fact, with the right conditions, you can have tomato sprouts within five days. Below are the steps to help you sprout tomatoes at home successfully.
1. Prepare Your Pot
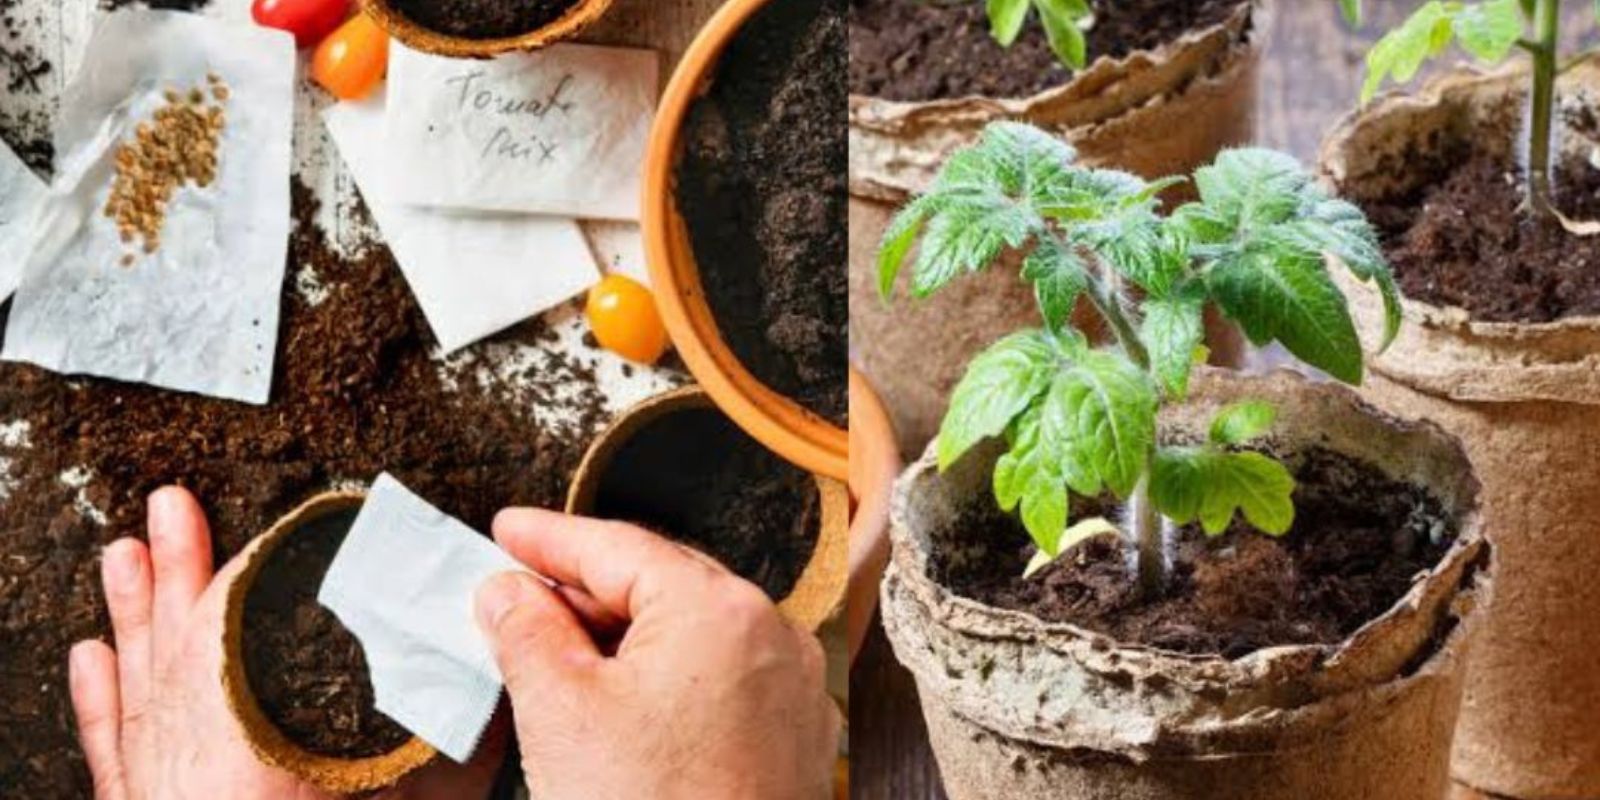
Start by choosing a pot that is suitable for growing your tomato sprouts. The pot doesn’t need to be very large at first, as you’re only sprouting seeds, but it should have good drainage to prevent water from accumulating at the bottom. Fill the pot with a moistened substrate, such as seed-starting mix or soil. The key here is to keep the substrate moist but not waterlogged. The moisture helps create the right conditions for germination while providing the necessary nutrients.
Make sure to press down the substrate gently to remove any air pockets, creating a smooth surface for your tomato slices.
2. Slice Your Tomato
Next, select a ripe tomato from your garden or the store. The tomato should be firm but fully ripe to ensure the seeds inside are mature and ready to germinate. Cut the tomato into slices that are about half a centimeter thick. Be sure each slice contains some seeds—this is crucial for the sprouting process.
If you have more than one variety of tomato, you can use slices from different types to see which ones sprout best for your growing conditions. Different tomato varieties may sprout at different rates, so it’s always a fun experiment to try a few.
3. Plant Tomato Slices
Now that your slices are ready, it’s time to plant them in the prepared substrate. Lay the tomato slices evenly on the moist surface of the pot, ensuring that each slice is positioned without overlapping. The seeds within each slice will soon begin to sprout, so it’s important that they are spaced out enough to give each plant the room it needs to grow.
Once the slices are in place, cover them with another thin layer of moist substrate. The layer of substrate on top helps maintain moisture and keeps the environment ideal for seed germination. You don’t need to press down the slices too hard, just enough to ensure good contact between the slices and the substrate.
4. Germination and Care
Now comes the waiting game. Place your pot in an area with indirect sunlight, such as near a window, where it will receive warmth but not direct sunlight. Keep the substrate moist but avoid overwatering, as this can lead to rotting.
If you’re sprouting in colder conditions, you might consider placing a clear plastic cover or a humidity dome over the pot to retain heat and moisture, speeding up the germination process. However, be sure to remove the cover occasionally to allow for proper airflow and prevent mold growth.
Germination typically takes about 5 to 7 days. During this period, check on your pot regularly to make sure the substrate stays moist but not soaked. After a week, you should start to see tiny sprouts emerging from the tomato slices. These are your future tomato seedlings!
5. Transplanting Sprouts
After about 10 days, the tomato sprouts should be strong enough to transplant into individual seedling pots. Carefully remove each sprout from the substrate, making sure not to damage the delicate roots. Using a small shovel or spoon can help with this task.
Fill individual seedling pots with a well-draining potting mix, preferably one that is peat-based. Gently plant the sprouted tomato seedlings into their new pots, pressing the substrate around them lightly to secure them in place. Water them lightly, ensuring the soil stays moist but not overly wet.
As the seedlings grow, you may need to add more substrate or gently transplant them into larger pots if they outgrow their current ones. Make sure the pots have good drainage to prevent water from collecting at the bottom, as this can lead to root rot.
Tips for Growing Healthy Tomatoes
- Light: Tomatoes need plenty of light to grow strong. While you’re sprouting them, indirect sunlight is fine, but as they grow, move them to a spot where they can receive at least 6-8 hours of direct sunlight each day. If you don’t have access to natural sunlight, you can supplement with artificial grow lights.
- Watering: Tomatoes like moist soil, but they don’t like to sit in water. Water your plants when the top of the soil feels dry to the touch, but make sure the pot has proper drainage to prevent overwatering.
- Temperature: Tomatoes thrive in warm temperatures. Ideal growing temperatures range from 70°F to 85°F (21°C to 29°C) during the day and slightly cooler at night. Keep your tomato seedlings in a location where temperatures remain relatively consistent.
- Fertilization: As your tomato seedlings grow, you may want to fertilize them every couple of weeks with a balanced liquid fertilizer. Be cautious not to over-fertilize, as this can lead to excess leaf growth and poor fruit production.
- Hardening Off: Before transplanting your tomato seedlings outdoors (if desired), harden them off by gradually introducing them to outdoor conditions. Start by placing them outside for a few hours a day, gradually increasing the time they spend outside over a week or two.
Why This Method Works
Sprouting tomatoes from slices rather than individual seeds is a quicker method that allows you to grow more plants with minimal effort. The tomato slices contain not only the seeds but also a portion of the tomato’s nutrients, which can give the seedlings a healthy start. By creating a conducive environment with moisture and warmth, you’re mimicking the natural germination process, but in a controlled way that speeds things up.
This method also helps conserve space, as you can start multiple tomato plants in one small pot. Once the sprouts are strong enough, you can transplant them into larger pots or directly into your garden.
Conclusion
Sprouting tomatoes at home is a fun and rewarding process that can yield tasty, homegrown fruits in just a few weeks. Whether you’re growing them for yourself or to share with friends and family, sprouting tomatoes in 5 days is an easy way to get started on your gardening journey. With just a few simple steps, you can transform tomato slices into thriving plants, all while learning more about the fascinating world of plant growth. Happy gardening!