
Geraniums are among the most popular plants for gardens and homes due to their vibrant colors, delightful fragrance, and easy care requirements. Whether you’re a seasoned gardener or a beginner looking to expand your plant collection, propagating geraniums from cuttings is a rewarding and cost-effective way to grow more of these stunning flowers. In this article, we will walk you through the process of rooting geranium cuttings, step-by-step, with helpful tips for ensuring success.
Why Root Geranium Cuttings?
Before diving into the process, let’s discuss why you might want to propagate geraniums by rooting cuttings in the first place. There are several reasons why rooting geraniums can be a great idea:
- Cost-Effective: Propagating geraniums from cuttings is an inexpensive way to grow new plants, as you don’t need to buy new ones.
- Maintain Plant Traits: When you root a cutting from an existing plant, you ensure that the new plant will have the same characteristics—such as flower color, fragrance, and growth habit—as the parent plant.
- Share with Friends: Rooted cuttings make great gifts for fellow gardeners or loved ones who appreciate beautiful plants.
- Fill Your Garden: If you have a favorite geranium variety, rooting cuttings allows you to fill your garden with that plant without having to wait for seeds to grow.
Understanding Geraniums and Their Growth
Geraniums are part of the Pelargonium family, and they can be propagated quite easily. These plants are typically grown from cuttings because they root quickly, grow vigorously, and flower profusely. Geraniums can be grown as annuals in many climates, while in others, they thrive year-round as perennials. However, they do require proper care, especially when it comes to propagation, as even small errors can result in failed cuttings.
There are two main types of geraniums: zonal geraniums and ivy geraniums. Both can be propagated by cuttings, but zonal geraniums are the most common variety grown in gardens. The rooting process for both types is similar, but ivy geraniums are slightly more delicate and may require extra attention to ensure success.
The Best Time to Root Geranium Cuttings
The best time to propagate geraniums is during the growing season, typically in late spring or early summer when the plant is actively growing. Avoid taking cuttings during the winter or late fall when the plant is dormant. During the warmer months, geraniums are in their prime growth phase, which means the cuttings will root more quickly and successfully.
Tools and Materials You’ll Need
Before you begin, gather the necessary tools and materials to make the rooting process smooth and successful. Here’s what you’ll need:
- Sharp Scissors or Pruning Shears: You’ll need clean, sharp tools to take your cuttings. Avoid using dull or rusty scissors, as this can damage the plant.
- Rooting Hormone: This is optional but can significantly speed up the rooting process. Rooting hormone contains natural plant growth hormones that encourage the development of roots.
- Small Pots or Containers: Use pots with good drainage to plant your cuttings. If you’re starting your cuttings in water, a glass or jar will work.
- Well-Draining Potting Soil: Geranium cuttings need soil that drains well to avoid waterlogged roots, which can lead to rot.
- Plastic Bag or Dome: A plastic bag or humidity dome will help maintain a warm, humid environment for your cuttings while they root.
- Water: Use clean, lukewarm water to keep the cuttings hydrated during the rooting process.
Step-by-Step Guide to Rooting Geranium Cuttings
Now that you have your materials ready, let’s get into the step-by-step process of rooting geranium cuttings. Follow these instructions carefully for the best results.
Step 1: Select a Healthy Stem
The first step in propagating geraniums is to select a healthy stem from the parent plant. Choose a non-flowering stem that is at least 4-6 inches long. A stem with fresh, green growth is ideal. Avoid stems that are old, woody, or flowering, as these will not root as effectively.
Use sharp scissors or pruning shears to take the cutting, making a clean cut just below a leaf node (the small bump where leaves emerge). Removing a cutting from a healthy part of the plant ensures that it has the best chance of developing strong roots.
Step 2: Remove Lower Leaves
Once you have your cutting, remove the lower leaves to expose about 2-3 inches of the stem. You want to remove all the leaves that would be submerged in the water or buried in the soil. Be sure to leave a few leaves at the top of the cutting, as these will help the plant stay alive while it’s developing roots.
Step 3: Apply Rooting Hormone (Optional)
While geraniums can root without rooting hormone, applying it can encourage faster and more successful root growth. Dip the cut end of the geranium cutting into the rooting hormone, tapping off any excess. Rooting hormone stimulates the formation of roots and helps prevent disease, making it a valuable tool for gardeners.
Step 4: Prepare the Potting Medium
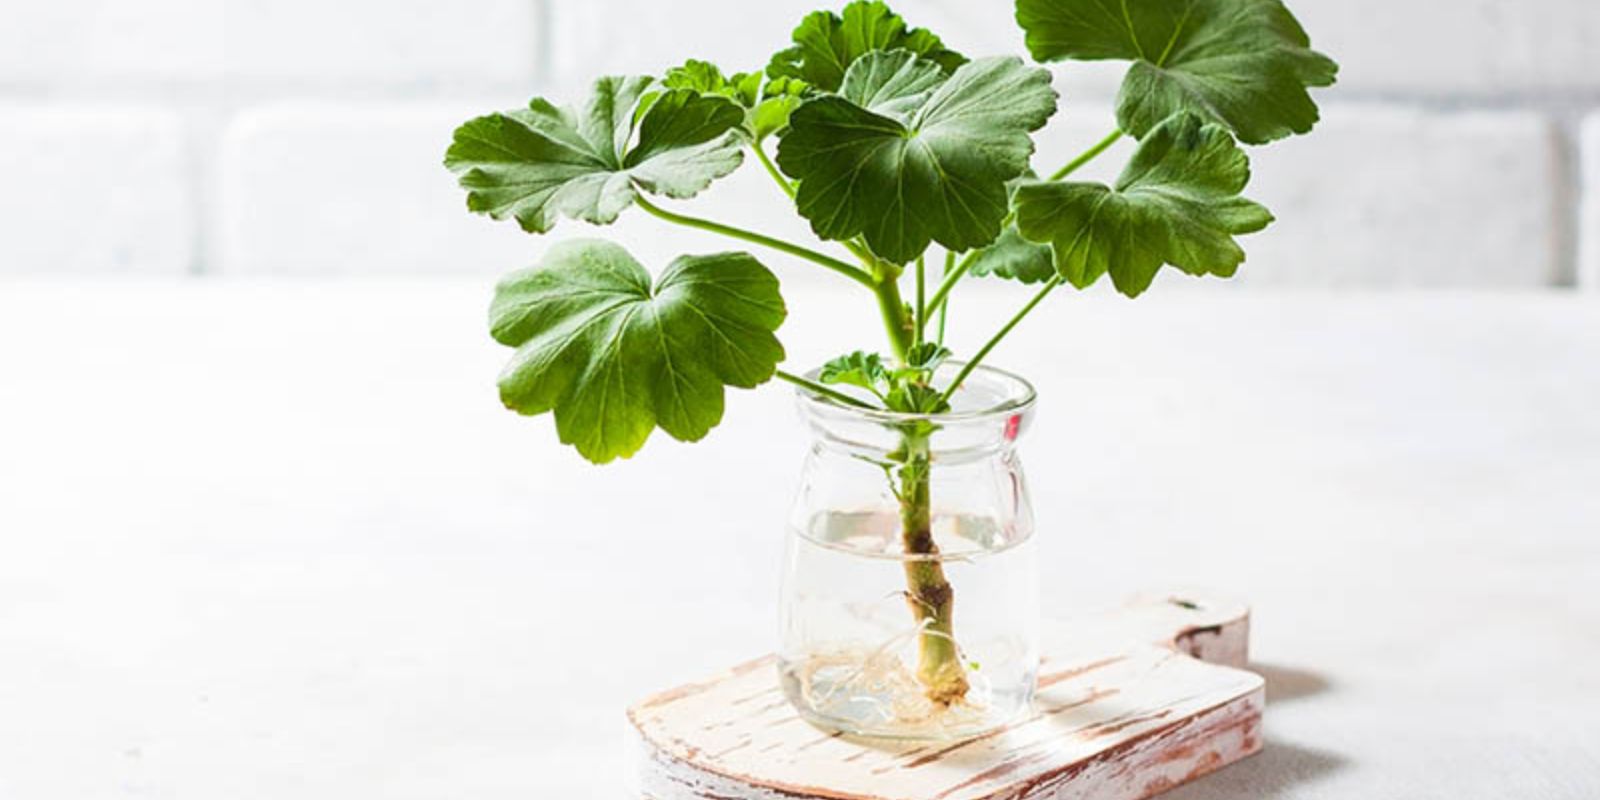
Now it’s time to prepare the growing medium for your cutting. If you’re rooting the cutting in soil, fill a small pot with well-draining potting soil. Cactus, succulent, or seed-starting mixes work well for this purpose. If you’re starting the cutting in water, simply place the cutting in a glass or jar with enough water to submerge the cut end, ensuring the leaves do not touch the water.
Step 5: Plant the Cutting (If Using Soil)
If you are rooting your cutting in soil, gently insert the cut end of the stem into the soil about 2-3 inches deep. Firm the soil around the cutting to ensure it stands upright. Water the cutting lightly to settle the soil.
Step 6: Create a Humid Environment
Geranium cuttings need a humid environment to root successfully. Place a plastic bag over the cutting or use a small plastic humidity dome to trap moisture. This will help prevent the cutting from drying out. Keep the cutting in a warm spot with indirect sunlight, as direct sunlight can scorch the cutting.
Step 7: Keep the Cutting Moist
It’s important to keep the cutting hydrated during the rooting process. Mist the cutting with water daily or keep the soil lightly moist (but not soaking wet). Be careful not to overwater, as this can lead to rot. A gentle misting or a water reservoir in the bottom of the pot will suffice.
Step 8: Wait for Roots to Develop
After about 2-3 weeks, the cutting should begin to develop roots. You can gently tug on the cutting to feel if there’s resistance, which is a sign that roots have started to form. Once the roots are well-developed, usually in 4-6 weeks, the cutting is ready for transplanting into a larger pot or directly into the garden.
Aftercare for Your New Geranium Plant
Once your geranium cutting has rooted, it’s time to focus on the care and maintenance of your new plant.
- Transplanting: If you rooted your geranium cutting in a small container, it’s time to transplant it into a larger pot with fresh potting soil. Choose a pot with good drainage to avoid waterlogging.
- Gradual Sun Exposure: Gradually introduce the new plant to full sunlight to prevent sunburn. Start with indirect light and slowly move it into brighter light over the course of a week.
- Regular Watering: Keep the plant hydrated but avoid overwatering. Allow the top inch of soil to dry out before watering again.
- Fertilize: After the plant has established itself, you can begin fertilizing with a balanced, water-soluble fertilizer to promote healthy growth.
Troubleshooting Common Issues
While rooting geraniums from cuttings is generally easy, it’s not uncommon to run into a few problems along the way. Here are some tips to troubleshoot common issues:
- No Roots: If your cutting isn’t rooting after several weeks, check the conditions. Make sure the cutting is in a warm, humid environment with indirect sunlight. Ensure the soil is well-draining, and the cutting isn’t too wet.
- Wilting Leaves: If your cutting’s leaves are wilting, it might be too dry or too wet. Make sure the soil is moist but not soggy, and ensure the cutting is kept in a humid environment.
- Mold or Rot: If you see mold or rot developing on your cutting, remove it immediately. Ensure there is enough airflow around the cutting and that the humidity isn’t too high.
Conclusion
Rooting geranium cuttings is a simple and rewarding way to propagate these beautiful plants. By following the steps outlined in this article, you can grow new geraniums to fill your garden or share with friends. With patience, proper care, and the right environment, you’ll soon be rewarded with healthy, thriving geraniums that will brighten your space. Happy propagating!
#GeraniumPropagation #PlantCare #GardeningTips #GreenThumb #IndoorGardening #PlantLovers #PlantPropagation #RootingCuttings #HomeGarden #Houseplants #ViralGardening #GardeningCommunity #GrowYourOwn #PlantGoals