
Orchids are one of the most beautiful and unique houseplants, prized for their stunning flowers and exotic appearance. However, like all plants, they can sometimes fall victim to neglect, pests, or environmental stress. If your orchid has started to look sad and rotten, you might be tempted to throw it away. But don’t give up just yet! With a little patience and a simple trick, you can bring your orchid back to life and restore it to its former glory.
In this article, we’ll walk you through the steps to revive a seemingly dead orchid, focusing on the essential care tips and the magical trick that will help rejuvenate your plant.
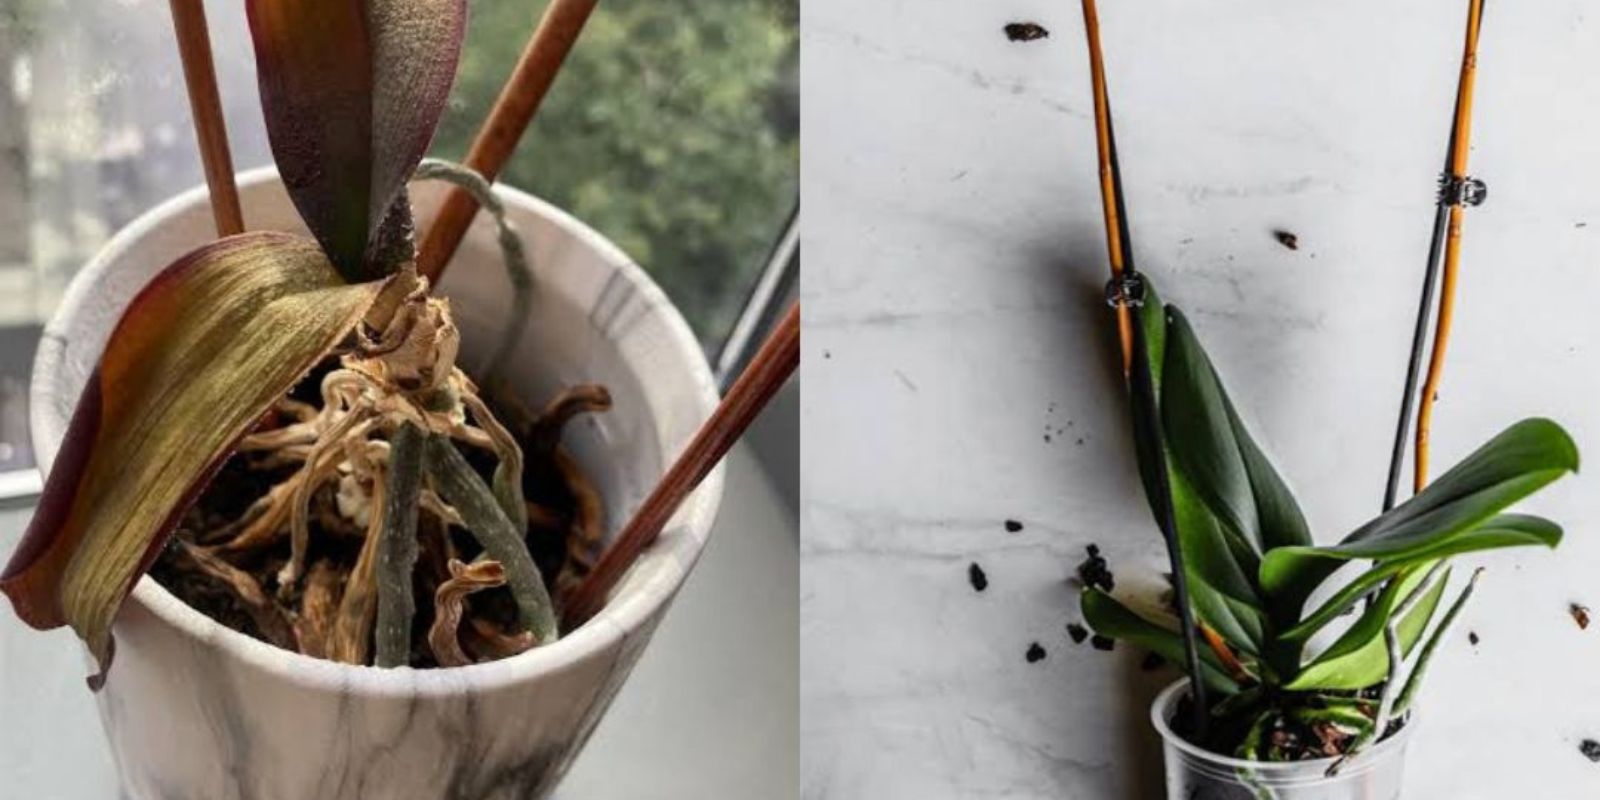
Understanding Orchid Decay
Before we dive into the solution, it’s essential to understand why orchids may start to rot in the first place. Orchids are sensitive plants that require specific care to thrive. They can easily suffer from root rot, improper watering, insufficient light, or environmental factors such as temperature fluctuations or poor air circulation.
Common signs of orchid decay include:
- Soft, mushy roots: When the roots become soft and mushy, it’s a sign of overwatering or poor drainage.
- Yellowing or wilting leaves: This may indicate that your orchid is not receiving enough light or nutrients.
- Brown or black spots on leaves: These could be the result of fungal infections or excessive moisture.
- Foul odor: A rotting smell often accompanies severe root decay.
If you notice these symptoms, don’t panic. There’s still hope for your orchid. With the right care and a little trick, you can nurse your plant back to health.
Step-by-Step Guide to Reviving Your Orchid
- Inspect the Orchid Thoroughly
The first step in rescuing a decaying orchid is to inspect the plant carefully. Remove the orchid from its pot to get a better look at the roots and the base of the plant. Gently shake off any old potting media (such as bark or moss) from the roots. Check the roots for any signs of rot, which typically appear as mushy, brown, or black areas.
Healthy roots should be firm, white, or green in color. If you see any rotten roots, use clean, sharp scissors or pruning shears to trim them off. Be sure to sterilize your tools to prevent the spread of disease.
- Trim Back Dead or Damaged Leaves
If your orchid has any dead or damaged leaves, it’s a good idea to remove them as well. This will help the plant focus its energy on new growth rather than trying to sustain unhealthy foliage. Be careful not to cut too close to the base of the plant, as this could cause additional stress.
- Disinfect the Plant
After removing the rotten roots and dead leaves, disinfect your orchid to prevent the spread of bacteria or fungi. You can use a mild solution of hydrogen peroxide (3%) and water, or a commercial plant disinfectant. Gently spray or dip the affected areas to kill any harmful pathogens.
- Prepare a New Potting Medium
Orchids thrive in well-draining potting media, such as a mix of orchid bark, perlite, and sphagnum moss. If your current potting mix is old or compacted, it’s time to repot your orchid into fresh media. Make sure the new mix is well-draining, as orchids hate sitting in waterlogged soil.
- Re-pot Your Orchid
Choose a clean, sterilized pot that is just slightly larger than the root system of your orchid. Avoid using a pot that’s too big, as this can cause the plant to become waterlogged. Fill the pot with your new potting medium and carefully place your orchid back in, ensuring that the roots are spread out evenly. Gently pack the medium around the roots to hold the plant in place, but be sure not to compact it too tightly.
- Watering and Humidity
Watering is crucial when trying to revive a dying orchid. Orchids don’t like to sit in water, but they do require consistent moisture. Water the plant thoroughly, allowing the water to drain out of the pot. After watering, place your orchid in a bright, indirect light spot. Avoid placing the orchid in direct sunlight, as this can scorch the leaves.
Orchids also need high humidity to thrive. If your home is dry, especially during the winter months, consider using a humidity tray or a room humidifier. You can also mist the leaves with water to boost the humidity around the plant.
- Give It Time to Recover
Once your orchid is repotted and properly watered, it’s time to give it some time to recover. Orchids are slow-growing plants, and it may take several weeks or even months for the plant to show signs of new growth. Be patient and resist the urge to overwater or fertilize the plant too early.
The Magical Trick That Revives Orchids
Now, here’s the secret that many orchid growers swear by to help revive a nearly dead orchid: the use of cinnamon. Yes, cinnamon! This common kitchen spice has antifungal and antibacterial properties that can help prevent infections and promote root growth. Here’s how to use it:
- After trimming the rotten roots, sprinkle a small amount of cinnamon powder directly on the cut ends. This will help protect the plant from any potential fungal infections and encourage the growth of healthy roots.
- Cinnamon also acts as a natural rooting hormone, which can speed up the recovery process.
You don’t need to go overboard with the cinnamon – just a light dusting is enough. Once applied, continue with the rest of the care instructions mentioned above.
Monitoring and Maintaining Orchid Health
After following these steps and applying the cinnamon trick, it’s important to keep an eye on your orchid’s progress. Monitor the plant closely for any signs of new growth or improvement. New roots should begin to appear within a few weeks, and eventually, you may start to see new leaves and even a flower spike.
Remember, orchids are sensitive plants, so avoid overwatering or fertilizing until the plant shows signs of recovery. If the orchid is recovering well, you can start to provide it with diluted orchid fertilizer to help it grow strong and healthy.
Why You Shouldn’t Throw Away Your Orchid
It’s easy to get discouraged when your orchid starts to decline, but giving up on it too soon could mean throwing away a beautiful plant that could have been revived. Orchids are incredibly resilient, and with the right care and attention, they can bounce back even after seemingly catastrophic damage. Reviving a rotten orchid is a rewarding experience that will not only save your plant but will also give you a sense of accomplishment.
Instead of discarding your orchid, consider it an opportunity to learn more about its needs and improve your overall plant care skills. Every orchid is different, and taking the time to understand its specific requirements will make you a better gardener in the long run.
Conclusion
Reviving a rotten orchid may seem daunting, but with a little patience, care, and the magical trick of cinnamon, you can bring your orchid back to life. Don’t give up on your plant just because it looks sad – with the right attention and proper care, your orchid can flourish again.
So, before you toss that seemingly dead orchid, try the simple steps we’ve outlined above. You may just be surprised at how quickly it recovers and starts to bloom once more. Gardening is all about learning, experimenting, and nurturing, and sometimes, even the most neglected plants can be saved with a little effort.
Give your orchid the love and care it deserves, and you’ll soon be enjoying its beautiful blooms once again!
Get Involved!
Have you ever revived a dying plant? Share your experiences and tips with us in the comments below! Don’t forget to use the hashtag #OrchidRescue to join the conversation and inspire others to bring their plants back to life.
#OrchidRescue #PlantRevival #GardeningTips #GreenThumb #HouseplantHacks #OrchidCare #PlantRescue #GardeningCommunity #ViralGardening