
Orchids are renowned for their exotic beauty and elegance, making them a popular choice for indoor gardeners. However, even the most experienced orchid growers can encounter issues, such as yellowing leaves. Yellow leaves on orchids can be a sign of various problems, from improper watering to pest infestations. In this comprehensive guide, we will explore the causes of yellowing leaves and provide actionable steps to revive your orchid to its former glory.
Understanding the Causes of Yellow Leaves
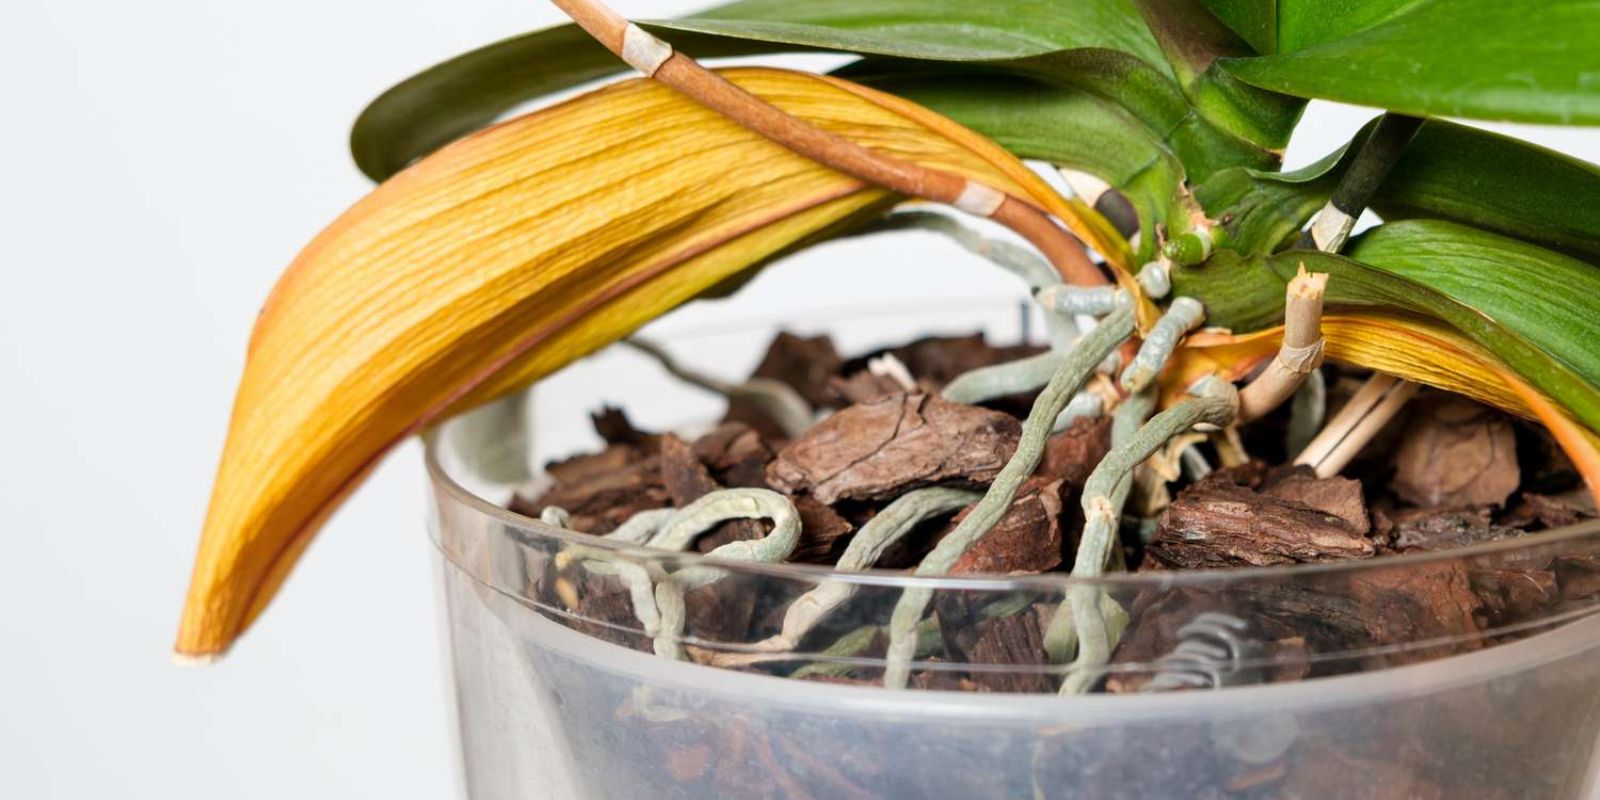
Before diving into solutions, it’s crucial to identify the underlying causes of yellowing leaves. Orchids are sensitive plants, and their leaves can turn yellow due to several factors, including:
- Overwatering: Orchids require a delicate balance of moisture. Overwatering can lead to root rot and subsequently cause the leaves to yellow.
- Underwatering: Conversely, insufficient watering can cause dehydration, resulting in yellow leaves.
- Improper Light Conditions: Orchids thrive in bright, indirect light. Too much direct sunlight can scorch leaves, while too little light can cause them to turn yellow.
- Nutrient Deficiency: A lack of essential nutrients can lead to yellowing. Orchids need specific nutrients to maintain healthy foliage.
- Pests and Diseases: Aphids, mealybugs, and fungal infections can cause yellowing and other symptoms.
- Temperature and Humidity Issues: Orchids have specific temperature and humidity requirements. Extreme conditions can stress the plant and cause leaf discoloration.
Step-by-Step Guide to Reviving Your Orchid
1. Assess Watering Habits
Check for Overwatering:
Overwatering is a common issue with orchids. Ensure that the potting medium is allowed to dry out slightly between waterings. To check, insert your finger into the soil up to the first knuckle. If it feels wet, delay watering. Ensure that your orchid pot has proper drainage to prevent water from accumulating at the bottom.
Prevent Underwatering:
On the other hand, underwatering can also cause yellow leaves. Ensure you water your orchid consistently but not excessively. A good rule of thumb is to water once a week, allowing the top inch of the potting medium to dry out before watering again.
2. Check Light Conditions
Orchids require bright, indirect light to thrive. Direct sunlight can cause the leaves to scorch and turn yellow. Place your orchid near a window with filtered light, such as through sheer curtains. If natural light is limited, consider using grow lights designed for orchids.
Adjust Light Exposure:
If your orchid is receiving too much direct sunlight, move it to a location with filtered light. Conversely, if it’s not getting enough light, relocate it to a brighter spot. Adjusting light conditions can often resolve issues with yellowing leaves.
3. Inspect for Pests and Diseases
Look for Pests:
Common pests that affect orchids include aphids, mealybugs, and spider mites. Examine the leaves and stems closely for signs of infestation. Small, sticky residues or webbing can indicate pest problems.
Treat Infections:
If you find pests, treat them with appropriate insecticides or natural remedies. For fungal infections, use a fungicide recommended for orchids. Regularly inspect your plant to prevent future infestations.
4. Adjust Temperature and Humidity
Optimal Temperature:
Orchids generally prefer temperatures between 65°F and 75°F (18°C to 24°C) during the day and slightly cooler at night. Avoid exposing your orchid to drafts or sudden temperature changes.
Maintain Humidity:
Orchids thrive in high humidity levels. Aim for 50-70% humidity. If your indoor environment is dry, consider using a humidifier or placing a shallow tray of water near the plant. You can also group plants together to create a more humid microclimate.
5. Examine Fertilization
Balanced Fertilization:
Orchids require specific nutrients to maintain healthy growth. Use a balanced orchid fertilizer (e.g., 30-10-10) and follow the recommended application rates. Over-fertilizing can lead to salt build-up and further stress the plant.
Avoid Fertilizer Burn:
Ensure you flush the potting medium with water occasionally to remove excess salts. This practice helps prevent fertilizer burn, which can cause yellowing leaves.
6. Repot if Necessary
Check Root Health:
Inspect the roots of your orchid. If they are brown, mushy, or smell unpleasant, it may be time to repot. Healthy roots should be firm and white or light green.
Repotting Steps:
- Choose a fresh orchid potting mix, typically made from bark, sphagnum moss, or a combination of both.
- Gently remove the orchid from its current pot, carefully untangling any damaged roots.
- Place the orchid in the new pot, ensuring it sits at the same depth as before.
- Water lightly and allow the plant to adjust to its new environment.
Conclusion
Reviving an orchid with yellow leaves requires a careful assessment of the plant’s environment and care routine. By addressing issues such as watering practices, light conditions, pest problems, and temperature and humidity levels, you can restore your orchid to its vibrant, healthy state. Remember, orchids are resilient plants that can bounce back with the right care and attention.
Motivational Sentence: With patience and the right approach, your orchid can flourish again. Share your journey with fellow orchid enthusiasts and celebrate the beauty of your thriving plant!
Hashtags: