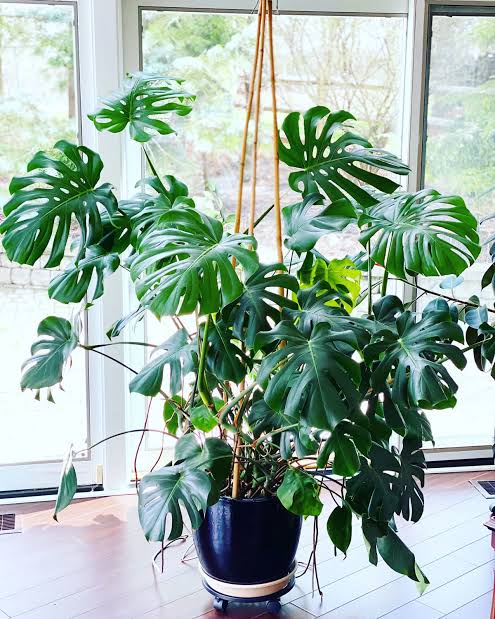
If your Monstera is starting to look a little cramped, roots peeking out of the pot or leaves drooping no matter how much love you give — it’s time for a fresh start! Knowing how to repot a Monstera plant properly is the secret to keeping this tropical beauty happy, healthy, and thriving.Whether you’re a beginner plant parent or an experienced indoor gardener, these Monstera repotting hacks inside will help you give your leafy friend the perfect home to stretch out and grow. 🌿🌱 Introduction: Why Repotting Your Monstera MattersMonsteras (often called “Swiss Cheese Plants”) are beloved for their lush, fenestrated leaves and jungle-like vibes. Native to tropical rainforests, they grow fast — and that means their roots can quickly outgrow their pot.Repotting helps your Monstera:✅ Get fresh nutrients from new soil.✅ Prevent root rot or binding.✅ Continue growing bigger, stronger leaves.✅ Stay well-drained and healthy.Most Monsteras need repotting every 1–2 years, ideally during spring or early summer, when they’re actively growing.🪴 1. Know When It’s Time to RepotBefore you dive in, check for the classic signs that your Monstera is ready for a new home.🌿 Signs Your Monstera Needs Repotting:Roots poking through drainage holes.Water runs straight through the pot (root-bound).Leaves yellowing or drooping for no clear reason.Slowed growth despite proper care.The plant feels top-heavy or unstable.💡 Hack: Gently slide your Monstera out of its pot — if you see dense, circling roots and little soil, it’s time!🪵 2. Choose the Perfect PotMonsteras love space — but not too much!Pick a pot that’s 2–3 inches larger in diameter than the old one.🪴 Potting Hacks Inside:Use pots with drainage holes to prevent waterlogging.Terracotta or ceramic pots are best — they allow airflow.If you prefer decorative pots without holes, keep your plant in a plastic nursery pot inside it.💡 Pro Tip: Avoid going too big — excess soil stays wet longer, which can lead to root rot.🌿 3. Prepare the Perfect Soil MixMonsteras thrive in well-draining, airy soil that mimics their rainforest roots.🌱 DIY Monstera Soil Mix Recipe:1 part potting soil1 part perlite (for drainage)1 part orchid bark or coco chips (for aeration)A handful of activated charcoal (optional, reduces mold and odor)🪴 Hack: Add a bit of compost for an organic nutrient boost — your Monstera will thank you with bigger, glossier leaves!🌿 4. Gently Remove and Loosen the RootsNow it’s time to free your Monstera from its old pot!🌼 Steps:Water your plant lightly the day before — moist soil is easier to work with.Turn the pot sideways and gently ease the plant out (use your hand to support the base).Loosen the outer roots with your fingers — untangle any that are circling the root ball.Trim away dead or mushy roots with clean scissors.💡 Hack: Always disinfect your scissors with alcohol before cutting — this prevents infections.🪴 5. Repot Like a ProHere comes the fun part — giving your Monstera its new home!🌿 Step-by-Step Repotting:Add a layer of fresh soil to the bottom of the new pot.Place the Monstera in the center, making sure the root ball sits about an inch below the rim.Fill around the sides with soil, pressing gently to eliminate air pockets.Water thoroughly until it drains out the bottom.💧 Hack: Rotate the plant as you fill to make sure it’s upright and stable — Monsteras can get lopsided if the soil settles unevenly.🌞 6. Care After RepottingYour Monstera will need a little TLC after its move.💚 Post-Repotting Hacks Inside:Light: Keep it in bright, indirect sunlight (avoid direct sun for a few days).Water: Don’t overwater — let the top 2 inches of soil dry out before watering again.Humidity: Mist the leaves or use a humidifier for that tropical vibe.Support: Add a moss pole or stake if your Monstera is tall — it helps aerial roots anchor and climb.🌿 Pro Tip: Add a small dose of liquid fertilizer 4–6 weeks after repotting to support new growth.🌿 7. Common Repotting Mistakes to AvoidEven experienced plant lovers slip up sometimes! Avoid these pitfalls:🚫 Using regular garden soil — it’s too dense and holds too much water.🚫 Choosing an oversized pot — it traps moisture and suffocates roots.🚫 Watering too soon or too often — roots need to settle first.🚫 Ignoring drainage holes — Monsteras hate soggy soil!💡 Hack: Stick your finger into the soil — if it’s damp below the surface, wait before watering again.🌼 8. Bonus: Encourage Growth After RepottingWant your Monstera to explode with new leaves? Here’s how:🌞 Give it bright, filtered light — near an east or south-facing window works best.🌿 Wipe leaves regularly with a damp cloth to remove dust.💧 Maintain 60–70% humidity (bathrooms or humidifiers are ideal).🌱 Feed monthly during spring and summer with a balanced liquid fertilizer.🪴 Rotate your plant weekly for even growth.💚 Hack: Add a moss pole — Monsteras naturally climb in the wild, and this helps them grow bigger, split leaves!🌸 Conclusion: A Happy Monstera Is a Growing Monstera!Repotting might sound intimidating, but with these “How to Repot a Monstera Plant Hacks Inside,” you’re well on your way to plant parent success.By choosing the right soil, pot, and care routine, you’ll give your Monstera the perfect environment to thrive. Within weeks, you’ll notice stronger roots, fresh new leaves, and that lush, jungle-like energy your home deserves. 🌿💫So grab your gloves, a bag of soil, and your favorite pot — it’s time to make your Monstera feel right at home again!