
Orchids are often considered one of the most beautiful and elegant flowering plants. However, despite their impressive appearance, orchids can sometimes show signs of stress or damage. Whether caused by improper care, environmental changes, or pests, a wilting or damaged orchid can leave any plant lover feeling discouraged. The good news is that orchids are quite resilient, and with a little bit of attention and the right approach, they can recover and thrive again.
In this article, we’ll guide you through the essential steps to help you revive a wilted or damaged orchid, so you can enjoy its beauty once more. From assessing the damage to providing the right environment, let’s dive into the best practices for orchid recovery.
1. Assess the Damage
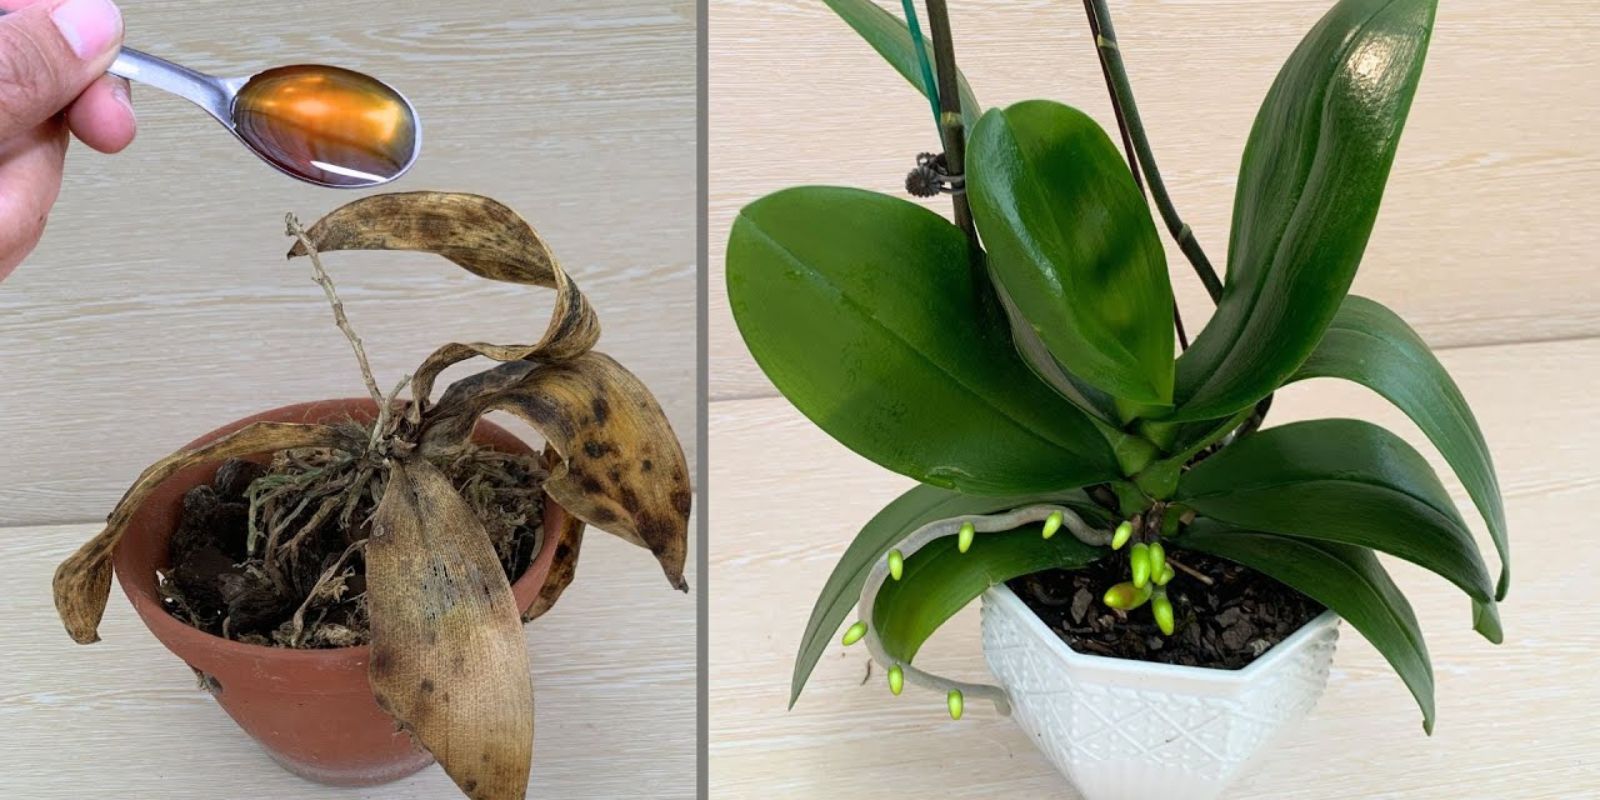
The first step in rescuing a damaged orchid is to assess the extent of the damage. The symptoms you see on the orchid can help determine the cause and how to proceed with care. Common signs of a stressed or unhealthy orchid include:
- Yellowing or Brown Leaves: This can indicate several issues, such as improper watering, disease, or pest infestation.
- Soft, Mushy Roots: Overwatering can cause the roots to rot, leading to mushy or discolored roots. Healthy roots are firm and white or light green.
- Wilted Flowers or Drooping Leaves: This can result from stress, improper watering, or a lack of sunlight.
- Pest Infestation: Look for tiny insects like mealybugs or scale insects that could be draining the life from your orchid.
Once you identify the problem, you can take the necessary steps to address it. It’s crucial to act quickly, as orchids can recover better the sooner they receive the appropriate care.
2. Trim Dead or Damaged Parts
After you’ve assessed the damage, the next step is to remove any parts of the orchid that are no longer viable. Using clean, sterilized scissors or pruning shears, trim off any dead or damaged leaves, stems, and roots.
- Dead or Yellowing Leaves: These leaves will not recover and may hinder the plant’s growth. Remove them at the base where they connect to the stem.
- Mushy or Rotting Roots: Cut away any roots that are black, mushy, or have a foul odor. Healthy orchid roots should be firm and white or green, so be sure to leave any good roots intact.
- Wilted Flowers: If flowers are wilting, gently remove them to redirect the plant’s energy toward healthy growth.
Be sure to disinfect your pruning tools with rubbing alcohol or bleach between cuts to prevent the spread of disease or infection.
3. Re-pot the Orchid (If Necessary)
If you discover that your orchid’s roots have been compromised, re-potting is often necessary. Orchids prefer well-draining pots and a special orchid mix designed to allow air to reach the roots. Here’s what you need to do when re-potting:
- Choose a New Pot: Select a new pot that’s about 1-2 inches larger in diameter than the current one. Ensure it has drainage holes to allow excess water to escape.
- Prepare the Orchid Mix: Orchids need a loose, well-draining growing medium such as bark, perlite, or coconut husk. Avoid using regular potting soil, as it can retain too much moisture and cause root rot.
- Remove Old Media: Gently remove the orchid from its current pot and carefully untangle any damaged roots. Remove any old, decayed orchid media from the roots.
- Place in the New Pot: Position the orchid in the new pot and fill it with the fresh orchid mix. Gently press down the mix to stabilize the plant, but don’t compact it too tightly.
Re-potting will give the orchid’s roots the fresh, airy environment they need to recover and encourage new growth. Be sure not to water the orchid immediately after re-potting. Wait about a week to allow the roots to settle into the new medium.
4. Check Your Watering Practices
One of the most common reasons for orchid stress is improper watering. Both overwatering and underwatering can cause damage to an orchid, leading to issues like wilting, yellowing leaves, and root rot. Here’s how to get your watering practices right:
- Overwatering: This is one of the most frequent causes of orchid issues. Orchids prefer to dry out slightly between waterings, so ensure the potting medium isn’t constantly soggy. Always check the moisture level before watering. Stick your finger into the soil mix—if it feels dry an inch or two below the surface, it’s time to water.
- Underwatering: If you notice dry, shriveled leaves or roots, your orchid may not be getting enough water. However, it’s essential to find the right balance. Orchids typically need water once a week, but this can vary depending on the environment and the type of orchid.
- Water Quality: Use room-temperature, distilled water or rainwater, as tap water may contain chemicals that can harm your orchid over time.
A consistent, balanced watering schedule is key to orchid recovery, so make sure you’re meeting the plant’s needs.
5. Increase Humidity
Orchids, particularly tropical varieties, thrive in high humidity. If your orchid appears stressed, one of the factors could be a lack of moisture in the air. Here’s how to increase humidity around your orchid:
- Humidity Trays: Place a shallow tray filled with water and pebbles near the orchid. As the water evaporates, it will increase the humidity in the surrounding area.
- Room Humidity: If the air in your home is dry, especially during winter, consider using a humidifier to keep the humidity level between 50-70%.
- Mist the Orchid: Lightly mist the leaves and roots of your orchid with water. Avoid wetting the flowers or crown, as this can lead to rot.
Increasing the humidity will create a more favorable environment for your orchid to recover and encourage healthy new growth.
6. Provide the Right Light
Light is essential for orchids, but the type of light and its intensity can make a big difference. Too much direct sunlight can scorch your orchid’s leaves, while too little light can slow down its recovery.
- Indirect Light: Orchids prefer bright, indirect light. Place your orchid near a window with filtered light, such as a north or east-facing window. If the sunlight is too harsh, you can use sheer curtains to diffuse it.
- Artificial Light: If natural light is insufficient, you can supplement it with artificial grow lights. Place the orchid under the grow light for 12-14 hours a day, and adjust the intensity based on the orchid’s needs.
Finding the right balance of light is crucial to helping your orchid recover and thrive. Be patient as the orchid adjusts to its new light conditions.
7. Be Patient and Observe Progress
Recovery can take time, so it’s important to be patient and continue monitoring your orchid’s condition. Keep an eye on the following:
- New Growth: After a few weeks, you should start to see new growth. This can be in the form of new roots, leaves, or flower spikes.
- Healthy Roots: If you notice the roots turning white or green, that’s a good sign that the plant is absorbing water and nutrients effectively.
- Leaf Health: Healthy leaves should appear firm and vibrant. If the leaves continue to yellow or turn brown, reassess the care conditions.
If you continue to provide the orchid with the right care, it will eventually recover fully and may even bloom again.
Conclusion
Reviving a wilted or damaged orchid is not always easy, but with the right care and attention, most orchids can recover and return to their former beauty. By assessing the damage, trimming dead parts, re-potting when necessary, adjusting watering habits, increasing humidity, and providing the right light, you can give your orchid the best chance for a full recovery.
Remember, orchids are resilient plants, and with patience and persistence, you’ll be rewarded with beautiful flowers and lush greenery. So, if your orchid is looking a bit worse for wear, don’t give up! Follow these steps, and soon enough, you’ll be able to enjoy a healthy and thriving orchid once again.