
Roses are beloved for their timeless beauty and captivating fragrance, making them a favorite among gardeners and flower enthusiasts. If you’re eager to expand your rose collection or share the joy of roses with friends and family, propagating roses from flower buds is a fascinating and effective method. This technique allows you to cultivate new rose plants from existing buds, ensuring that the new plants will possess the same stunning characteristics as the parent plant. In this comprehensive guide, we will walk you through the process of propagating roses from flower buds, offering detailed steps and valuable tips to help you succeed.
Introduction
Rose propagation is a rewarding endeavor that can lead to a thriving garden full of beautiful blooms. While traditional methods of rose propagation often involve stem cuttings or grafting, propagating roses from flower buds is a unique approach that can be both simple and effective. By following the right techniques, you can create new rose plants that will flourish and bring vibrant color to your garden. This method is particularly useful for gardeners looking to replicate specific rose varieties or share their favorite roses with others.
Materials Needed
Before you begin the propagation process, gather the following materials:
- Healthy Rose Plant: Choose a robust rose plant from which to take flower buds.
- Sharp Pruning Shears: For clean and precise cuts.
- Rooting Hormone: To encourage root development.
- Potting Medium: A well-draining mix such as a combination of sand and peat moss.
- Plant Pots: Small pots or containers for planting the cuttings.
- Plastic Bag or Dome: To create a humid environment around the cuttings.
- Water: For keeping the soil moist.
Step-by-Step Guide to Propagating Roses from Flower Buds
Step 1: Select Healthy Buds
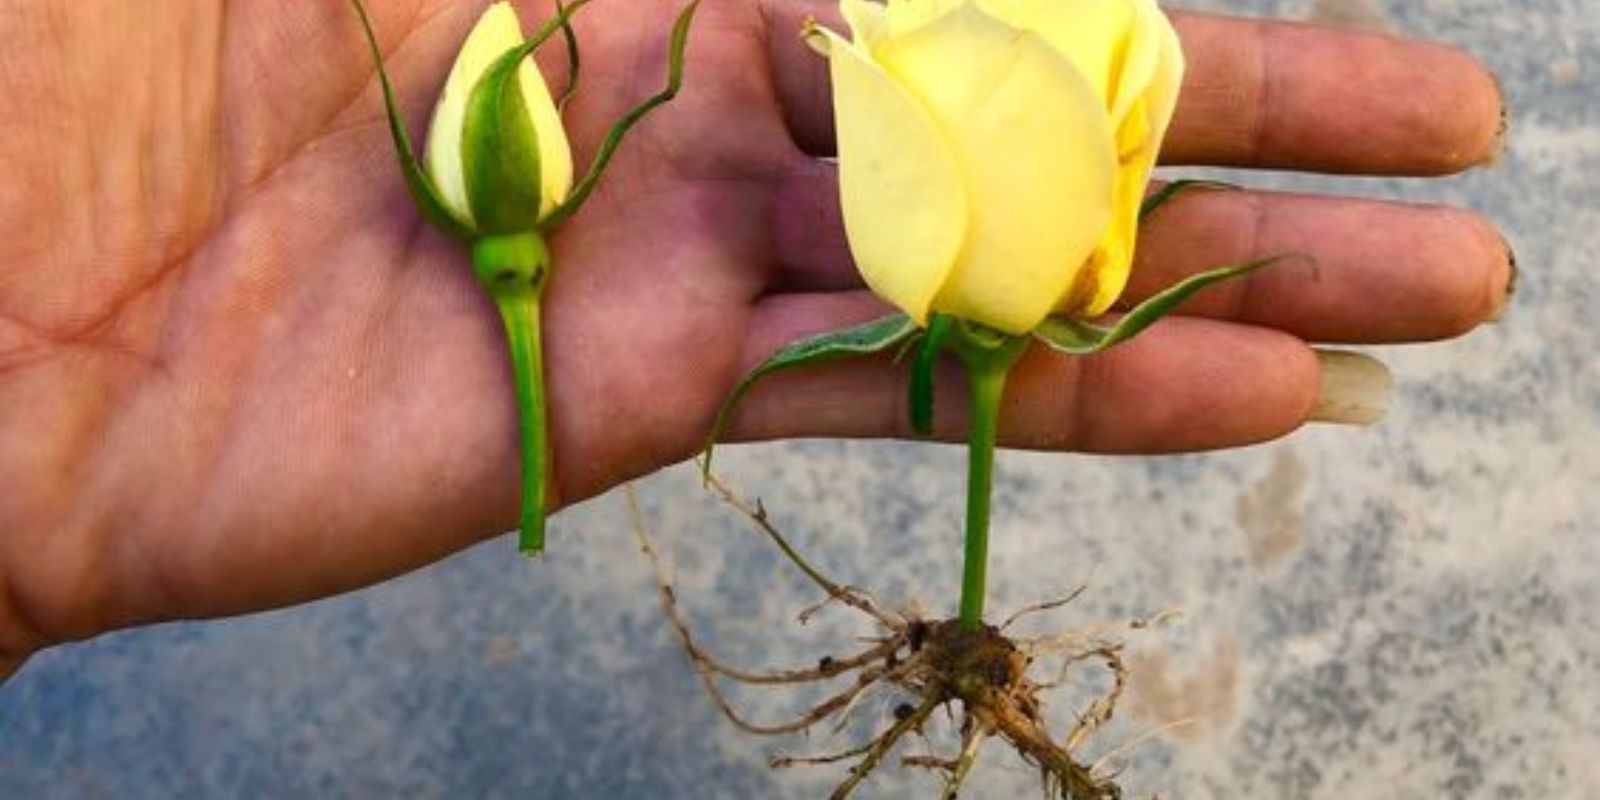
Choose mature and healthy flower buds from a well-established rose plant. The buds should be firm, plump, and not overly ripe. Avoid using buds that are damaged, diseased, or showing signs of decay. Healthy buds are more likely to successfully propagate and develop into strong, vibrant plants.
Step 2: Prepare the Cuttings
Using sharp pruning shears, carefully cut the flower buds from the rose plant. Leave a small section of stem attached to each bud, approximately 3-4 inches long. This stem will serve as the base for rooting. Trim the stem to remove any excess leaves or foliage, which can help reduce moisture loss and improve rooting success.
Step 3: Treat the Cuttings
To enhance the chances of successful rooting, dip the cut end of each stem in rooting hormone. Rooting hormone is a growth stimulant that encourages the formation of roots. Follow the instructions on the rooting hormone package for the appropriate amount to use. Make sure to shake off any excess powder before planting.
Step 4: Plant the Cuttings
Prepare small pots or containers with a well-draining potting medium. A mixture of sand and peat moss is ideal for rooting rose cuttings. Fill each pot with the medium and create small holes using a pencil or stick. Gently insert the treated cuttings into the holes, ensuring that the cut end is buried in the soil. Firm the soil around the base of each cutting to provide stability.
Step 5: Create a Humid Environment
To encourage root development, create a humid environment around the cuttings. Cover the pots with a plastic bag or a plastic dome to trap moisture and maintain high humidity. Place the pots in a warm location with bright, indirect sunlight. Avoid direct sunlight, which can cause the cuttings to overheat and dry out.
Step 6: Monitor and Water
Regularly check the soil moisture and ensure that it remains consistently moist but not waterlogged. Overwatering can lead to root rot, while underwatering can cause the cuttings to dry out. Mist the cuttings lightly if needed to maintain humidity. After a few weeks, gently tug on the cuttings to check for resistance, which indicates that roots are forming.
Step 7: Transplant When Ready
Once the cuttings have developed a healthy root system, they will be ready for transplanting. Gently remove the rooted cuttings from their pots and transfer them to larger pots or directly into your garden. Prepare the new planting site with well-draining soil and provide adequate space for the rose plants to grow. Water the newly transplanted roses thoroughly and continue to care for them as they establish themselves.
Tips for Success
- Choose the Right Time: The best time to propagate roses from flower buds is during the growing season, typically in late spring or early summer. This allows the cuttings to take advantage of the optimal conditions for growth.
- Maintain Cleanliness: Use clean, sterilized pruning shears and pots to prevent the spread of diseases and pathogens.
- Be Patient: Rose propagation can take several weeks to months. Be patient and provide consistent care to ensure the best results.
- Experiment with Different Varieties: Try propagating different rose varieties to see which ones respond best to the propagation method. This can help you identify the most successful techniques for your garden.
- Provide Adequate Care: Once transplanted, continue to provide regular care, including watering, fertilizing, and pruning, to help your new rose plants thrive.
Conclusion
Propagating roses from flower buds is an exciting and rewarding method that allows you to expand your garden with beautiful, vibrant roses. By following the steps outlined in this guide, you can successfully create new rose plants that will bring joy and color to your garden throughout the year. Embrace this technique, experiment with different rose varieties, and watch as your garden flourishes with stunning new blooms. Happy gardening! 🌹🌿