
Roses have long been a symbol of beauty and love, captivating gardeners and flower enthusiasts alike. While purchasing roses from a nursery can be tempting, propagating your own roses from cuttings is a rewarding and cost-effective method that allows you to cultivate a variety of beautiful blooms in your garden. This article will provide you with a detailed, step-by-step guide on how to propagate roses from cuttings, enabling you to expand your collection and share the joy of these exquisite flowers with friends and family.
Understanding Rose Propagation
Rose propagation can be done in several ways, including seed, grafting, and layering. However, propagating roses from cuttings is one of the easiest and most reliable methods. This technique involves taking a cutting from a healthy rose plant and encouraging it to develop roots in a suitable growing medium. Once rooted, the new plants can be transplanted and nurtured to produce stunning flowers.
Benefits of Propagating Roses from Cuttings
- Cost-Effective: Propagating roses from cuttings eliminates the need to purchase new plants from a nursery, saving you money.
- Preservation of Varieties: If you have a favorite rose variety, propagating from cuttings allows you to create clones of that specific plant.
- Satisfaction: There’s immense satisfaction in nurturing a cutting from a small piece into a full-grown rose bush.
- Share the Joy: Successfully propagating roses provides you with the opportunity to share your creations with friends and family, whether as gifts or for their gardens.
Step-by-Step Guide to Propagate Roses from Cuttings
Step 1: Select the Right Time
The best time to take rose cuttings is during the growing season, typically in late spring to early summer when the plant is actively growing. Softwood cuttings, taken from new growth, are most successful during this time. However, semi-hardwood cuttings can also be taken in late summer to early fall.
Step 2: Choose Healthy Cuttings
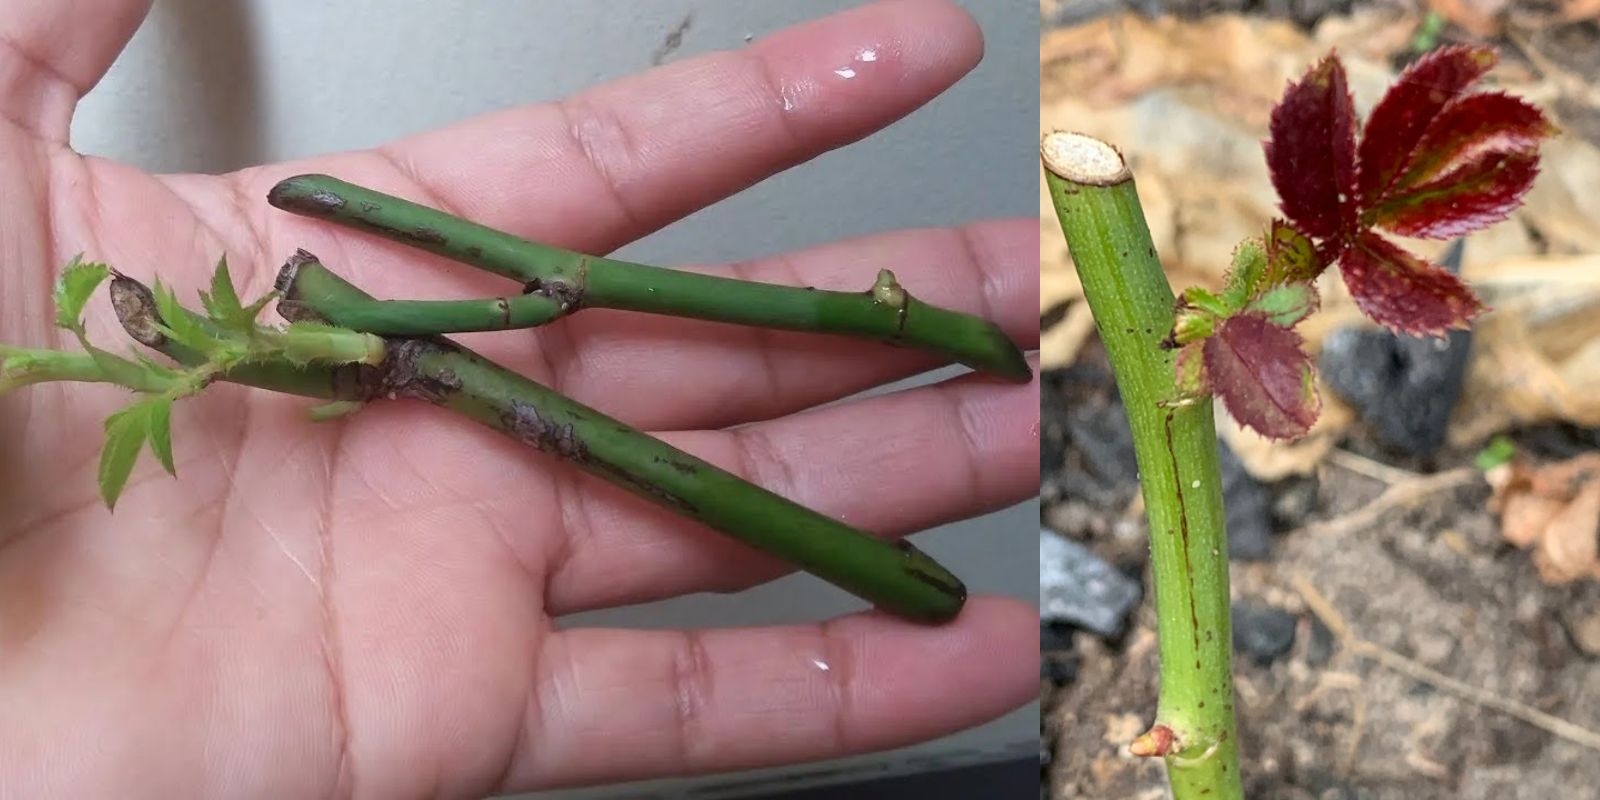
Look for healthy, disease-free stems on the parent plant. Aim for stems that are about 6 to 8 inches long and have at least two or three leaf nodes (the bumps on the stem where leaves emerge). Avoid cuttings with flowers or buds, as these can divert energy away from root development.
Step 3: Prepare the Cuttings
Using clean, sharp pruning shears, cut the stem at a 45-degree angle just below a node. This angle increases the surface area for rooting. Remove any leaves from the lower half of the cutting to reduce moisture loss. If there are any flowers or buds, remove them as well.
Step 4: Apply Rooting Hormone
While not absolutely necessary, applying rooting hormone can significantly improve your success rate. Dip the cut end of the stem in rooting hormone powder or gel, which contains growth hormones that encourage root formation. Tap off any excess to prevent clumping.
Step 5: Plant the Cuttings
Fill a container with a well-draining potting mix, such as a combination of peat moss, perlite, and vermiculite. Make holes in the soil with a pencil or your finger and insert the cuttings into the holes. Ensure that at least one node is buried in the soil, as this is where roots will emerge.
Step 6: Water the Cuttings
Gently water the cuttings to settle the soil around them. Be careful not to overwater, as this can lead to rot. The soil should be moist but not soggy. If you’re using pots with drainage holes, excess water will escape.
Step 7: Create a Humid Environment
To encourage rooting, cover the container with a plastic bag or plastic wrap, creating a mini greenhouse effect. This helps retain humidity, which is crucial for the cuttings to thrive. Make sure the plastic doesn’t touch the cuttings, as this could cause rot. Use stakes or chopsticks to keep the plastic off the leaves if necessary.
Step 8: Provide Indirect Light
Place the container in a location with bright, indirect sunlight. Direct sunlight can be too harsh for the cuttings, potentially causing them to dry out or scorch. A windowsill with filtered light or a shaded outdoor area is ideal.
Step 9: Monitor and Water
Check the cuttings regularly to ensure the soil remains moist. Water them if the top inch of soil feels dry. If you see condensation forming inside the plastic, it indicates that humidity levels are adequate. Remove the plastic covering periodically to allow for airflow and prevent mold growth.
Step 10: Check for Roots
After about four to six weeks, gently tug on the cuttings to see if they have rooted. If you feel resistance, roots are forming. If not, give them more time and continue to care for them as described above.
Step 11: Transplant the New Roses
Once the cuttings have established roots, it’s time to transplant them. Choose a larger pot or prepare a spot in your garden. If transplanting to the garden, ensure the location receives at least six hours of sunlight per day and has well-draining soil. Gently remove the rooted cuttings from their container, being careful not to damage the roots.
If using pots, fill them with a high-quality potting mix and create a hole in the center. Place the rooted cutting into the hole and backfill with soil, gently pressing down to eliminate air pockets. Water the new plants thoroughly to help them settle into their new home.
Step 12: Care for Your New Rose Plants
After transplanting, continue to care for your new rose plants as you would with any established rose bush. This includes regular watering, ensuring they receive adequate sunlight, and providing fertilizer as needed. Monitor for pests and diseases, and prune your roses as necessary to encourage healthy growth.
Additional Tips for Successful Propagation
- Use Clean Tools: Always use sterilized pruning shears to prevent the spread of disease.
- Patience is Key: Not all cuttings will root, so don’t be discouraged if some fail. Keep trying and learn from the process.
- Experiment with Different Varieties: Try propagating different rose varieties to see which ones thrive best in your garden.
- Consider Soil Conditions: Roses prefer slightly acidic to neutral soil (pH 6.0-7.0). Test your soil before planting to ensure the best conditions for growth.
Conclusion
Propagating roses from cuttings is a simple yet rewarding process that can lead to an abundance of stunning blooms in your garden. By following the steps outlined in this guide, you’ll be well on your way to growing your own beautiful rose bushes. With patience and care, you’ll not only enjoy the beauty of your own propagated roses but also share them with others, spreading the joy of gardening. So, gather your supplies and start propagating today!
Motivation to Get Started
Embarking on the journey of rose propagation is a fulfilling experience that connects you with nature and enhances your gardening skills. Don’t hesitate to share your successes, challenges, and beautiful blooms with fellow gardening enthusiasts using popular hashtags like #RosePropagation #GardeningJoy #FlowerPower #DIYGardening #GardenGoals. Happy gardening!