
Rosemary, with its fragrant needles and versatile culinary uses, is a prized herb in gardens and kitchens alike. Propagating rosemary from a cutting is a simple and effective way to expand your herb collection without purchasing new plants. This guide will walk you through the entire process, from selecting the right cutting to nurturing your new plant into a thriving rosemary bush.
Introduction
Rosemary (Rosmarinus officinalis) is a hardy, evergreen herb that thrives in various climates. It’s valued not only for its aromatic leaves, which enhance a range of dishes, but also for its ability to attract pollinators and provide a touch of greenery year-round. Propagating rosemary from a cutting is an excellent way to grow new plants at home. With just a few easy steps, you can create a fresh rosemary plant that will flourish in your garden or indoors.
1. Selecting the Right Cutting
Choosing the Right Twig:
- Health Matters: Select a healthy, mature rosemary plant for cuttings. Look for firm, green twigs that are free of disease or pest damage. The best cuttings come from the upper, newer growth of the plant.
- Cutting Size: Choose a twig that is about 4 to 6 inches long. It should be sturdy and not too woody, as younger growth has a higher success rate for rooting.
2. Preparing the Cutting
Making the Cut:
- Diagonal Cut: Use clean, sharp scissors or pruning shears to make a diagonal cut at the base of the twig. This angled cut increases the surface area for root development.
- Resting Period: Place the cutting in a cool, dry location for about 24 hours to allow the cut end to callus over. This helps prevent rot when the cutting is placed in water or soil.
Removing Leaves:
- Leaf Stripping: After the resting period, strip off the leaves from the lower half of the cutting, leaving only the top few inches with leaves. This reduces water loss and allows the cutting to focus on developing roots.
3. Preparing the Container
Using Water:
- Container Selection: Choose a clear glass container or jar. This allows you to monitor the root development and ensure the cutting is submerged in water.
- Filling the Container: Fill the container with room-temperature water. Make sure the base of the cutting is fully submerged, but the remaining leaves are above the water level to prevent rot.
Placement:
- Light and Temperature: Place the container in a bright spot with indirect sunlight. Avoid direct sunlight, which can heat the water and harm the cutting. Maintain a room temperature of 65-75°F (18-24°C) for optimal rooting conditions.
4. Monitoring and Caring for the Cutting
Water Management:
- Water Replacement: As the water evaporates, replace it with fresh room-temperature water. This keeps the cutting hydrated and prevents stagnation, which can lead to mold and bacterial growth.
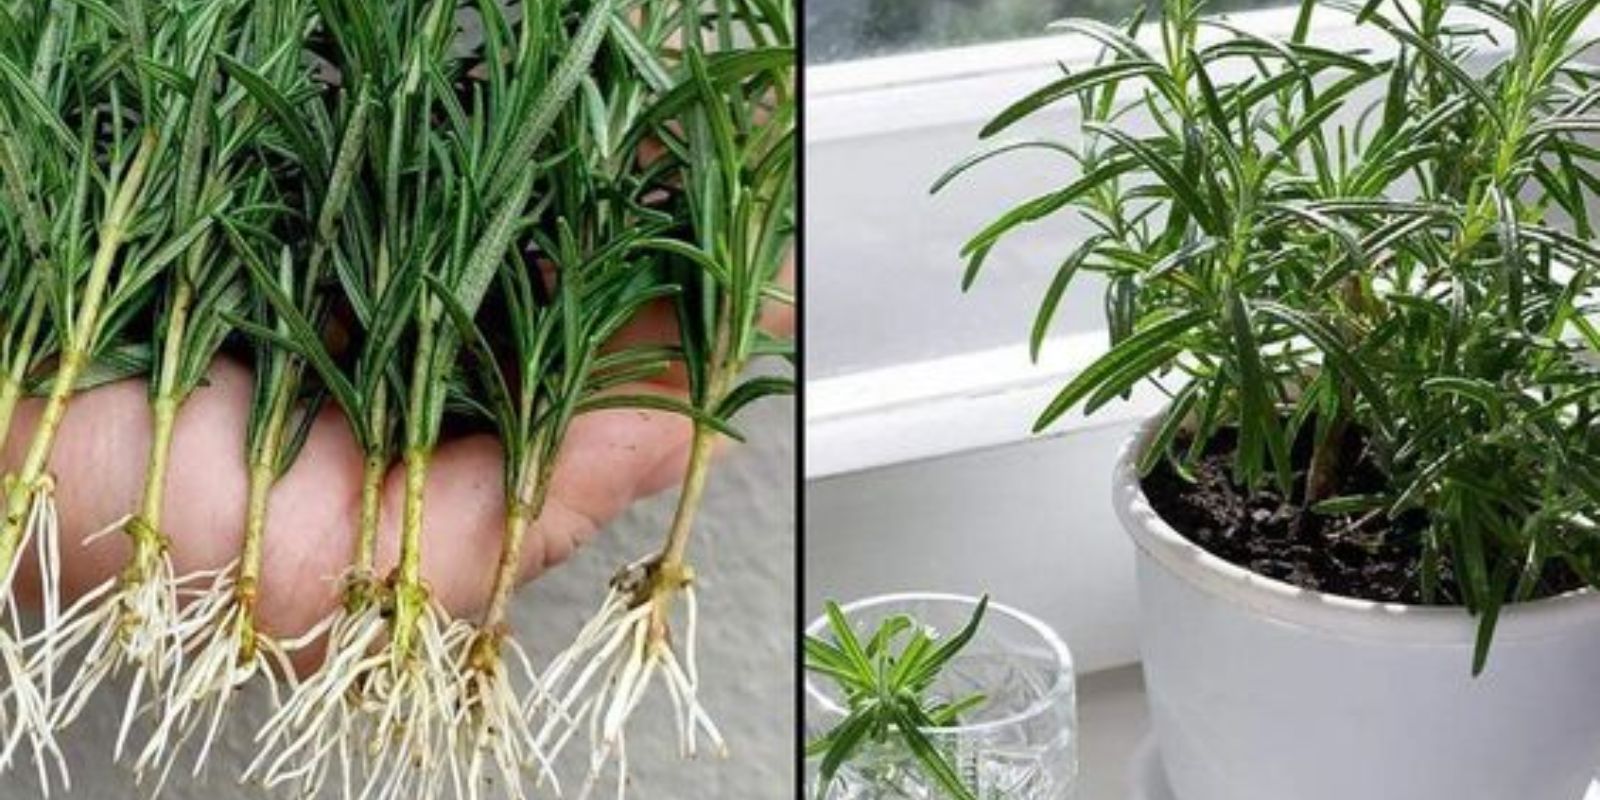
Observing Root Development:
- Checking for Roots: After about a week, you should start to see small roots forming at the base of the cutting. Continue to monitor the cutting for root growth.
- Timing: Allow the roots to grow to about 1 to 2 inches long before transplanting. This ensures that the cutting has a strong enough root system to support its growth in soil.
5. Transplanting the Cutting
Choosing a Pot:
- Pot Size: Select a pot that is about 6 inches in diameter for the initial transplant. Ensure the pot has drainage holes to prevent waterlogging.
- Soil Mix: Use a well-draining potting mix, ideally a blend of equal parts potting soil, perlite, and sand. This mix promotes healthy root development and prevents waterlogging.
Planting Procedure:
- Making a Hole: Create a small hole in the center of the soil mix in the pot. Gently place the rooted cutting into the hole, ensuring that the roots are well-spread and not cramped.
- Filling and Watering: Fill the pot with soil around the cutting, firming it gently to remove air pockets. Water the newly planted cutting thoroughly to settle the soil and ensure good root-to-soil contact.
6. Caring for the New Rosemary Plant
Watering:
- Watering Schedule: Water the rosemary plant every 2 to 3 days, keeping the soil consistently moist but not waterlogged. Rosemary prefers slightly drier conditions, so allow the top inch of soil to dry out between waterings.
- Drainage: Ensure that the pot has good drainage to prevent root rot. Empty any excess water from saucers beneath the pot to avoid stagnant water.
Light and Temperature:
- Sunlight Needs: Place the rosemary plant in a sunny location, preferably with 6 to 8 hours of direct sunlight daily. If growing indoors, consider using grow lights to supplement natural light.
- Temperature: Maintain a temperature range of 65-75°F (18-24°C). Rosemary thrives in warm conditions and can tolerate a light frost, but extreme cold should be avoided.
7. Long-Term Care and Maintenance
Fertilizing:
- Nutrient Needs: Fertilize the rosemary plant with a balanced, water-soluble fertilizer once a month during the growing season (spring and summer). Follow the manufacturer’s instructions for the correct dosage.
- Organic Options: For a more natural approach, consider using compost or well-aged manure to provide nutrients.
Pruning and Harvesting:
- Pruning: Regularly trim the rosemary plant to promote bushier growth and prevent it from becoming leggy. Remove any dead or damaged stems and harvest leaves as needed.
- Harvesting: Harvest rosemary leaves by snipping off sprigs with clean scissors. Use fresh or dried leaves for cooking, and enjoy the herb’s aromatic flavor.
Pest and Disease Management:
- Monitoring: Inspect the plant regularly for pests such as spider mites or aphids. Treat infestations with organic insecticidal soap or neem oil.
- Disease Prevention: Avoid overwatering and ensure proper air circulation to prevent fungal diseases. Remove any affected plant parts promptly to prevent the spread of disease.
Conclusion
Propagating rosemary from a cutting is an enjoyable and productive way to grow this versatile herb at home. By following these steps, you can successfully create new rosemary plants and enjoy their many benefits, from enhancing your culinary creations to adding a touch of greenery to your space. Embrace the process and take pride in growing your own rosemary—an herb that will provide beauty and flavor for years to come.