
Introduction:
Growing your own potatoes at home is an immensely satisfying experience. Not only does it provide a steady supply of fresh, tasty potatoes, but it also gives you control over the entire growing process. Whether you’re an experienced gardener or a novice looking to try your hand at something new, propagating potatoes can be a fun and rewarding endeavor. This guide will walk you through the simple steps needed to ensure a bountiful harvest of potatoes right from your backyard.
Selecting Seed Potatoes:
The first step in propagating potatoes is selecting the right seed potatoes. Seed potatoes are specially grown and free from diseases that can affect your crop. It’s crucial to buy certified seed potatoes from a reputable garden center or nursery. These potatoes are not treated with sprout inhibitors and will give you the best chance for a healthy and productive harvest. Choose firm, healthy-looking potatoes with several “eyes” or buds on them. These eyes are where the new potato plants will sprout from.
Chitting the Potatoes:
Chitting is the process of encouraging seed potatoes to sprout before planting. This step can give your potatoes a head start and lead to an earlier and more abundant harvest. To chit your potatoes, place them in a cool, light-filled area with the eyes facing upward. An egg carton can be a convenient container for this purpose. Leave the potatoes for 2-3 weeks, during which time small sprouts will begin to form. Aim for stout, green sprouts about half an inch long.
Cutting and Curing:
If your seed potatoes are large, you can cut them into smaller pieces to make the most of your stock. Each piece should be roughly the size of a golf ball and contain at least one or two eyes. After cutting, it’s important to let the pieces cure for a few days. Lay them out in a single layer in a cool, dry place. Curing allows the cut surfaces to dry and form a protective layer, reducing the risk of rot and disease when planted.
Preparing the Soil:
Potatoes thrive in well-drained, fertile soil with plenty of organic matter. Choose a sunny spot in your garden, as potatoes need at least six hours of direct sunlight each day. Prepare the soil by digging it over to a depth of about 12 inches and removing any weeds or stones. Incorporate plenty of compost or well-rotted manure to improve soil fertility and structure. Potatoes prefer slightly acidic soil with a pH between 5.0 and 6.0.
Planting the Potato Pieces:
Once your potato pieces have cured, it’s time to plant them. Dig trenches or individual planting holes about 4 inches deep and 12 inches apart in rows that are 24-36 inches apart. Place the potato pieces in the trench or hole with the eyes facing upward. Cover them with soil and water well. As the plants grow, you will need to mound soil around the stems to protect the developing tubers from sunlight and to encourage the growth of more tubers.
Hilling the Plants:
Hilling is a crucial step in growing potatoes. As the potato plants grow, you need to periodically mound soil up around the stems. This practice, known as hilling, helps protect the developing tubers from sunlight, which can cause them to turn green and become inedible. It also provides more room for tubers to grow. Start hilling when the plants are about 6 inches tall. Pull soil from between the rows and mound it up around the base of the plants, leaving just the top few inches of the plant exposed. Repeat this process every few weeks or whenever the plants grow another 6 inches.
Watering and Maintenance:
Consistent moisture is essential for healthy potato growth. Water the plants regularly, aiming to keep the soil evenly moist but not waterlogged. Potatoes need about 1-2 inches of water per week. Mulching around the plants can help retain soil moisture and keep weeds at bay. Be vigilant about weeding, as potatoes do not compete well with weeds. Inspect your plants regularly for pests and diseases. Common pests include potato beetles and aphids, while diseases such as blight can also affect your crop. Remove any affected foliage promptly to prevent the spread of disease.
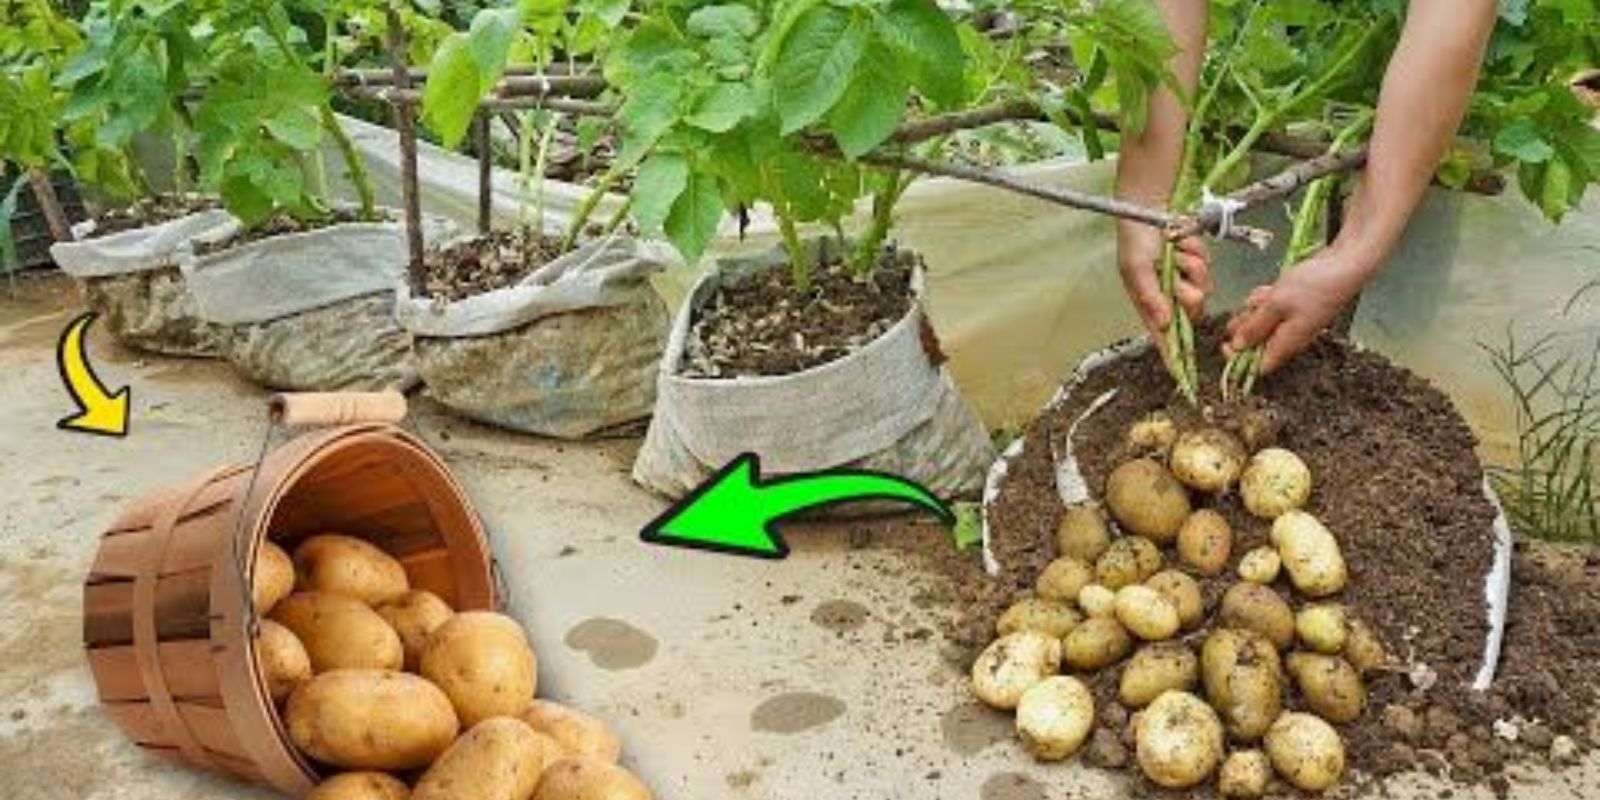
Harvesting:
Your potatoes are ready to harvest when the plants start to flower and the foliage begins to yellow and die back. This usually occurs about 10-12 weeks after planting for new potatoes or 15-20 weeks for main crop varieties. To harvest, carefully dig around the base of the plants with a fork or spade, taking care not to damage the tubers. Gently lift the plant and shake off the soil to reveal your potatoes. Allow the potatoes to dry in the sun for a few hours to toughen their skins before storing.
Storing Your Potatoes:
After harvesting, it’s important to store your potatoes correctly to ensure they last. Store them in a cool, dark, and well-ventilated place. Avoid storing them in the fridge, as the cold temperature can turn the starches into sugars, altering the taste. Potatoes should be kept at a temperature of around 45-50°F. Place them in a paper or burlap sack rather than plastic bags, which can trap moisture and cause rot. Check your stored potatoes regularly and remove any that show signs of spoilage.
Motivation:
Growing potatoes at home is a straightforward process that yields delicious results. With a little preparation and care, you can enjoy a plentiful harvest of homegrown potatoes. So why not give it a try? Start your potato propagation journey today and experience the joy of harvesting and eating your own homegrown potatoes. Happy gardening! 🌱🥔
By following these steps, you’ll be well on your way to enjoying a bountiful crop of homegrown potatoes. Each stage, from selecting the right seed potatoes to harvesting and storing your tubers, is designed to maximize your yield and ensure a healthy, productive garden.