
Gardening enthusiasts often look for cost-effective and rewarding ways to expand their gardens. One of the best techniques to multiply your favorite shrubs, trees, and woody plants is through hardwood cuttings. This simple yet powerful propagation method allows you to create new plants from existing ones, ensuring a continuous supply of greenery for your garden.
If you’ve ever wished to grow more plants without spending money on nursery stock, this guide will teach you how to successfully propagate plants from hardwood cuttings. With the right steps, you can turn pruned branches into thriving plants. Let’s dive into the process!
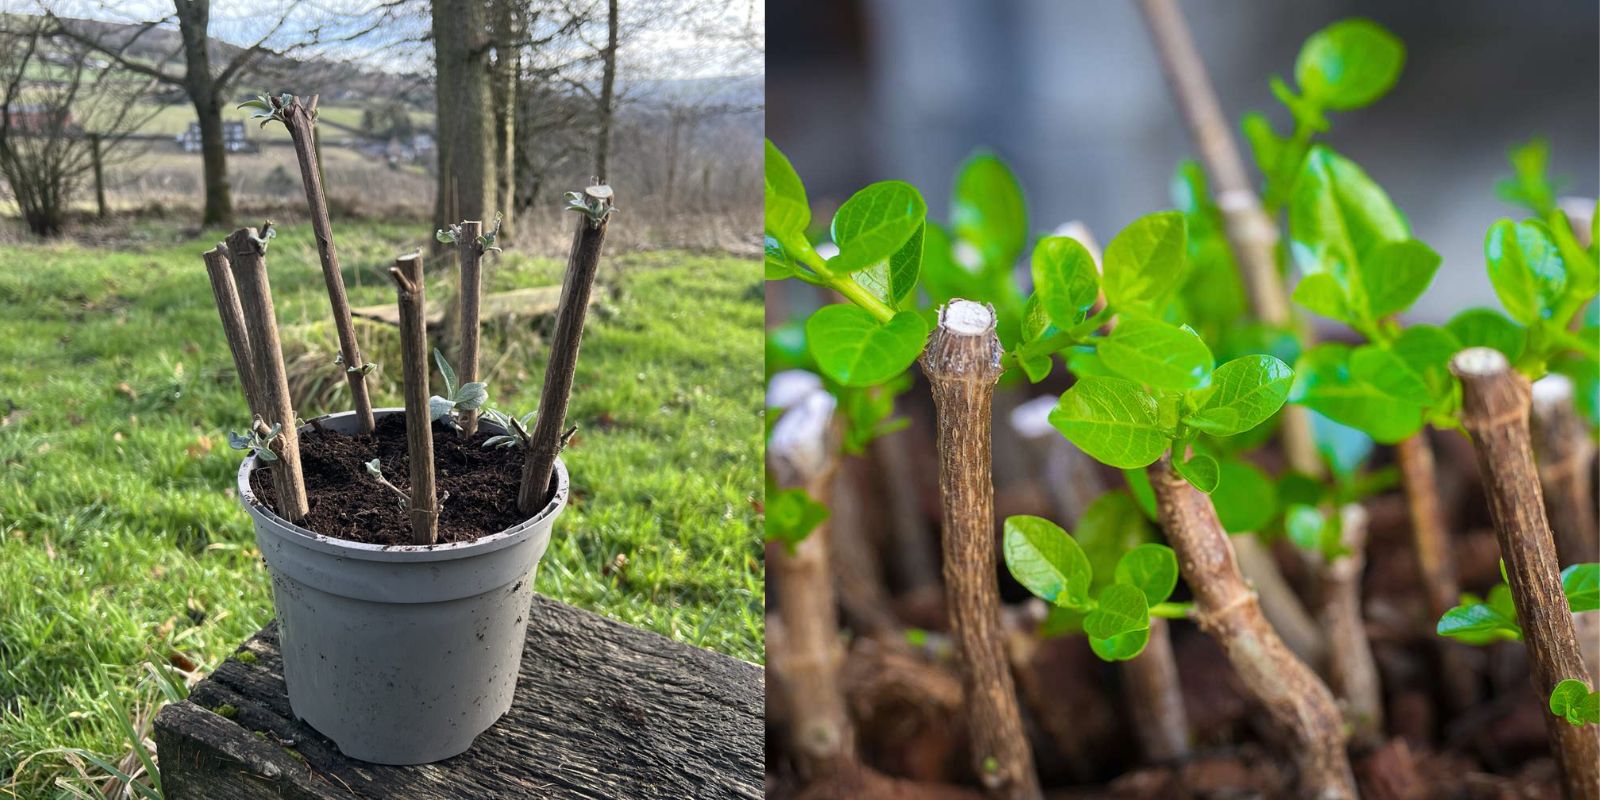
What Are Hardwood Cuttings?
Hardwood cuttings are mature, woody stems taken from deciduous and evergreen plants during their dormant season, typically in late fall or winter. Unlike softwood cuttings taken in spring or summer, hardwood cuttings are firmer, making them more resilient to temperature fluctuations and requiring less maintenance.
Benefits of Hardwood Cuttings
- Cost-effective: Propagation from cuttings saves money compared to buying new plants.
- Preserves plant genetics: Produces clones of the parent plant with the same traits.
- Requires minimal resources: Needs only basic materials like soil, rooting hormone, and pots.
- Eco-friendly: Reduces plant waste by utilizing pruned branches.
Best Plants for Hardwood Cuttings
Many woody plants can be propagated through hardwood cuttings. Some popular choices include:
- Deciduous Shrubs and Trees: Roses, grapes, willows, maples, forsythia, dogwood, currants
- Evergreens: Boxwood, junipers, hollies, yews
- Fruit Trees and Vines: Figs, pomegranates, elderberries, blueberries, grapevines
Step-by-Step Guide to Propagating Hardwood Cuttings
1. Selecting and Preparing the Cuttings
🔹 When to Take Cuttings: Late fall to early winter, when the plant is dormant.
🔹 Choosing the Right Branches:
- Look for strong, healthy, and disease-free branches.
- The cutting should be about the thickness of a pencil (6–12 inches long).
- Ensure it has at least three nodes (small bumps where leaves grow).
🔹 Cutting the Stem:
- Use sharp, clean pruning shears to make a straight cut at the top (above a node) and a diagonal cut at the bottom (below a node).
- The angled cut helps identify which end should go into the soil.
2. Preparing the Cutting for Rooting
🔹 Remove Excess Leaves: Strip off any leaves from the lower half of the cutting. If dealing with an evergreen cutting, keep a few small leaves at the top.
🔹 Apply Rooting Hormone:
- Dip the bottom end of the cutting into rooting hormone powder or gel.
- This step increases the chances of root development, especially for woody plants.
3. Planting the Cuttings
🔹 Choosing the Right Medium:
- A well-draining mix of sand, peat moss, and perlite works best.
- Avoid heavy garden soil, which retains too much moisture and may cause rot.
🔹 Planting Depth:
- Insert the cutting about 1/3 of its length into the soil.
- Keep at least one node beneath the soil surface.
🔹 Spacing:
- If planting multiple cuttings in one container, space them a few inches apart.
4. Providing the Right Conditions
🔹 Watering:
- Keep the soil evenly moist but not waterlogged.
- Avoid letting the cuttings dry out, as this can hinder root development.
🔹 Light and Temperature:
- Place cuttings in a cool, sheltered location with indirect light.
- If kept outdoors, cover them with a cold frame or plastic tent for protection.
- In warmer climates, partial shade works well.
🔹 Humidity Control:
- Wrapping the pot in a plastic bag can help retain moisture.
- Be sure to ventilate occasionally to prevent mold growth.
5. Monitoring Growth and Transplanting
🔹 Checking for Root Development:
- Hardwood cuttings typically take 2–4 months to develop roots.
- Gently tug on the cutting—if there’s resistance, roots have formed.
🔹 Transplanting into Larger Pots or the Garden:
- Once strong roots develop, move the cuttings into individual pots with potting soil.
- Gradually expose them to more sunlight before transplanting into the ground in spring.
Common Mistakes and How to Avoid Them
🔸 Using Soft or Weak Stems: Choose sturdy, mature wood for successful propagation. 🔸 Skipping Rooting Hormone: While some plants root without it, hormone application significantly improves success rates. 🔸 Overwatering: Excess moisture can lead to rot; ensure proper drainage. 🔸 Planting Too Deeply: This can cause rotting before roots have a chance to develop.
FAQs About Hardwood Cuttings
Q: Can I propagate hardwood cuttings in water?
A: Some plants (like willow) root well in water, but most prefer soil for stronger root development.
Q: How long does it take for roots to form?
A: It varies by species, but generally, expect root growth in 8–16 weeks.
Q: Can I take hardwood cuttings from any plant?
A: No, hardwood propagation works best for specific shrubs, trees, and vines. Soft-stemmed plants need different methods.
Q: Do I need to fertilize the cuttings?
A: Not immediately. Once new leaves appear and the roots are strong, apply a diluted fertilizer.
Final Thoughts
Hardwood cuttings are an excellent way to multiply your favorite plants, ensuring a thriving, budget-friendly garden. With a little patience and care, you can enjoy new plants that are genetically identical to the parent plant.
🌿 Try this method today and watch your garden grow! Have you propagated plants before? Share your experience in the comments! 🌱💚
#GardeningHacks #PlantPropagation #GrowYourOwn #GreenThumb #GardenLovers #SustainableGardening