
Introduction
The Thai Jambura, also known as the Thai Pomelo or Thai Batabi, is a tropical fruit loved for its juicy, sweet-tart flavor and large, aromatic fruits. Cultivating your own Jambura plant is not only rewarding but also a step toward sustainable gardening. Propagation is the easiest and most efficient way to grow a Thai Pomelo plant at home. Whether you’re a gardening enthusiast or a beginner, this guide will walk you through every step of propagating and caring for this amazing citrus plant.
Why Propagate a Jambura Plant?
Propagation is an excellent way to grow new plants without the cost of purchasing seedlings. By propagating a Jambura plant, you can:
- Ensure the new plant retains the same qualities as the parent plant.
- Save money and experiment with home gardening techniques.
- Expand your garden with a healthy, productive citrus tree.
Materials You’ll Need
- A healthy Thai Pomelo tree for cuttings.
- Sharp, clean pruning shears or scissors.
- Rooting hormone (optional but recommended).
- A well-draining potting mix or coco peat.
- A small pot or propagation tray.
- A plastic bag or propagation dome.
- Spray bottle for misting.
Step-by-Step Guide to Propagating Thai Pomelo
1. Choose the Right Time for Propagation
The best time to propagate Thai Pomelo is during the growing season, typically in spring or early summer. This is when the plant is actively producing new growth and can recover quickly from cuttings.
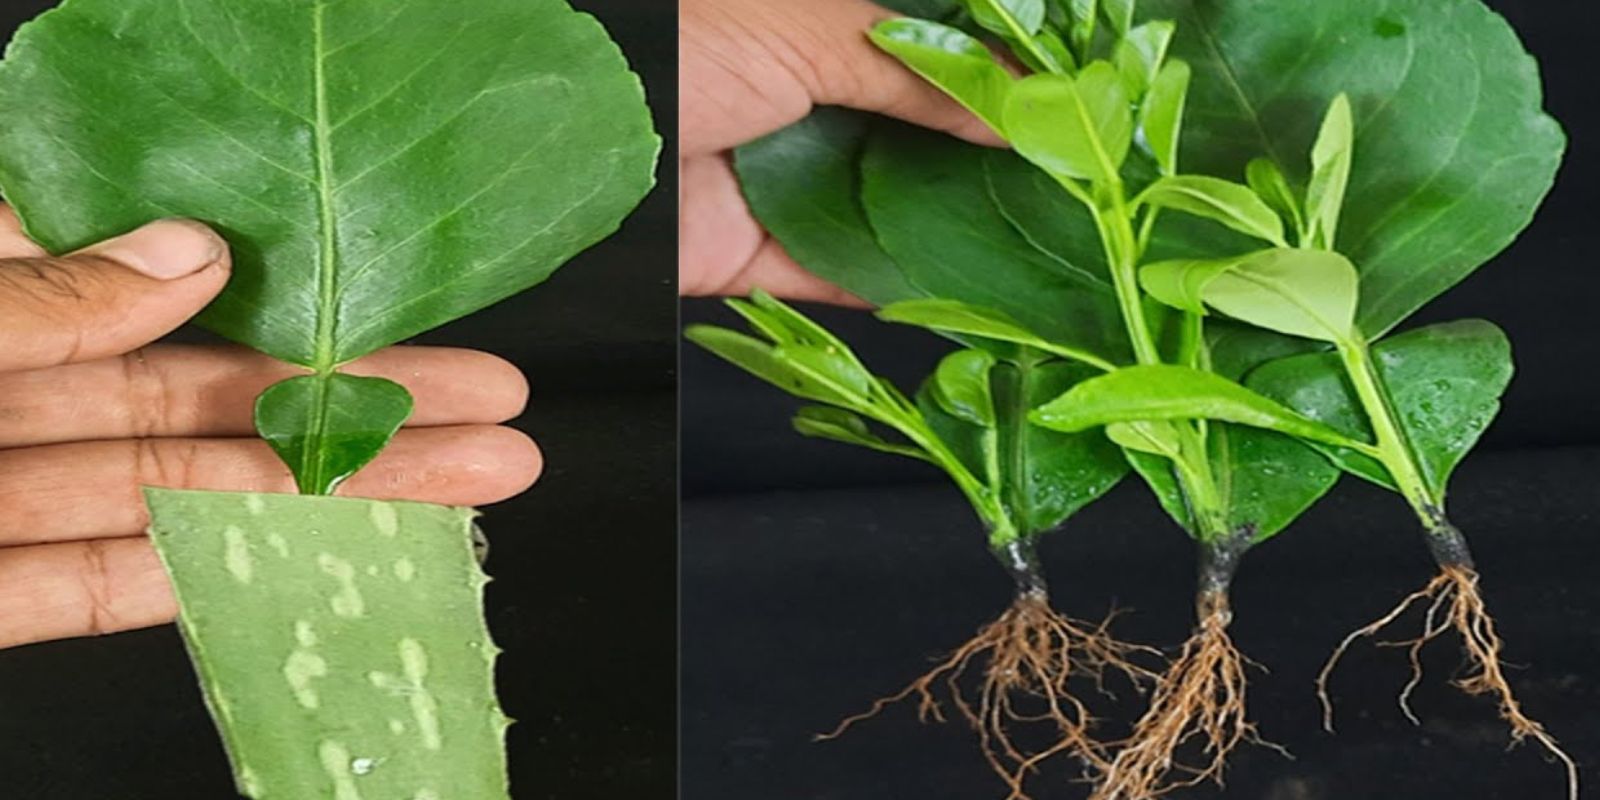
2. Select Healthy Cuttings
Identify a semi-hardwood branch on the parent plant. This is a branch that is neither too soft (new growth) nor too hard (mature wood). Cut a 6–8 inch piece with at least 2–3 nodes (the points where leaves grow). Ensure the cutting is free of disease or pest damage.
3. Prepare the Cutting
- Remove the leaves from the lower half of the cutting. This helps prevent excessive moisture loss and encourages root development.
- Leave a few leaves at the top of the cutting to allow photosynthesis to continue.
4. Apply Rooting Hormone
To increase the chances of successful rooting, dip the cut end of the stem into rooting hormone. This step is optional but highly recommended for faster root growth.
5. Prepare the Potting Medium
Use a well-draining potting mix, such as a combination of coco peat, perlite, and compost. The medium should retain some moisture without becoming waterlogged. Fill your pot or propagation tray with this mixture.
6. Plant the Cutting
Make a hole in the potting mix and insert the cutting, ensuring at least one node is buried. Gently press the soil around the cutting to secure it in place.
7. Maintain Optimal Humidity
Cover the cutting with a plastic bag or propagation dome to create a mini greenhouse effect. This helps retain moisture and provides a humid environment, which is essential for root formation.
8. Place in a Warm, Indirectly Lit Area
Place the potted cutting in a location with indirect sunlight. Avoid direct sunlight, as it can cause the cutting to dry out. The ideal temperature range is 70–85°F (21–29°C).
9. Watering and Maintenance
- Mist the cutting daily to keep the humidity level high.
- Water the soil lightly, ensuring it remains moist but not soggy. Overwatering can lead to rot.
10. Monitor Root Development
Roots typically begin to develop within 4–6 weeks. To check progress, gently tug on the cutting. If you feel resistance, roots are forming.
Caring for Your New Pomelo Plant
Transplanting
Once the cutting has developed a healthy root system, it’s time to transplant it into a larger pot or directly into the garden. Use nutrient-rich, well-draining soil and ensure the new location receives plenty of sunlight.
Watering
Water the plant regularly but allow the top layer of soil to dry out between waterings. Pomelo plants dislike soggy soil, so proper drainage is essential.
Fertilizing
Feed the plant with a balanced citrus fertilizer every 4–6 weeks during the growing season. Look for a fertilizer high in nitrogen to encourage healthy foliage and fruit production.
Pruning
Regularly prune the plant to remove dead or diseased branches and to shape the canopy. This encourages healthy growth and prevents overcrowding.
Pest and Disease Management
Common pests for citrus plants include aphids, scale, and spider mites. Use organic insecticides or neem oil to manage infestations. Keep an eye out for signs of fungal diseases like leaf spot or root rot, and take appropriate action if needed.
Tips for Success
- Use Mature Plants: Select cuttings from a parent plant that has already produced fruit for the best results.
- Avoid Overwatering: Excess moisture can cause the cutting to rot before roots form.
- Be Patient: Rooting can take several weeks, so don’t be discouraged if progress seems slow.
- Experiment: Try propagating multiple cuttings at once to increase the chances of success.
Conclusion
Growing your own Thai Jambura plant from cuttings is a rewarding experience that connects you to nature while adding a tropical touch to your garden. With proper care and attention, your propagated Pomelo plant will grow into a thriving tree, providing you with delicious fruit and a sense of accomplishment.
💡 Have you propagated a Jambura plant before? Share your experiences or ask questions in the comments below!
Viral Gardening Hashtags
#PropagatePomelo #GrowThaiJambura #CitrusPropagation #GardeningTips #TropicalGardening #SustainableGardening #GrowYourOwnFruit #HomeGardenersUnite #GreenThumbGoals #FruitTreeLove