
Propagating ivy (Hedera spp.) is a rewarding and straightforward process that brings the beauty of nature into your home or garden while expanding your plant collection for free. Ivy is known for its resilience and adaptability, making it a great candidate for propagation. Whether you’re aiming to beautify an indoor space or create a lush outdoor landscape, ivy cuttings offer a reliable way to cultivate vibrant green growth. This guide will take you through each step of the propagation process, from selecting and preparing cuttings to nurturing and transplanting your new plants.
Why Propagate Ivy?
Ivy plants are not only attractive but also beneficial in several ways. They add aesthetic appeal to any setting, improve air quality, and can be used as ground cover or climbing plants. Propagating ivy is particularly rewarding because:
- It’s cost-effective: No need to buy additional plants; you can multiply from one parent plant.
- It’s simple: Ivy propagation is beginner-friendly and requires minimal equipment.
- It encourages plant health: Pruning for cuttings promotes bushier growth in the parent plant.
Materials Needed for Ivy Propagation
Before you start, gather these basic materials:
- A healthy ivy plant for cuttings
- A pair of clean, sharp scissors or pruning shears
- Small pots with potting soil or a container for water propagation
- A rooting hormone (optional but helpful)
- A spray bottle for misting
- Labels (if you’re propagating multiple varieties)
Step 1: Select a Healthy Stem
The success of propagation begins with the selection of a healthy stem. Choose a long, mature vine from your ivy plant. Look for stems with bright green leaves and no signs of disease or pests. Make sure the stem has multiple nodes (the small bumps along the vine where leaves grow), as this is where roots will develop.
Step 2: Cut Below a Node
Using your clean scissors or pruning shears, cut a 4-6 inch section from the stem, just below a node. This is essential, as the node will serve as the root-growing point for your new plant. Ideally, each cutting should have at least 3-4 leaves, providing enough energy for the cutting to establish roots.
Step 3: Prepare the Cutting
Now that you have your cutting, prepare it for rooting by removing the leaves on the lower half of the stem. This exposes the nodes, which is where the roots will develop. Be careful not to damage the nodes as you strip the leaves. If you’re using a rooting hormone, dip the cut end into the powder or gel for an extra boost in root growth.
Step 4: Root in Water or Soil
You can choose between two methods to root your ivy cuttings: water propagation or direct soil propagation. Both have their benefits and drawbacks, so choose the one that works best for you.
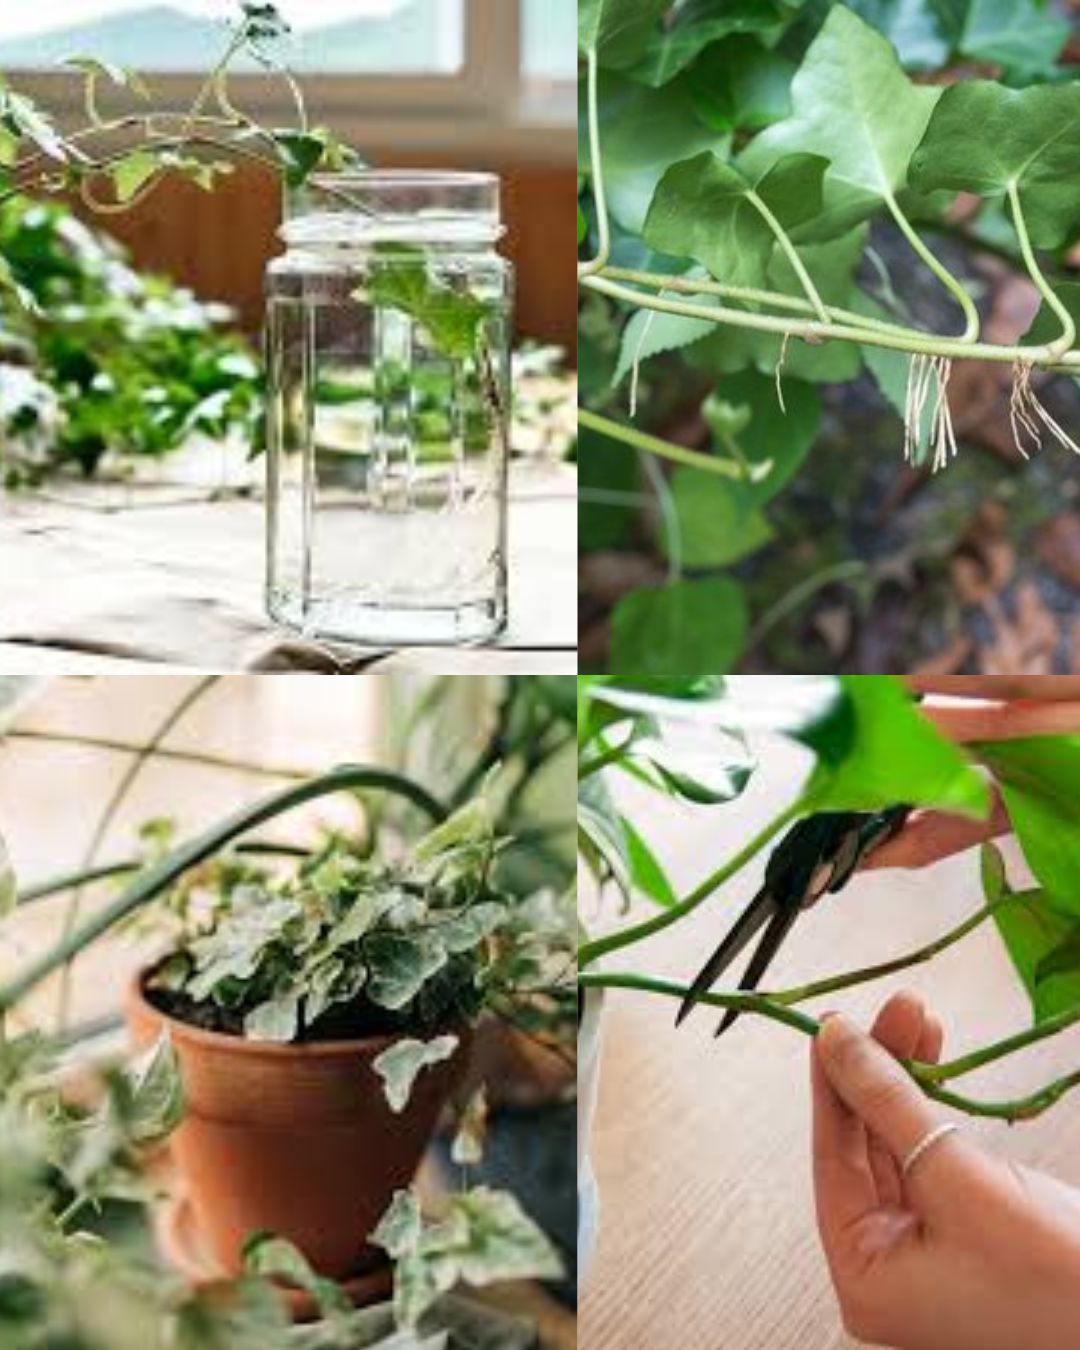
Water Propagation
- Place the prepared cutting in a glass or jar of water, ensuring the nodes are fully submerged. Keep the leaves above water to prevent rot.
- Place the container in a spot with bright, indirect light. Avoid direct sunlight, which can cause overheating.
- Change the water every few days to keep it fresh and oxygenated.
- After about 1-2 weeks, you should see small roots beginning to grow from the nodes. Wait until the roots are around 2-3 inches long before transferring to soil.
Soil Propagation
- Fill a small pot with well-draining potting soil, and make a hole in the center.
- Insert the cutting into the hole, ensuring the nodes are buried about 1-2 inches below the surface.
- Firmly press the soil around the cutting to secure it.
- Mist the soil lightly to maintain moisture, and place the pot in a bright spot with indirect sunlight.
Step 5: Provide Proper Lighting and Humidity
Regardless of your chosen method, light and humidity play a critical role in the successful propagation of ivy. Ivy cuttings thrive with bright, indirect sunlight. Avoid direct sunlight, as it can scorch the leaves or heat the water too much for the cutting.
To create an ideal environment, maintain high humidity by misting the cuttings daily or placing them in a plastic bag to retain moisture. If propagating multiple cuttings, consider a mini greenhouse or a clear cover for humidity.
Step 6: Monitor Root Growth
Over the next few weeks, keep an eye on your cuttings. For water propagation, look for root development every few days. For soil propagation, gently tug on the stem after 3-4 weeks to check for resistance, which indicates that roots are forming. In both cases, be patient—root development can take a few weeks, but proper care will yield results.
Step 7: Transplanting Your Rooted Cuttings
Once your cuttings have established roots (usually around 3-6 inches in length), they are ready to be transplanted into larger pots or directly into your garden.
- Water Propagated Cuttings: If your cuttings were rooted in water, plant them in small pots with well-draining potting soil. Dig a hole in the soil deep enough to hold the root system, place the cutting in, and cover with soil.
- Soil Propagated Cuttings: These cuttings can either stay in their original pots to grow or be moved to a larger container if they are thriving.
Give your newly transplanted ivy a good watering and place it back in indirect light. As the plant acclimates to its new pot, reduce watering slightly to prevent waterlogging.
Step 8: Caring for Your New Ivy Plants
Young ivy plants require a bit of attention but are generally low-maintenance:
- Watering: Keep the soil moist, but not soggy. Allow the top inch of soil to dry out before watering again.
- Light: Ivy prefers bright, indirect sunlight. Too much direct light may cause leaf burn, while too little light can lead to sparse growth.
- Fertilizer: Feed your ivy with a balanced liquid fertilizer once a month during the growing season to encourage lush growth.
- Pruning: Trim as needed to maintain shape and encourage fullness. You can also propagate the trimmings to grow even more ivy!
Common Issues with Ivy Propagation
- Rotting Cuttings: Too much water or poor air circulation can cause cuttings to rot, especially if leaves touch the water. Ensure leaves stay dry and water is changed frequently.
- Slow Root Growth: Some varieties may take longer to root. Patience is key, but using a rooting hormone can help.
- Pests: Keep an eye out for aphids, spider mites, and mealybugs. Regularly misting the plant or wiping leaves with soapy water can help prevent infestations.
Benefits of Growing Ivy from Cuttings
- Affordable: Growing ivy from cuttings is cost-effective and lets you expand your collection without buying new plants.
- Eco-Friendly: Propagating plants at home reduces the environmental impact associated with store-bought plants.
- Decorative: Ivy is versatile and enhances the aesthetic of both indoor and outdoor spaces. You can grow it as a trailing plant, ground cover, or climber.
- Therapeutic: The process of propagation is relaxing and rewarding, allowing you to reconnect with nature.
Final Tips
Propagating ivy can seem daunting at first, but once you try it, you’ll find it simple and rewarding. Enjoy watching your cuttings grow, and don’t hesitate to experiment with different varieties of ivy. Try using these methods on other plants as well, as many houseplants and garden plants respond well to similar propagation techniques.
Conclusion: Turn One Ivy Plant into Many!
Propagation is not only practical but also a wonderful way to deepen your connection to gardening. Ivy plants are durable, beautiful, and easy to propagate, making them ideal for beginners and experienced gardeners alike. So, gather your cuttings, follow these steps, and soon you’ll have a lush, green collection of ivy plants to enjoy and share.