
Geraniums are among the most popular flowering plants, cherished for their colorful blooms, versatility, and ease of care. Whether you are a seasoned gardener or just starting, propagating geraniums can be a fun and rewarding project that allows you to expand your garden or fill your balcony with these beautiful flowers. In this article, we’ll delve into the different methods of propagating geraniums, tips for successful growth, and how to care for them to ensure a stunning display all season long.
The Allure of Geraniums
Before diving into the propagation process, let’s take a moment to appreciate why geraniums are such a beloved choice among gardeners. Known for their vibrant colors—ranging from reds and pinks to purples and whites—geraniums can brighten up any space. They are perennial in many regions, hardy, and can thrive in pots, hanging baskets, or garden beds. Furthermore, geraniums are relatively low-maintenance, making them ideal for busy gardeners.
Benefits of Propagating Geraniums
- Cost-Effective: Propagating your own geraniums allows you to save money compared to purchasing new plants from a nursery.
- Variety: If you have a specific geranium variety you love, propagating from it ensures you have more of that particular type in your garden.
- Satisfaction: There’s something incredibly satisfying about nurturing a plant from cutting to full bloom. It can deepen your connection to gardening and enhance your enjoyment of the process.
- Sustainability: By propagating plants instead of buying new ones, you contribute to a more sustainable gardening practice.
Now that we understand the appeal of geraniums and the benefits of propagation, let’s explore how to propagate them effectively.
Methods of Propagating Geraniums
1. Stem Cuttings
This is the most common and straightforward method for propagating geraniums. Here’s a step-by-step guide to getting started:
Materials Needed:
- Healthy geranium plant
- Clean, sharp scissors or pruning shears
- Small pots or containers
- Well-draining potting mix (a mix of potting soil and perlite is ideal)
- Water
- Plastic bags or a clear plastic dome (for humidity)
Steps:
- Select a Healthy Parent Plant: Choose a healthy geranium that is thriving. Look for a plant with plenty of new growth.
- Take Cuttings: Using clean scissors, snip off 3-4 inch (7-10 cm) stems just below a leaf node. Avoid taking cuttings from flowers or buds; focus on stems with new growth.
- Prepare the Cuttings: Remove the lower leaves from each cutting, leaving only a few leaves at the top. This helps to minimize moisture loss.
- Allow Cuttings to Callous: Place the cuttings in a dry, shaded area for a few hours. This allows the cut ends to callous over, which helps prevent rot once they are planted.
- Plant the Cuttings: Fill small pots with the well-draining potting mix. Insert the calloused end of each cutting into the soil, burying it about an inch deep. Water lightly to settle the soil around the cutting.
- Create a Humid Environment: Cover the pots with plastic bags or a clear plastic dome to maintain humidity. This helps the cuttings retain moisture while they root.
- Provide Indirect Light: Place the pots in a location with bright, indirect sunlight. Direct sun can scorch the cuttings, so ensure they are protected.
- Water Regularly: Check the soil moisture regularly. Keep it slightly moist but avoid overwatering, as this can lead to rot.
- Transplant Once Established: After a few weeks, gently tug on the cuttings to check for roots. If you feel resistance, the cuttings have likely rooted. Once established, transplant them into larger pots or directly into your balcony containers.
2. Leaf Cuttings
Another method of propagation is through leaf cuttings, which can also yield healthy plants.
Steps:
- Select Healthy Leaves: Choose mature, healthy leaves from the parent plant.
- Prepare the Leaves: Cut the leaf into sections, ensuring each piece has a vein or stem attached.
- Callous and Plant: Allow the leaf sections to callous for a few hours before placing them in a potting mix. Bury the vein end in the soil.
- Maintain Humidity and Light: Follow the same humidity and light guidelines as with stem cuttings.
- Watch for Roots: Just like stem cuttings, be patient as roots develop. This method may take a little longer but can be equally successful.
3. Division
If you have a mature geranium plant that has grown quite large, division is another effective method.
Steps:
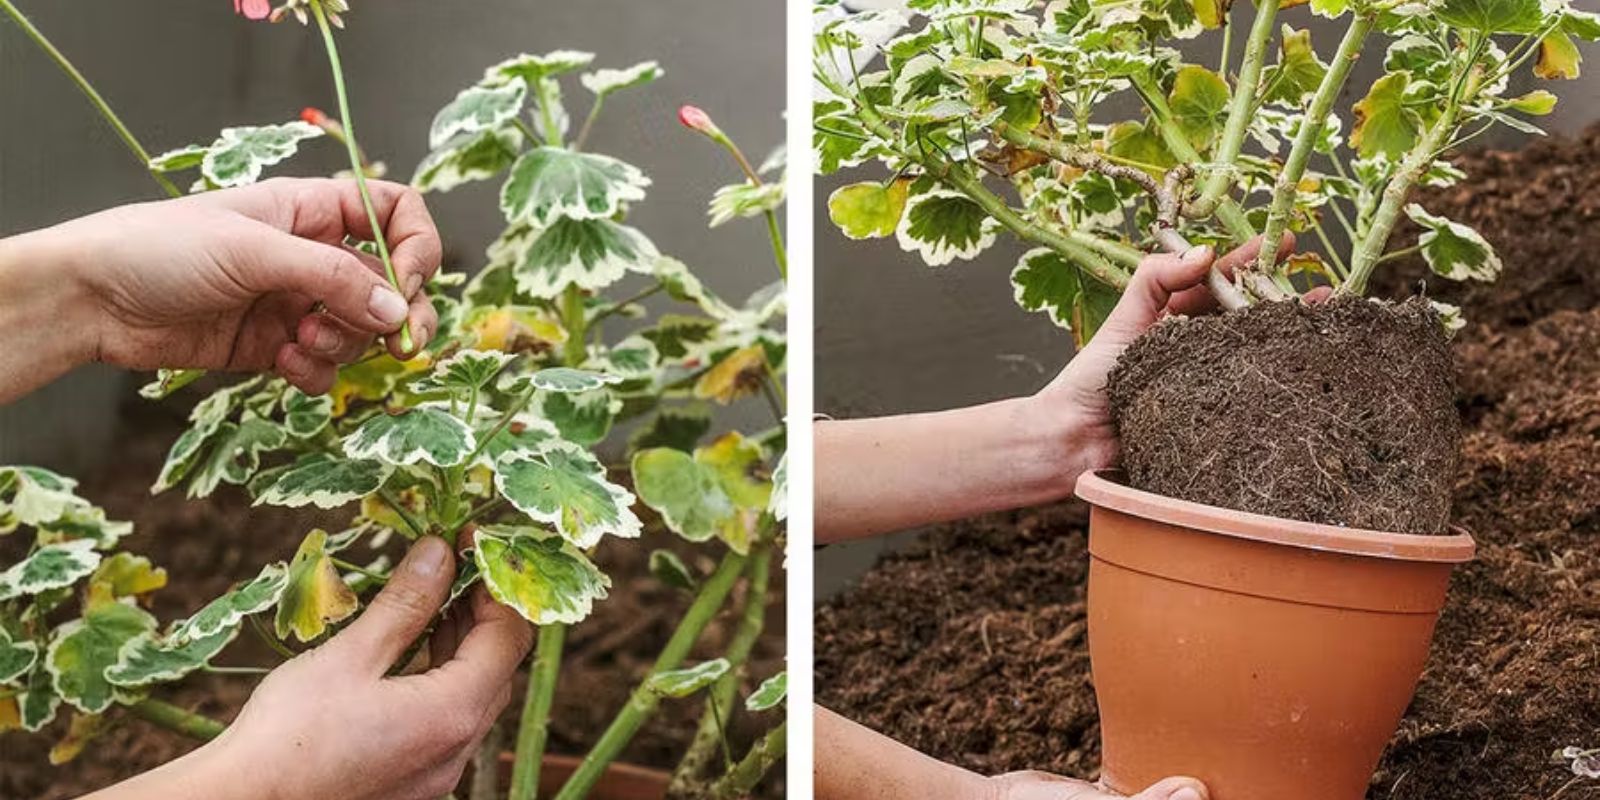
- Remove the Plant: Gently take the entire geranium plant out of its pot or the ground.
- Divide the Roots: Using clean hands or a garden spade, carefully separate the plant into smaller sections, ensuring each section has roots and stems.
- Replant: Replant each divided section into fresh potting mix in new pots or garden beds, ensuring they are well-watered.
- Care for Divided Plants: Follow the same care guidelines as for newly propagated plants.
Caring for Your Propagated Geraniums
Once you have successfully propagated your geraniums, caring for them is crucial to ensure they thrive.
1. Light Requirements
Geraniums love sunlight and should receive at least 6 hours of direct sunlight daily. If you are growing them indoors, place them near a sunny window. For outdoor plants, ensure they are in a sunny spot on your balcony or garden.
2. Watering
Water your geraniums regularly, allowing the top inch of soil to dry out between waterings. Overwatering can lead to root rot, while underwatering can cause wilting.
3. Fertilizing
Feed your geraniums with a balanced, water-soluble fertilizer every four to six weeks during the growing season. This will promote healthy growth and vibrant blooms.
4. Pruning and Deadheading
To encourage bushier growth and more blooms, pinch back the tips of the stems. Deadhead spent flowers to encourage new blooms and prevent the plant from going to seed.
5. Pest Control
Keep an eye out for pests such as aphids and spider mites. If you notice any infestations, treat them with insecticidal soap or neem oil.
The Joy of a Flower-Filled Balcony
Imagine stepping onto your balcony to be greeted by a vibrant display of colorful geraniums swaying gently in the breeze. Propagating geraniums not only allows you to beautify your outdoor space but also fosters a deeper connection to nature and gardening.
Motivational Conclusion
Now that you know how to propagate geraniums, it’s time to roll up your sleeves and get started! With a little patience and care, you can create a stunning floral display that will brighten your balcony for months to come. Share your propagation journey and blooming successes with fellow gardening enthusiasts! 🌼✨
Hashtags for Interaction: #GeraniumGoals #BalconyBlooms #PlantPropagation #GardeningJoy #FlowerPower #GardenInspiration #GreenThumb
By following these steps and tips, you can successfully propagate geraniums and enjoy the beauty they bring to your space. Happy gardening!