
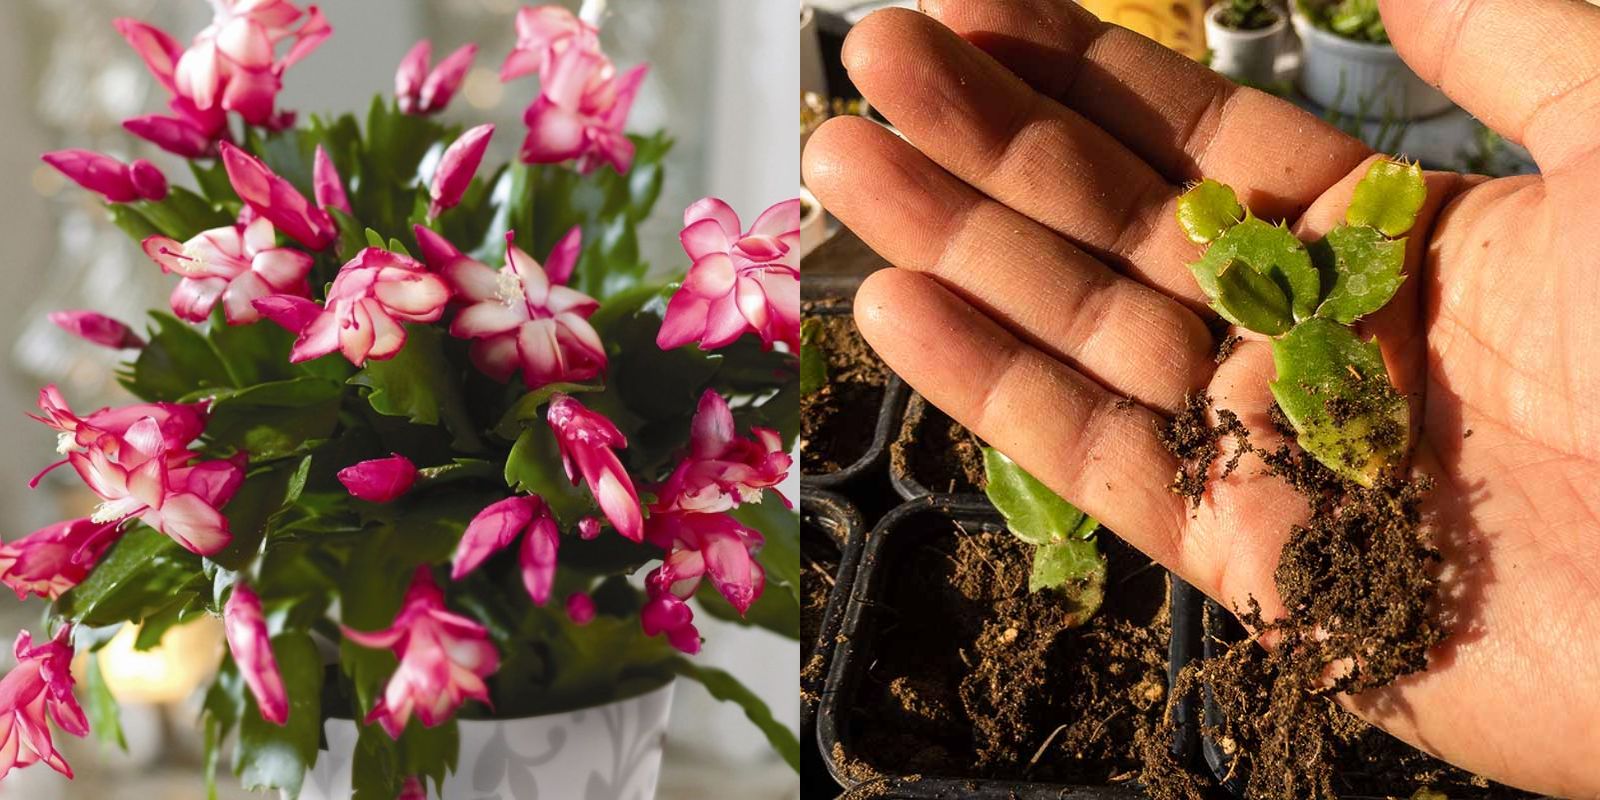
The Christmas cactus, scientifically known as Schlumbergera, is a popular houseplant appreciated for its vibrant, tubular flowers that bloom in shades of pink, red, and white during the winter months. Unlike most cacti, which thrive in dry, arid environments, the Christmas cactus originates from the lush, tropical forests of Brazil, where it grows in the understory of trees. This unique background contributes to its distinctive growth habits and care requirements.
One of the most rewarding aspects of owning a Christmas cactus is the ability to propagate it easily. Propagation not only allows you to expand your collection but also lets you share this beautiful plant with friends and family. This article will guide you through the steps to propagate and grow a Christmas cactus successfully.
Understanding the Christmas Cactus
Before diving into propagation, it’s essential to understand the Christmas cactus’s characteristics. Unlike traditional cacti, the Christmas cactus has flat, segmented stems and blooms in the winter, hence its name. It prefers a more humid environment and indirect light, making it an ideal indoor plant. The propagation process is straightforward and can be done using stem cuttings, which root easily and grow into new plants.
Benefits of Propagating Christmas Cacti
- Cost-Effective: Propagating your own plants saves you money compared to purchasing new ones.
- Gifting: Sharing propagated plants is a thoughtful gift for friends and family who appreciate gardening.
- Plant Diversity: Propagation allows you to experiment with different growing conditions and soil mixes, leading to diverse growth experiences.
Tools and Materials Needed
Before you start, gather the following tools and materials:
- Sharp Scissors or Pruning Shears: For taking cuttings.
- Potting Mix: A well-draining potting mix, preferably formulated for cacti or succulents.
- Small Pots or Containers: To house the cuttings.
- Water: For watering the cuttings.
- Labels (Optional): To keep track of different varieties.
Step-by-Step Guide to Propagating Christmas Cactus
Step 1: Choose a Healthy Parent Plant
Start by selecting a healthy, mature Christmas cactus. Look for one with vibrant green stems and no signs of pests or diseases. A robust parent plant ensures that your cuttings will have the best chance of success.
Step 2: Take Cuttings
Using sharp, clean scissors or pruning shears, take cuttings from the parent plant. Choose segments that are at least 2-4 inches long, ensuring each cutting has two to three segments. Make the cut cleanly at a joint or segment of the stem to encourage rooting.
Step 3: Let the Cuttings Dry
After taking your cuttings, allow them to dry for a few hours or overnight in a warm, dry location. This drying period is crucial as it helps form a callus over the cut end, reducing the risk of rot when planted.
Step 4: Prepare the Soil
While the cuttings are drying, prepare your potting mix. Use a well-draining potting mix to prevent water from accumulating around the roots. If you prefer, you can create your own mix using equal parts of potting soil, perlite, and sand.
Step 5: Plant the Cuttings
Once the cuttings have dried, it’s time to plant them. Fill your small pots with the prepared potting mix, leaving about an inch of space at the top. Insert the dried cuttings into the soil about an inch deep, ensuring they are standing upright. Make sure not to overcrowd the pot if you are planting multiple cuttings.
Step 6: Water Sparingly
After planting, lightly water the cuttings. The soil should be moist but not soggy. Allow the soil to dry out between waterings, as overwatering can lead to root rot. A general rule of thumb is to water every two to three weeks, depending on humidity and temperature.
Step 7: Provide Indirect Light
Place the pots in a location with bright, indirect light. Direct sunlight can scorch the delicate cuttings, while too little light can hinder their growth. A north or east-facing window is often ideal.
Step 8: Monitor Growth
Be patient! It may take several weeks for roots to develop. During this time, keep an eye on the moisture levels and light exposure. If you notice any signs of wilting or yellowing, adjust your watering schedule accordingly.
Step 9: Transplanting (Optional)
Once your cuttings have rooted and new growth appears, you can transplant them into larger pots if desired. This step is optional, as the cuttings can thrive in their original containers for quite some time. If you choose to transplant, be gentle to avoid damaging the roots.
Caring for Your Christmas Cactus
Once your Christmas cactus has established roots, it requires ongoing care to flourish. Here are some essential tips to keep your plant healthy:
Light Requirements
As mentioned earlier, the Christmas cactus thrives in bright, indirect light. Too much direct sunlight can lead to leaf burn, while too little light may prevent blooming.
Watering Schedule
Adjust your watering schedule based on the season. During the growing season (spring and summer), water when the top inch of soil feels dry. In fall and winter, reduce watering, especially when the plant is in bloom.
Fertilization
Fertilize your Christmas cactus every month during the growing season with a balanced liquid fertilizer diluted to half strength. Avoid fertilizing during the dormant winter months.
Humidity Levels
The Christmas cactus prefers a humid environment. To increase humidity, you can mist the plant occasionally or place a small humidifier nearby.
Pruning
After blooming, consider pruning your Christmas cactus to encourage bushier growth. You can cut back a few segments, which will also provide you with additional cuttings for propagation.
Common Problems and Solutions
1. Yellowing Leaves
Yellow leaves may indicate overwatering or poor drainage. Ensure your potting mix is well-draining and adjust your watering schedule accordingly.
2. Lack of Blooms
If your Christmas cactus fails to bloom, it may not be getting enough light or may need a cooler rest period. Ensure it receives adequate light and consider placing it in a cooler room (around 50-60°F) for a few weeks before blooming.
3. Pests
Watch out for common pests such as spider mites, mealybugs, and scale. If you notice any pests, remove them with a damp cloth or use insecticidal soap to treat the plant.
Conclusion
Propagating and growing a Christmas cactus is a rewarding and fulfilling gardening experience. By following the steps outlined in this guide, you can successfully propagate your own plants and enjoy their stunning blooms for years to come. Whether you’re sharing cuttings with friends or expanding your own collection, the Christmas cactus offers beauty and joy during the holiday season and beyond.
So, gather your supplies, select a healthy parent plant, and start your propagation journey today! Happy gardening! 🌵✨
Feel free to share your propagation successes and tips with fellow plant lovers using the hashtags #ChristmasCactus #PropagationJourney #IndoorGardening #GreenThumbs!