
Gardenias are among the most admired flowering plants, famous for their intoxicating fragrance and glossy foliage. While buying a fully grown gardenia from a nursery is one way to add this beauty to your home, propagating gardenias from cuttings is a budget-friendly and rewarding option. This comprehensive guide will walk you through the process of propagating gardenias step by step and provide essential tips for their care.
The Appeal of Gardenias
Gardenias belong to the Rubiaceae family and are native to tropical and subtropical regions. Their creamy white flowers have a strong, pleasant scent that can fill a garden or room with a soothing aroma. Whether grown indoors or outdoors, gardenias are a symbol of elegance. However, their reputation for being a little fussy in care makes propagation even more satisfying.
Step-by-Step Guide to Propagate Gardenias from Cuttings
1. Choose the Right Time
Propagation success rates are highest when gardenias are actively growing. Late spring to early summer is the ideal time to take cuttings.
2. Select a Healthy Cutting
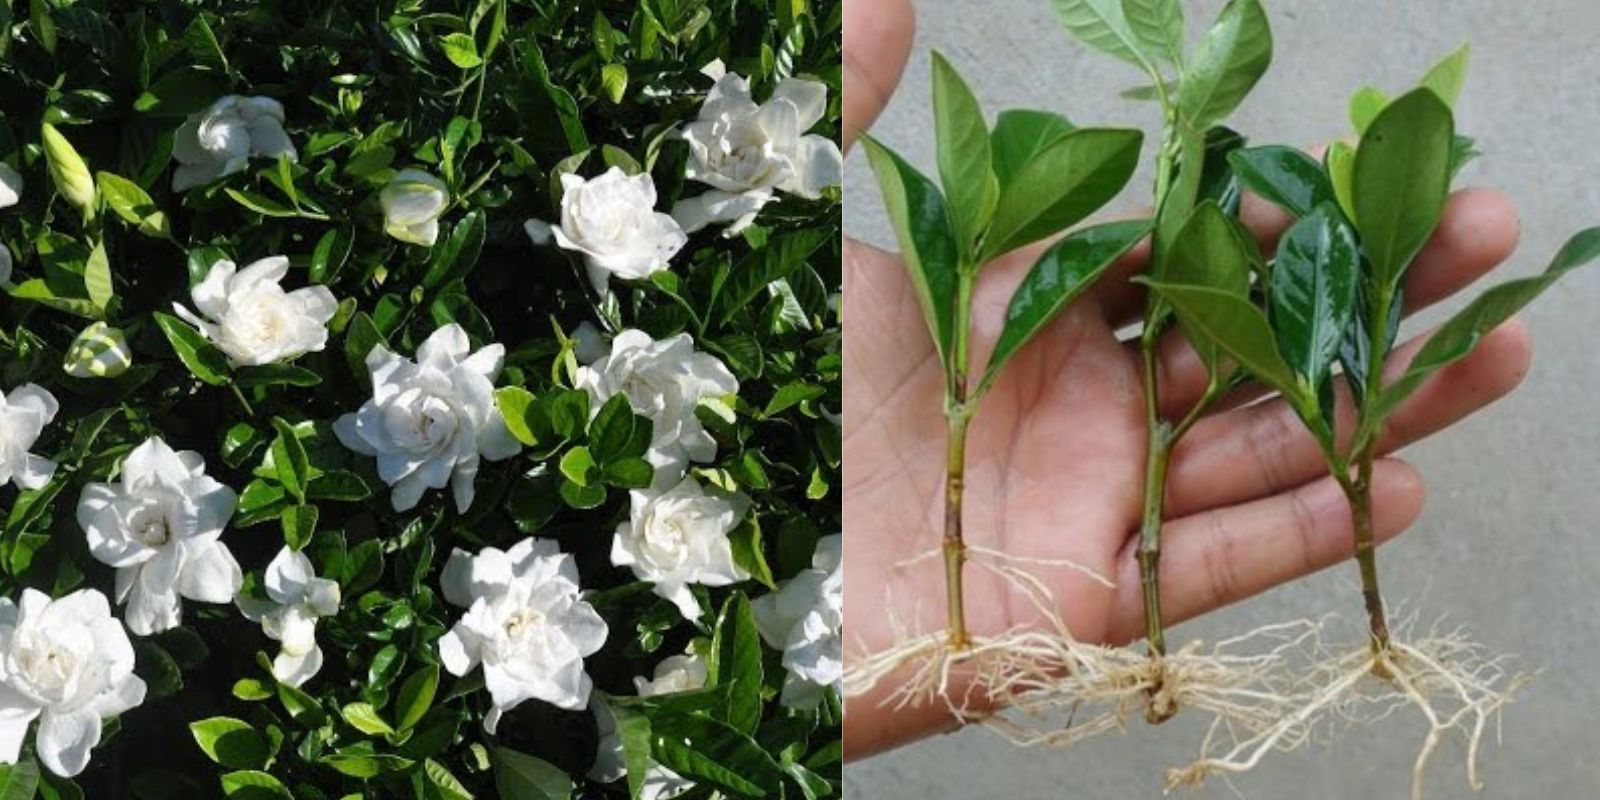
- Find a semi-hardwood stem from a mature, healthy gardenia plant. Semi-hardwood stems are neither too green nor fully woody.
- Cut a 4-6 inch section just below a leaf node (the point where leaves emerge).
3. Prepare the Cutting
- Remove the lower leaves, leaving only 2-3 leaves at the top.
- Trim any flower buds or blooms from the cutting to allow the plant to focus its energy on root development.
- Dip the cut end into a rooting hormone to stimulate root growth.
4. Prepare the Soil and Pot
- Use a small pot with good drainage holes.
- Fill it with a well-draining soil mix, such as a combination of peat moss and perlite or coarse sand.
- Moisten the soil lightly but avoid making it soggy.
5. Plant the Cutting
- Create a small hole in the soil and insert the cutting 1-2 inches deep.
- Press the soil gently around the cutting to secure it in place.
6. Create a Humid Environment
- Cover the pot with a clear plastic bag or a plastic dome to trap humidity.
- Ensure the plastic does not touch the leaves to prevent mold growth. You can use small stakes to create a tent-like structure.
7. Provide Proper Lighting
- Place the pot in a location with bright, indirect sunlight.
- Avoid exposing the cutting to direct sunlight, as it can dry out the tender leaves.
8. Maintain Moisture
- Check the soil regularly to ensure it stays moist but not waterlogged.
- Mist the leaves occasionally to maintain humidity, especially if the air in your home is dry.
9. Be Patient
- Roots typically start forming within 4-6 weeks.
- Gently tug the cutting after a month to see if there’s resistance, indicating root development.
10. Transplanting
- Once the cutting has developed a robust root system, it’s ready to be transplanted into a larger pot or directly into the garden.
Caring for Your Gardenias
After successful propagation, proper care is essential to keep your gardenia thriving.
1. Soil Requirements
Gardenias prefer acidic soil with a pH of 5.0-6.0. Using a potting mix designed for acid-loving plants like azaleas or camellias is a great choice.
2. Light
Gardenias thrive in bright, indirect sunlight. Outdoors, they prefer morning sun and afternoon shade. Indoors, place them near a window with filtered light.
3. Watering
- Gardenias need consistent moisture but dislike soggy soil.
- Water when the top inch of soil feels dry to the touch.
- Use rainwater or distilled water if possible, as hard tap water can cause leaf discoloration.
4. Humidity
Gardenias are humidity-loving plants. Indoors, use a humidifier or place a tray of water near the plant to increase moisture in the air.
5. Fertilization
Feed your gardenia every 4-6 weeks during its active growing season with a fertilizer formulated for acid-loving plants. Look for fertilizers with balanced amounts of nitrogen, phosphorus, and potassium.
6. Pruning
Prune gardenias after blooming to maintain their shape and encourage new growth. Remove any dead or yellowing leaves to improve the plant’s overall health.
7. Pest and Disease Management
Common pests like aphids, mealybugs, and spider mites can affect gardenias. Regularly inspect the plant and use insecticidal soap or neem oil if necessary.
Tips for Thriving Gardenias
- Mulching: Adding a layer of mulch around the base of the plant can help retain moisture and regulate soil temperature.
- Temperature: Gardenias thrive in temperatures between 65°F-75°F (18°C-24°C). Protect them from sudden temperature fluctuations.
- Repotting: Repot your gardenia every 2-3 years or when it outgrows its pot to ensure healthy root development.
Benefits of Propagating Gardenias
- Cost-Effective: Growing gardenias from cuttings is much cheaper than buying mature plants.
- Satisfaction: Watching a plant grow from a small cutting to a flourishing beauty is immensely gratifying.
- Eco-Friendly: Propagation helps reduce waste and promotes a sustainable gardening practice.
Common Challenges and How to Overcome Them
1. Yellowing Leaves
- Cause: Overwatering, poor drainage, or alkaline soil.
- Solution: Adjust watering habits, ensure proper drainage, and check soil pH.
2. Wilting or Browning Tips
- Cause: Low humidity or underwatering.
- Solution: Increase humidity and water consistently.
3. No Blooms
- Cause: Insufficient light or improper fertilization.
- Solution: Ensure the plant gets bright, indirect sunlight and use a fertilizer designed for blooming plants.
Final Thoughts
Propagating gardenias from cuttings is a fulfilling way to expand your plant collection and enjoy the beauty of this stunning species. With patience and the right care, you can turn a single cutting into a thriving gardenia that graces your space with its fragrant blooms.
💬 Have you tried propagating gardenias before? Share your experiences and tips in the comments!
Hashtags:
#GardeniaPropagation #GrowYourOwn #FragrantBlooms #PlantParentLife #HomeGardening #GardeniaCare #PropagationTips #GardeningLove #PlantLovers #Houseplants 🌱