
Orchids are among the most beautiful and captivating plants, but they can also be challenging to propagate. However, with a simple, natural, and cost-effective method—using a banana peel—propagating an orchid becomes an easy and accessible task for both novice and experienced gardeners. In this article, we will explore how you can successfully propagate orchids using a banana peel, step-by-step, with the help of a few essential tips and tricks.
Why Propagate Orchids?
Before diving into the banana peel method, let’s first explore the benefits of orchid propagation. Orchids, especially the popular Phalaenopsis species, are relatively expensive to buy. Propagating your orchids not only helps you grow more plants for your home but also gives you the opportunity to share the beauty of orchids with friends and family. Additionally, propagation is a fun and educational process that allows you to understand your plants better and build a deeper connection with them.
While many methods of orchid propagation, such as using keikis (young plants that grow on the flower spike), involve specific tools and patience, using a banana peel to propagate orchids is a straightforward and organic approach that anyone can try.
The Benefits of Using Banana Peels in Gardening
Banana peels have long been used as a natural fertilizer in gardening due to their high nutrient content. They are rich in potassium, phosphorus, calcium, and magnesium—minerals that are essential for plant growth and development. The peel’s natural properties are ideal for encouraging the rooting and growth of plants. Banana peels are also full of antioxidants and enzymes that help support the growth of new roots and shoots in orchids.
Moreover, using a banana peel for propagation is an eco-friendly alternative to chemical rooting hormones, which are often used in traditional propagation methods. This method utilizes a readily available, biodegradable resource that is free from harmful chemicals, making it a perfect choice for gardeners who prefer organic solutions.
What You’ll Need:
Before you begin the process, gather the following supplies:
- A ripe banana (preferably organic if possible)
- Orchid cutting (a healthy stem or keiki)
- Small pot or container
- Orchid potting mix or well-draining soil
- Scissors or pruning shears
- A clear plastic bag or plastic wrap (optional, to create a humid environment)
Step-by-Step Guide to Propagating Orchids Using a Banana Peel
1. Prepare Your Orchid Cutting
The first step in propagating your orchid is to obtain a healthy cutting. You can propagate orchids using either a healthy flower spike, a keiki (young plant), or a stem with visible nodes where roots will develop.
- Flower Spike Method: Cut a healthy flower spike close to the base of the plant, ensuring you leave a few nodes on the spike. A node is a small bump or protrusion from which new roots will form.
- Keiki Method: If your orchid is producing a keiki (a baby orchid that grows on the flower spike), carefully remove it by cutting the spike just below the keiki. This is a great way to propagate orchids, especially Phalaenopsis, which tend to produce keikis easily.
- Stem Method: If you’re working with a stem, ensure it’s strong and healthy and that the node is clearly visible for the roots to develop from.
Once your cutting is ready, gently clean it with water to remove any dirt or debris, and allow it to dry for a few hours.
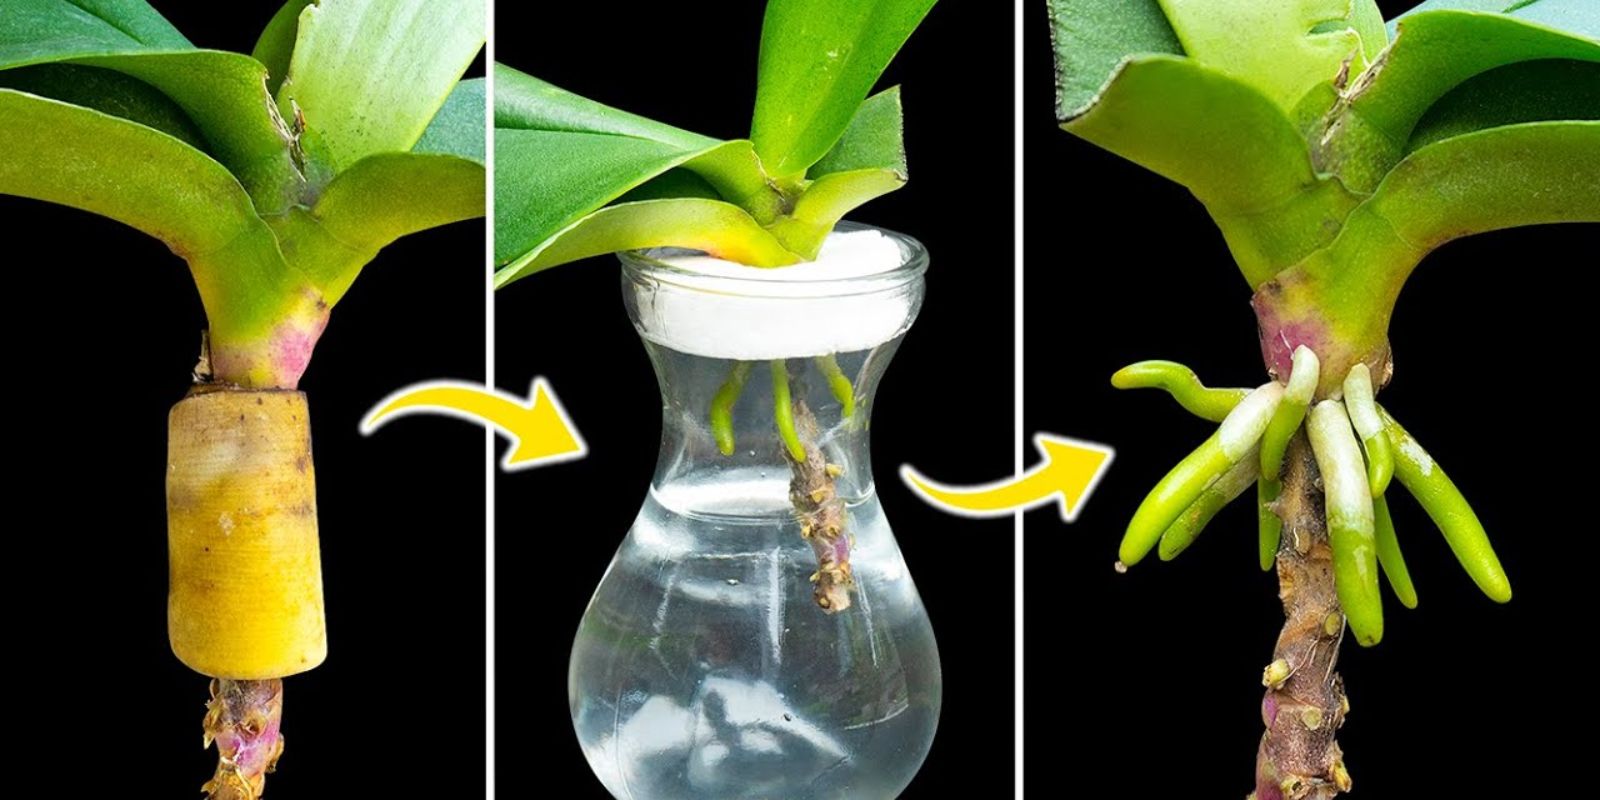
2. Prepare the Banana Peel
Next, take your ripe banana peel and cut it into small, manageable pieces. The peel needs to be in direct contact with the orchid cutting for the propagation process to be successful.
The reason why banana peels work so well is that they are rich in potassium, which stimulates root growth. Cut the banana peel into strips or small chunks that will fit into the bottom of your pot. You don’t need to remove the peel’s skin, as the nutrients and growth-promoting elements are contained within the peel itself.
3. Set Up the Pot and Soil
Choose a small pot that is slightly larger than the orchid cutting you’re planning to propagate. The pot should have drainage holes to prevent water from accumulating at the bottom, which could lead to root rot. If you don’t have orchid potting mix, you can use a well-draining soil mix that is suitable for orchids. Orchid roots need good airflow and drainage to thrive, so make sure the mix you use has good aeration.
Place a layer of soil at the bottom of the pot, and then add the pieces of banana peel to the soil. Arrange the banana peel pieces evenly so that they cover the bottom of the pot. This will create a nutrient-rich foundation for your orchid cutting.
4. Plant the Orchid Cutting
Now, place your orchid cutting into the pot, making sure that the node of the cutting is in contact with the banana peel pieces. The node is the part of the orchid cutting where new roots will sprout, so it’s important to ensure good contact with the nutrients in the peel.
Once the cutting is placed in the pot, fill the pot around the cutting with more orchid mix or well-draining soil. Be sure not to cover the node completely with soil, as this may hinder root development. Lightly pat the soil around the cutting to ensure it is firm and stable.
5. Create a Humid Environment
Orchids thrive in humid environments, so it’s essential to create a mini greenhouse effect for your new cutting. Place the pot in a location with indirect light, and cover the pot with a clear plastic bag or plastic wrap. This will help trap moisture around the cutting, which is necessary for root growth.
Ensure that the plastic cover does not touch the cutting directly, as this could cause rot. Instead, create a few small holes in the plastic to allow some airflow while maintaining humidity.
6. Monitor and Maintain Humidity
Over the next few weeks, monitor the humidity and temperature around the cutting. Orchids typically require high humidity levels (around 50-70%) for successful rooting. Check the soil moisture regularly—keep it moist but not soggy. Water the cutting only when the soil begins to dry out.
After a few weeks, you should start to see small roots emerging from the node where the banana peel was placed. The rooting process can take anywhere from 4 to 8 weeks, depending on the type of orchid and the environment.
7. Transplant Your Orchid
Once your orchid cutting has developed healthy roots, it’s time to transplant it into a larger pot with well-draining orchid mix. Remove the cutting carefully from the original pot, and plant it into the new container. Water the plant thoroughly and place it in a spot with indirect sunlight to help it acclimate.
Final Tips and Tricks for Success
- Patience is Key: Orchid propagation using banana peels is a natural process, so don’t expect instant results. It may take several weeks for roots to develop, but with consistent care, your orchid cutting will take root.
- Light Requirements: After transplanting your propagated orchid, be sure to place it in a spot with bright, indirect light. Direct sunlight can scorch the leaves, so it’s best to keep it in a shaded area or near a window with filtered light.
- Maintain Proper Temperature: Orchids generally prefer temperatures between 65°F and 75°F (18°C and 24°C). Keep your propagated orchid in a warm environment to encourage faster growth.
- Avoid Overwatering: Orchids are sensitive to overwatering, so always check that the soil has proper drainage, and only water when the soil feels dry.
Conclusion
Propagating orchids using a banana peel is a simple, sustainable, and effective method for growing new orchids at home. With minimal effort and a few basic supplies, you can enjoy the process of watching your orchid cutting grow into a beautiful new plant. Not only is this an affordable way to propagate orchids, but it’s also an eco-friendly approach that uses a common household item.
So, next time you finish a banana, don’t toss the peel—use it to propagate your orchids and watch your garden grow! Happy gardening! 🌸
#OrchidPropagation #BananaPeelGardening #PlantPropagation #EcoFriendlyGardening #SustainableGardening #OrchidLovers #HomeGardening