
Introduction
Abutilon, commonly known as the “Flowering Maple,” is a stunning plant known for its vibrant, bell-shaped flowers that come in various hues, including red, orange, yellow, and pink. These plants make a great addition to any garden due to their striking blooms and bushy appearance. If you’ve fallen in love with the Abutilon in your garden or a friend’s home, you’ll be happy to know that it’s relatively easy to propagate the plant from cuttings. Propagating Abutilon from cuttings is not only an affordable way to grow more plants, but it’s also a rewarding gardening activity that can expand your collection and allow you to share this beautiful plant with others. In this article, we will explore the process of propagating Abutilon from cuttings, providing you with all the necessary information and tips to succeed.
Why Propagate Abutilon from Cuttings?
Before diving into the steps, let’s discuss why propagating Abutilon from cuttings is a great option:
- Cost-Effective: Instead of purchasing new plants, propagating your own Abutilon cuttings can save you money. All you need are a few healthy stems, and you’ll have multiple new plants at no additional cost.
- Grow More of Your Favorite Plants: If you already have a beloved Abutilon in your garden or home, propagating from cuttings is a way to ensure you can continue growing and enjoying your favorite varieties.
- Gift for Friends and Family: By propagating Abutilon, you can share your love for gardening and give away plants to friends and family. It’s a thoughtful and personal gift that brings beauty to their homes as well.
- Maintain Desired Traits: When you propagate Abutilon from cuttings, you are able to maintain the traits of the original plant, such as flower color and plant size, ensuring that your new plant will have the same characteristics.
Materials Needed for Abutilon Propagation
Before you get started, make sure you have the following materials ready:
- Healthy Abutilon Plant: Choose a mature and healthy plant to take cuttings from. Ensure that the plant is free of pests and diseases.
- Pruning Shears or Sharp Scissors: You’ll need a pair of clean, sharp pruning shears or scissors to make precise cuts without damaging the plant.
- Rooting Hormone (Optional): While not necessary, a rooting hormone can help encourage faster root development and increase your chances of success.
- Small Pots: Have a few small pots ready to place the cuttings in once they are taken from the parent plant.
- Well-Draining Potting Mix: Use a light, well-draining potting mix. A mix designed for cuttings or seedlings works well.
- Plastic Bag or Propagation Dome: To create a humid environment, which will help the cuttings establish roots more easily, you’ll need a clear plastic bag or a propagation dome to cover the pots.
- Watering Can or Spray Bottle: You’ll need to water the cuttings and keep them moist during the rooting process.
- Optional: A humidity tray to help maintain moisture around the cuttings.
Step-by-Step Guide to Propagating Abutilon from Cuttings
Step 1: Choose the Right Time to Take Cuttings
The best time to take Abutilon cuttings is during the spring or early summer. This is when the plant is actively growing, and the cuttings are most likely to root successfully. Avoid taking cuttings during the plant’s dormant period in the winter, as rooting is less likely to occur.
Step 2: Select Healthy Stems for the Cuttings
When selecting stems to take cuttings from, choose healthy, non-flowering branches that are firm but not too woody. A cutting taken from a non-flowering stem will focus its energy on growing roots rather than trying to flower.
Aim for a cutting that is about 4 to 6 inches long. Ensure that it has at least two to three sets of leaves, as this will help with photosynthesis and provide enough energy for the cutting to grow.
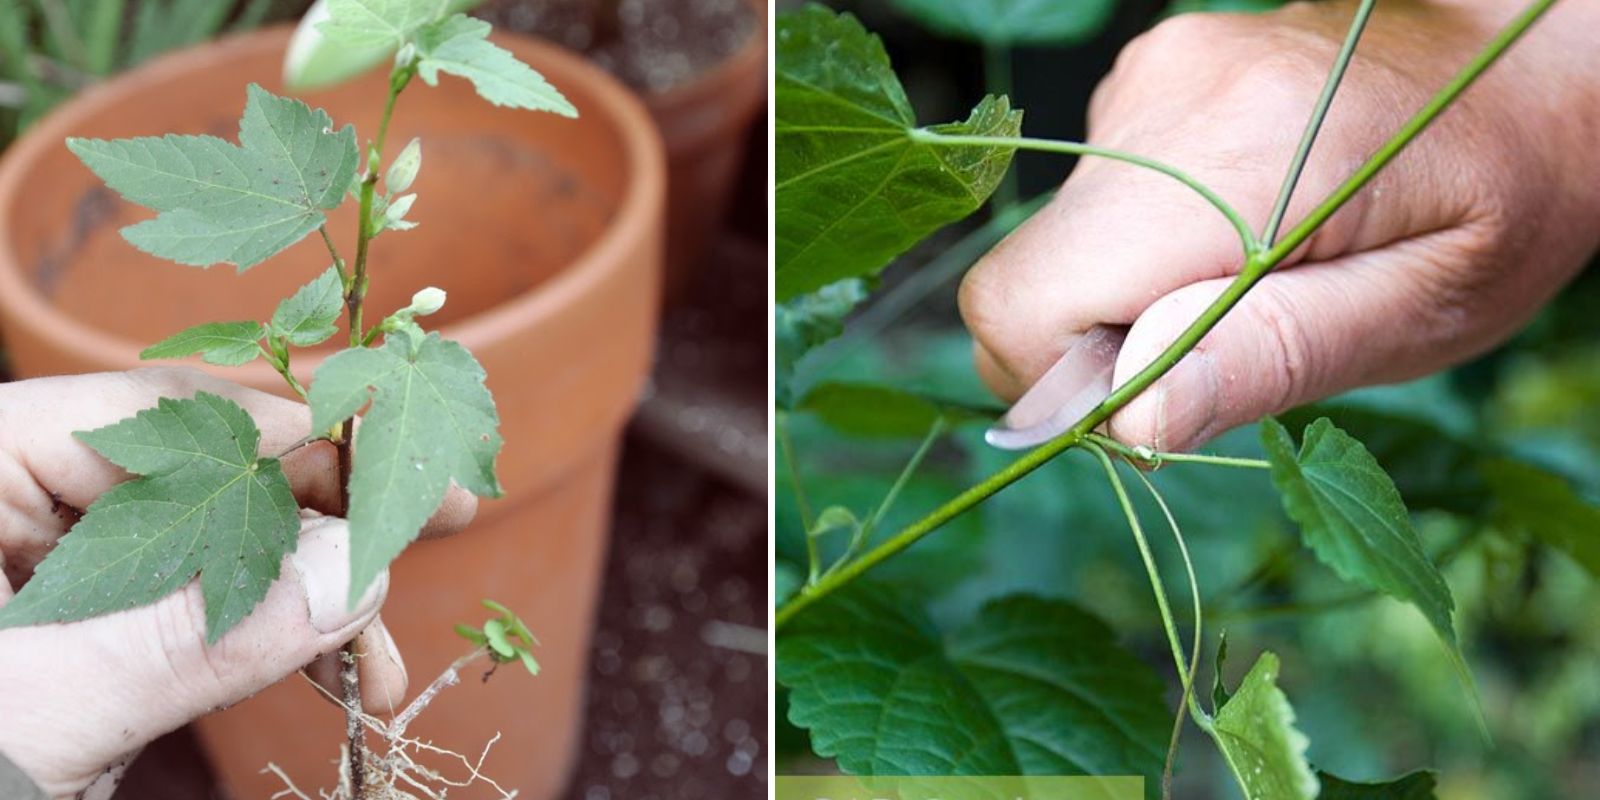
Step 3: Prepare the Cutting
Using clean, sharp pruning shears or scissors, take the cutting from the parent plant. Make a clean, angled cut just below a node, which is the point where leaves emerge from the stem. Be sure to remove any leaves from the lower portion of the cutting to expose the stem, leaving only one or two leaves at the top.
Step 4: Optional: Apply Rooting Hormone
While it’s optional, applying rooting hormone to the cut end of the stem can speed up the rooting process. Rooting hormone encourages the development of roots and increases the success rate of the cutting. Dip the cut end of the stem into the hormone, tapping off any excess powder.
Step 5: Plant the Cutting in Potting Mix
Take a small pot and fill it with a well-draining potting mix. Using a pencil or stick, make a hole in the center of the potting mix, and gently insert the cutting into the hole. Press the soil around the cutting to ensure it is secure. Water thoroughly to settle the soil around the cutting.
Step 6: Create a Humid Environment
Cover the cutting with a clear plastic bag or place it in a propagation dome to create a mini greenhouse effect. This helps retain moisture and humidity, which is essential for the rooting process. Be sure that the plastic doesn’t touch the cutting itself, as this can encourage mold or rot. If necessary, prop the bag or dome up with sticks to create some space.
Step 7: Place the Cutting in an Ideal Location
Place the pot with the cutting in a warm, bright location with indirect sunlight. Avoid direct sunlight, as it can cause the cutting to overheat and dry out. The temperature should ideally be between 65°F and 75°F (18°C to 24°C) for optimal rooting conditions.
Step 8: Keep the Soil Moist
Check the soil regularly to ensure it remains moist, but not soggy. Overwatering can cause the cutting to rot, so it’s important to maintain a balance. You can also lightly mist the cutting with water to keep humidity levels high. If using a plastic bag, you may need to vent it occasionally to prevent excess moisture from building up.
Step 9: Monitor for Root Development
After 4 to 6 weeks, the cutting should begin to root. Gently tug on the cutting to see if it resists, which indicates that roots have developed. If the cutting hasn’t rooted yet, give it more time and keep the environment stable.
Step 10: Transplant the Rooted Cutting
Once the cutting has developed roots, it is time to transplant it into a larger pot with regular potting mix or directly into the garden if the outdoor temperature is warm enough. Gently remove the cutting from the pot and carefully plant it in the new location, ensuring the roots are not disturbed. Water well and keep the plant in a sheltered area for a week or two to help it acclimate to its new environment.
Conclusion Propagating Abutilon from cuttings is a simple and rewarding process that allows you to expand your plant collection and share beautiful plants with friends and family. By following the steps outlined in this guide, you’ll be able to enjoy more vibrant blooms and lush foliage in your garden or home. Whether you’re a seasoned gardener or a beginner, propagating Abutilon is an accessible and fun way to grow your gardening skills.
Now that you know how to propagate Abutilon from cuttings, take the plunge and start your own propagation adventure! Happy gardening! 🌱🌸
Motivating Sentence: Share your Abutilon propagation journey with us! 🌿 Let’s grow together and fill our gardens with beauty and color! #GardeningJoy #PlantPropagation #AbutilonLove #FloweringMaple #GreenThumb #GardeningTips