
Poinsettias are synonymous with the holiday season, bringing vibrant colors and festive cheer to homes around the world. While these beautiful plants are often purchased during the winter months, did you know that you can propagate them yourself? By using simple gardening techniques, you can grow a new poinsettia plant from a cutting and enjoy its stunning display year after year. In this guide, we will walk you through the process of propagating a poinsettia from a cutting, ensuring that your holidays are filled with even more beauty in the years to come.
Why Propagate a Poinsettia?
Poinsettias are not just for the holiday season — they can be grown year-round, bringing continuous joy. Propagating a poinsettia allows you to extend its life, ensuring that the plant’s vibrant colors will continue to grace your home long after the original one has faded. It is also an affordable way to multiply your poinsettia collection and create new plants for family and friends.
When you propagate a poinsettia, you are essentially taking a small part of the original plant (a cutting) and encouraging it to develop roots so it can grow into a fully-fledged plant. The best part? You can do this without needing to buy a new plant each year. It’s a rewarding and sustainable gardening practice that can be done with just a few simple tools and materials.
What You’ll Need to Propagate a Poinsettia
Before you get started, make sure you have all the necessary materials for a successful propagation:
- Healthy Poinsettia Plant: Choose a plant that is robust with healthy stems and vibrant leaves. This will ensure your cutting is taken from a strong source.
- Sharp Scissors or Pruning Shears: These tools will make clean cuts, reducing the risk of damaging the plant and allowing for better root development.
- Rooting Hormone (Optional): While not essential, rooting hormone helps stimulate root growth and increases the success rate of propagation.
- Well-Draining Potting Soil: Choose a light, well-draining potting mix for your cutting to prevent waterlogging, which can lead to root rot.
- Small Pots or Containers: You will need small containers to plant your cuttings, preferably with drainage holes to ensure proper water flow.
- Plastic Wrap or a Clear Plastic Bag: This will help create a humid environment to encourage root growth.
- Watering Can or Spray Bottle: A gentle way to keep the soil moist without oversaturating it.
Step-by-Step Guide to Propagating Your Poinsettia
Now that you have your materials ready, it’s time to get started with the propagation process. Follow these simple steps to successfully propagate a poinsettia from a cutting:
Step 1: Choose a Healthy Poinsettia Plant
To begin the process, select a healthy poinsettia plant. Look for one with strong, vibrant stems and healthy, green leaves. A plant that is well-established will produce better cuttings than one that is struggling. Avoid choosing a plant that is showing signs of disease or damage, as this will negatively affect the success of your propagation efforts.
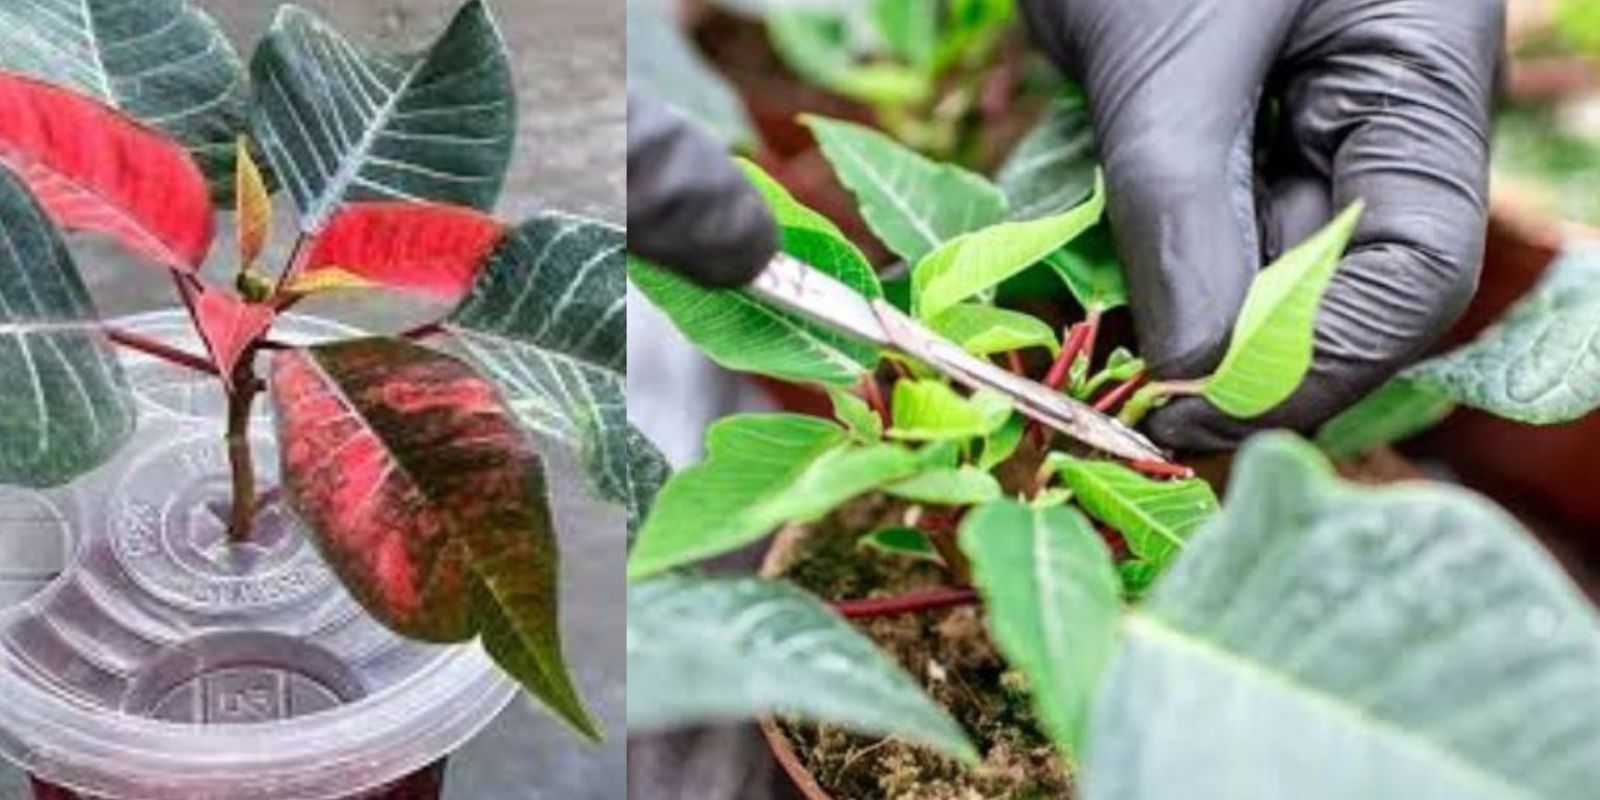
Step 2: Make the Cut
Once you’ve identified a healthy stem, use sharp scissors or pruning shears to cut a 4-6 inch piece from the tip of the stem. It’s important to make the cut just below a leaf node, which is where the leaves and new growth emerge. This is where the roots will form when the cutting is placed in soil.
Be sure to cut the stem at a clean, sharp angle to minimize damage to the plant. A clean cut reduces the risk of infection and helps the cutting establish roots more effectively.
Step 3: Prepare the Cutting
After cutting the stem, remove any leaves from the bottom 1-2 inches of the cutting to expose the stem. Leave the top 2-3 leaves intact, as these will continue to photosynthesize and support the cutting as it establishes roots.
If you choose to use rooting hormone (which is optional but can boost success rates), dip the cut end of the stem into the hormone powder. Rooting hormone encourages the growth of new roots, giving the cutting a better chance of surviving and thriving.
Step 4: Plant the Cutting
Fill a small pot or container with well-draining potting soil. It’s essential to use a soil mix that allows water to pass through easily to prevent the cutting from becoming waterlogged. Make a small hole in the center of the soil using a pencil or your finger, then gently insert the cutting into the hole, making sure the exposed part of the stem is buried about 1-2 inches deep.
After placing the cutting in the soil, gently press the soil around the base of the cutting to secure it in place. This helps remove air pockets and ensures good contact between the cutting and the soil, which is crucial for root development.
Step 5: Provide Proper Care and Environment
Once your cutting is in the pot, place it in a warm location with indirect sunlight. Direct sunlight can be too intense for the cutting and may cause it to wilt or dry out. A spot with bright, indirect light is ideal for encouraging root growth.
To promote humidity and encourage rooting, you can cover the pot with a plastic bag or plastic wrap. This creates a mini greenhouse effect, trapping moisture around the cutting and maintaining a humid environment that is favorable for root development.
Ensure the cutting stays in a warm location, ideally between 65-75°F (18-24°C). Temperatures that are too cold can slow down the rooting process and may even cause the cutting to rot.
Step 6: Water the Cutting Regularly
Water the cutting lightly, keeping the soil moist but not soggy. A gentle misting with a spray bottle or watering the soil directly can help maintain the appropriate moisture level. Make sure the pot has drainage holes to prevent excess water from collecting at the bottom.
Check the cutting regularly to ensure the soil doesn’t dry out. If the humidity level drops too much, you may need to re-moisten the soil or adjust the plastic covering to keep it humid.
Step 7: Monitor the Cutting for Root Development
Within a few weeks, you should begin to notice new growth at the top of the cutting, as well as the development of roots underneath. Once you see roots forming, you can remove the plastic covering and continue to care for the cutting as a young plant.
Step 8: Transplant Once Rooted
When the roots have grown strong and are visible through the drainage holes of the pot, it’s time to transplant the cutting into a larger pot with regular potting soil. At this point, the cutting is a young plant that is ready to grow independently.
When transplanting, be gentle with the roots to avoid damaging them. Gently place the rooted cutting into a larger pot, and fill it with fresh potting soil. Water the new plant thoroughly and continue to care for it as you would a mature poinsettia.
Care Tips for Your Newly Propagated Poinsettia
After propagating your poinsettia, there are a few additional care tips to ensure the plant thrives:
- Watering: Keep the soil moist, but avoid overwatering. Allow the top layer of soil to dry out between waterings.
- Light: Provide bright, indirect light for your poinsettia to continue growing strong.
- Temperature: Keep the plant in a warm area, avoiding drafts or temperatures below 60°F (15°C).
- Fertilizing: Feed your poinsettia with a balanced fertilizer every few weeks during the growing season to support healthy growth.
Final Thoughts
Propagating a poinsettia from a cutting is a simple and rewarding way to enjoy the beauty of these festive plants year after year. By following these easy steps, you can successfully create a new poinsettia plant that will continue to brighten your home with its vibrant blooms. Whether you are an experienced gardener or a beginner, propagating a poinsettia is a fun and educational process that can be done with minimal effort. So, grab your pruning shears, and start propagating today!
Have you ever propagated a poinsettia? Share your experiences in the comments below! We’d love to hear how you’ve successfully grown your own plants.