
Guava trees are a wonderful addition to any garden, producing delicious fruits packed with vitamins and minerals. If you have a mature guava tree in your garden or know someone with one, you can easily propagate your own tree using cuttings. This method of propagation is not only simple, but it also allows you to clone the parent tree, ensuring the new plant has the same genetic traits. Whether you want a guava tree in your yard or want to grow one in a pot, this step-by-step guide will help you propagate your very own guava tree from cuttings.
Why Choose Propagation by Cuttings?
Propagation by cuttings is an efficient and cost-effective way to grow new plants. Unlike starting from seed, where you can face variability in fruit characteristics, cuttings produce genetically identical plants to the parent tree. Guava trees propagated this way will begin fruiting sooner, usually within 2-3 years, as opposed to trees grown from seed, which can take much longer. If you’re eager to enjoy the sweet taste of fresh guavas, propagating by cuttings is a great option.
When to Propagate Guava from Cuttings
The ideal time to propagate guava from cuttings is during the spring or early summer when the plant is actively growing. During this period, guava trees produce new stems that are semi-hardwood, which are the most successful for rooting. This is because semi-hardwood cuttings have the right balance of maturity and flexibility needed for successful root development.
Materials You’ll Need
Before you begin, gather all the necessary materials. Here’s a list of what you will need:
- A healthy guava tree to take cuttings from
- A sharp knife or pruning shears
- Rooting hormone (optional but recommended)
- A small pot with drainage holes
- Well-draining potting soil or a mix of perlite and peat moss
- A plastic bag or plastic wrap to create humidity
- Watering can or spray bottle
- A clean, flat surface to work on
Step-by-Step Guide to Propagate Guava from Cuttings
Follow these simple steps to propagate your guava tree from cuttings successfully:
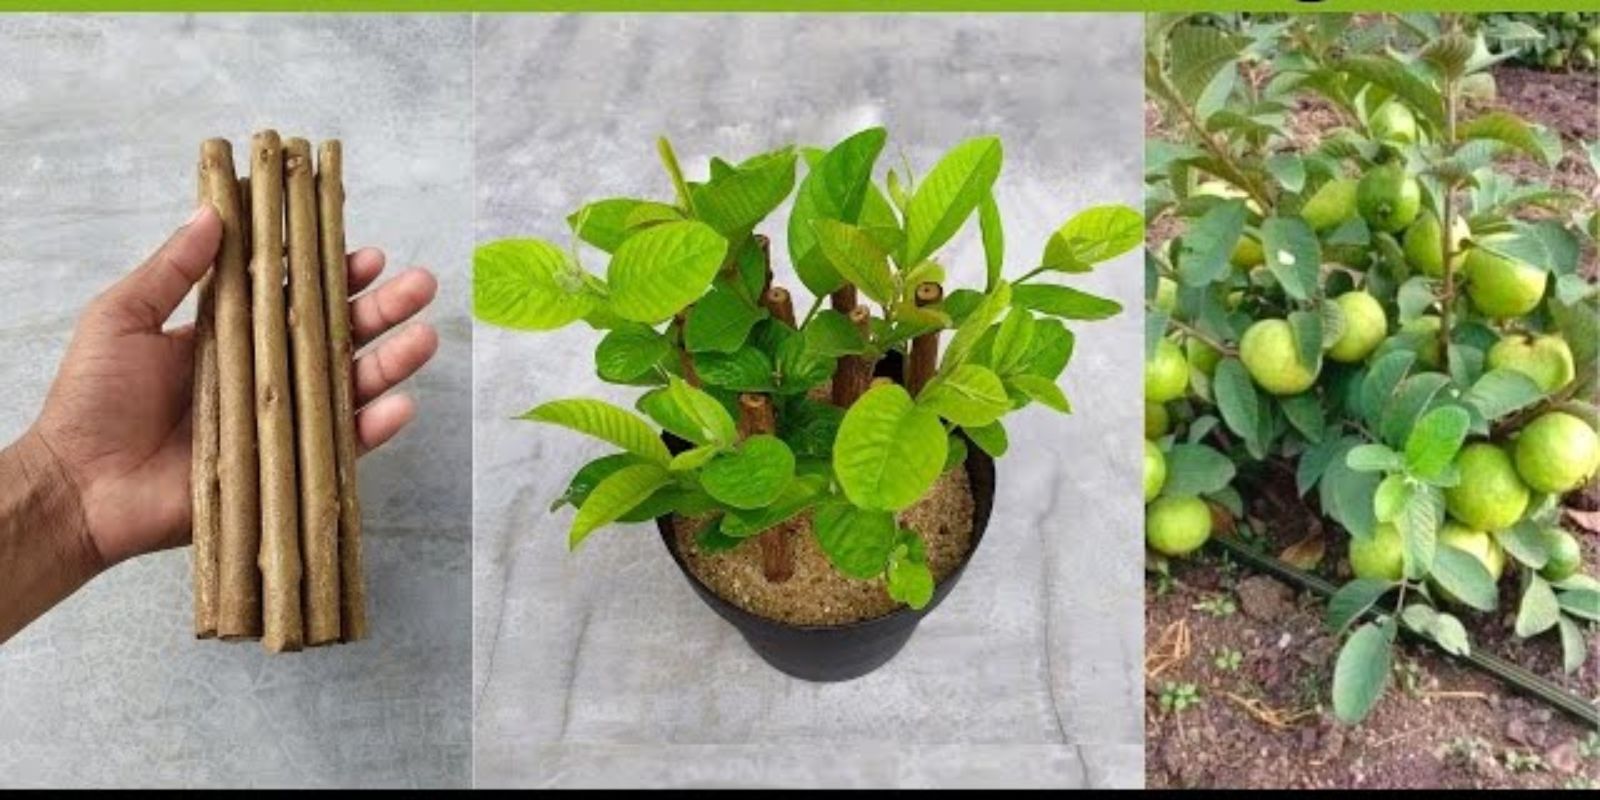
Step 1: Select a Healthy Guava Tree and Choose the Right Cutting
Start by selecting a healthy, mature guava tree to take your cuttings from. Look for a tree that has no signs of disease, pest infestation, or damage. The best time to take cuttings is in the spring or early summer when new growth is abundant.
Look for a semi-hardwood branch that is about 6-8 inches long. The stem should be firm, yet flexible, and free from flowers or fruit. Cuttings taken from younger, softwood growth may not root successfully, while hardwood cuttings from old wood are less likely to sprout. A cutting from the middle-aged wood (semi-hardwood) is ideal.
Step 2: Prepare the Cutting
Once you’ve selected the right branch, use a sharp knife or pruning shears to cut a healthy section just below a leaf node (the point where a leaf connects to the stem). Make sure the cutting is about 6-8 inches long, with at least two or three leaves remaining at the top. Remove any leaves from the bottom half of the cutting to ensure they don’t touch the soil.
Step 3: Apply Rooting Hormone
Rooting hormone is a helpful tool for encouraging root growth in cuttings. It can help increase the chances of successful rooting. Dip the cut end of the guava cutting into rooting hormone powder or gel. Gently tap off any excess powder before proceeding. This step isn’t mandatory, but it can significantly improve your results.
Step 4: Prepare the Pot and Soil
Choose a small pot with drainage holes to avoid waterlogging. Fill the pot with well-draining potting soil, such as a mix of perlite and peat moss. This mixture will help the cutting root and establish itself without becoming too soggy. Moisten the soil slightly to create the ideal environment for rooting.
Step 5: Plant the Cutting
Insert the cutting into the soil, ensuring the cut end is buried at least 2 inches deep. Gently pack the soil around the base of the cutting to secure it in place. Be careful not to damage the stem while planting it.
Step 6: Create a Humid Environment
One of the most important factors for rooting success is maintaining a humid environment. Guava cuttings need moisture to stimulate root growth. To create a humid microenvironment, cover the pot with a plastic bag or plastic wrap. This will help retain moisture around the cutting. Make sure the plastic doesn’t touch the leaves, as it could cause them to rot.
Step 7: Place the Cutting in a Warm, Bright Spot
Find a warm location with indirect light to place your potted cutting. Avoid placing it in direct sunlight, as this could overheat the cutting and cause it to dry out. A location with temperatures between 70-85°F (21-29°C) is ideal for rooting. The cutting will also benefit from the warmth, which encourages root growth.
Step 8: Water Regularly
Water the cutting lightly every few days, ensuring the soil stays consistently moist but not soggy. Check the moisture level regularly to prevent overwatering, as this could lead to rot. If you notice the plastic covering becoming too wet, remove it briefly to allow some moisture to escape. Overly humid conditions can lead to mold or mildew, so keep the balance right.
Step 9: Check for Roots
After about 2-4 weeks, check the cutting for root development. Gently tug on the cutting to see if it offers resistance. If the cutting resists, it means roots have formed. At this point, you can carefully remove the plastic covering and allow the cutting to acclimate to the open air.
Step 10: Transplant the Rooted Cutting
Once the cutting has developed a healthy root system, it’s time to transplant it into a larger pot or directly into the garden. If transplanting into a pot, choose one that is slightly larger than the current container and fill it with well-draining soil. Make a hole in the center, place the rooted cutting, and cover the roots with soil.
If planting in the garden, ensure that the location is well-drained, receives plenty of sunlight, and is protected from extreme weather conditions. Be sure to water the transplant well after planting.
Step 11: Care for Your New Guava Tree
After transplanting, continue to care for your new guava tree by keeping it well-watered and in a sunny location. Fertilize it with a balanced fertilizer every few months to promote healthy growth. With patience, your guava tree will grow strong and produce fruit within a couple of years.
Tips for Success
- Be sure to choose a healthy, disease-free guava tree for cuttings to ensure a successful propagation.
- Use a clean, sharp knife or pruning shears to avoid damaging the cutting.
- If your environment is too dry, consider using a humidifier or placing a shallow dish of water near the cutting to increase humidity.
- Don’t rush the rooting process; patience is key when propagating plants from cuttings.
- You can propagate multiple cuttings at once to increase your chances of success.
Conclusion
Propagating a guava tree from cuttings is a rewarding and straightforward process that allows you to grow your own fruit-bearing tree at home. By following the simple steps outlined in this guide, you’ll be able to create a new guava tree with minimal effort. Whether you want a fresh batch of guavas or simply love the idea of growing your own fruit, propagation by cuttings is a fun and cost-effective method to enjoy the process of growing a guava tree from scratch.
Happy gardening, and don’t forget to share your propagation success stories with fellow gardeners! #GuavaPropagation #FruitTreeGardening #GrowYourOwn #HomeGardening #PlantLovers #PropagationTips