
Potatoes are one of the most versatile and beloved vegetables worldwide, celebrated for their ability to complement various dishes, from creamy mashed potatoes to crispy fries. Growing potatoes in your backyard can be a fulfilling experience, providing fresh, flavorful tubers right at your fingertips. In this comprehensive guide, we’ll walk you through everything you need to know about planting potatoes, from choosing the right varieties to harvesting your crop. Whether you’re a seasoned gardener or a novice, this step-by-step guide will ensure you enjoy a successful potato harvest.
Understanding Potatoes
Potatoes belong to the Solanaceae family, which also includes tomatoes and eggplants. They are grown from seed potatoes, which are small tubers or pieces of larger tubers. Each seed potato contains multiple “eyes” or buds, which will sprout into new potato plants.
Benefits of Growing Potatoes
- High Yield: Potatoes are known for their ability to produce a substantial yield from a relatively small space.
- Nutritional Value: They are rich in vitamins C and B6, potassium, and dietary fiber, making them a healthy addition to your diet.
- Versatility: Potatoes can be cooked in countless ways, from boiling and baking to frying and roasting.
- Storage: Properly stored potatoes can last for months, providing you with homegrown produce well into the winter.
Step-by-Step Guide to Planting Potatoes
Step 1: Choose the Right Seed Potatoes
The first step to a successful potato harvest is selecting the right seed potatoes. Purchase certified seed potatoes from a reputable garden center or nursery to ensure they are disease-free. You can choose from various potato types, including:
- Early Varieties: These mature quickly and are ready to harvest in about 70-90 days. Examples include ‘Red New Dawn’ and ‘Yukon Gold.’
- Maincrop Varieties: These take longer to mature (about 100-120 days) and typically yield a larger crop. Popular choices include ‘Russet Burbank’ and ‘Maris Piper.’
Step 2: Prepare the Soil
Potatoes thrive in well-drained, loose soil rich in organic matter. Follow these steps to prepare your planting area:
- Select a Site: Choose a location that receives full sun for at least 6-8 hours a day.
- Test the Soil: Conduct a soil test to check pH levels. Potatoes prefer slightly acidic soil, with a pH between 5.8 and 6.5.
- Amend the Soil: Add organic matter, such as compost or well-rotted manure, to improve soil structure and fertility.
- Loosen the Soil: Use a garden fork or tiller to loosen the soil to a depth of about 12 inches, breaking up any clumps.
Step 3: Cut and Cure Seed Potatoes
If your seed potatoes are larger than a golf ball, you can cut them into smaller pieces, ensuring each piece has at least one eye.
- Cutting: Cut the seed potatoes 1-2 days before planting. Allow them to dry for a day or two to form a protective callus over the cut surface. This helps prevent rot after planting.
- Curing: Place the cut pieces in a cool, dark place for 1-2 days. This process helps to toughen the skin and prevents disease.
Step 4: Create Furrows for Planting
Once your seed potatoes are ready, it’s time to plant. Follow these steps:
- Mark Rows: Use a measuring tape to mark rows 2-3 feet apart.
- Dig Furrows: Dig trenches about 4 inches deep in the marked rows. The soil should be loose and crumbly to allow for good drainage.
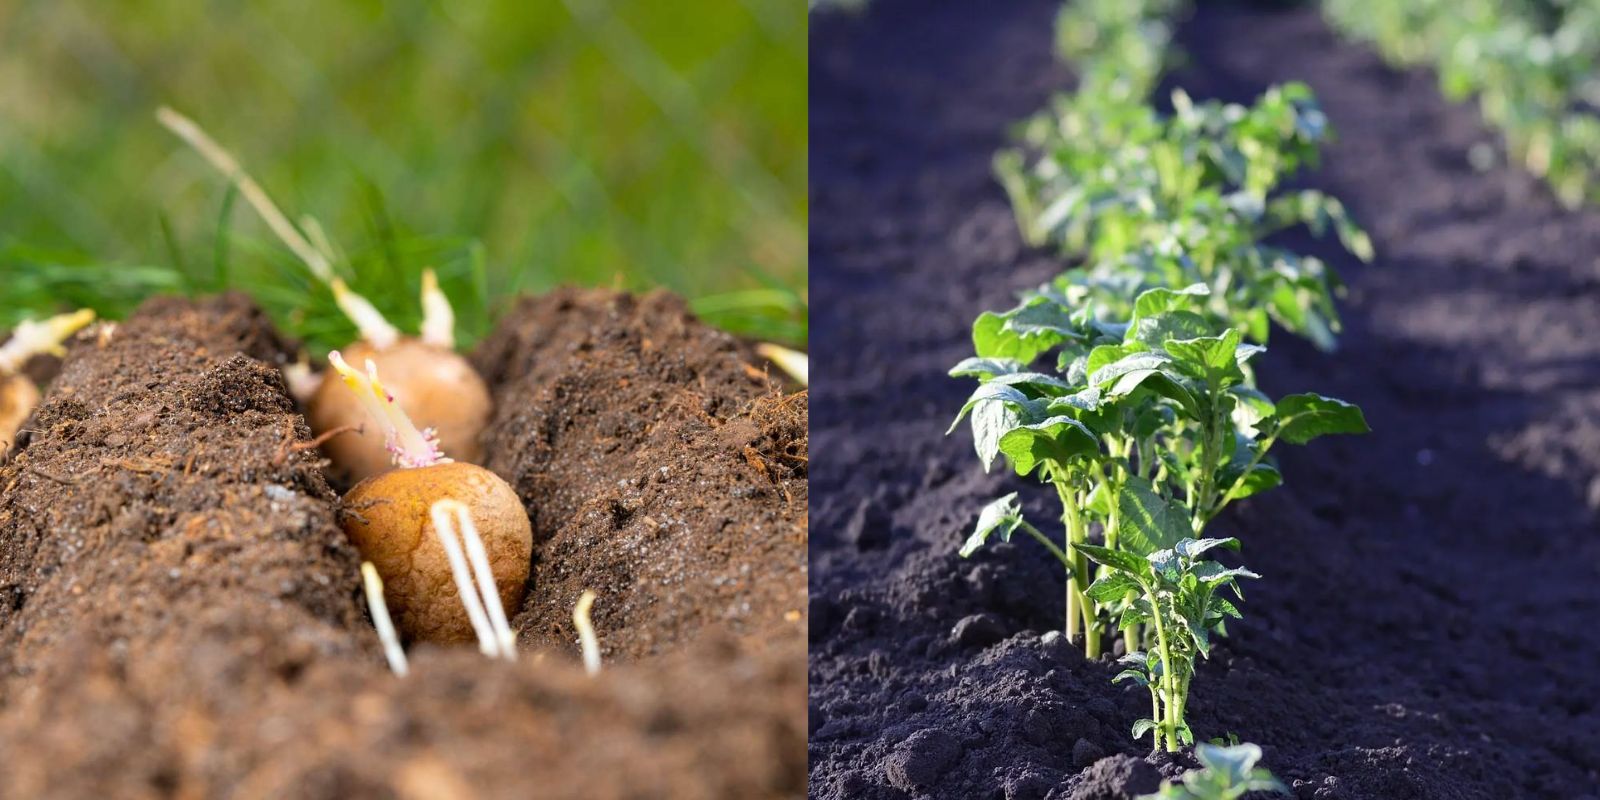
Step 5: Plant the Seed Potatoes
Now that your furrows are ready, it’s time to plant the seed potatoes:
- Place Seed Potatoes: Place the cut side of the seed potato down into the trench, spacing them about 12 inches apart.
- Cover with Soil: Gently cover the seed potatoes with about 2-4 inches of soil, ensuring not to compact the soil too much.
Step 6: Water Thoroughly
After planting, give the area a thorough watering. Potatoes need consistent moisture, especially during the early growth stages.
- Initial Watering: Water the freshly planted potatoes deeply to encourage root establishment.
- Ongoing Watering: Aim to keep the soil consistently moist but not waterlogged. Water every 1-2 weeks, depending on rainfall and soil conditions.
Step 7: Hill the Potatoes
As your potato plants grow, they will develop stems and leaves above ground. Hilling is the practice of mounding soil around the base of the plants, which has several benefits:
- Encourages Tuber Growth: Hilling encourages the development of more tubers along the buried stems.
- Prevents Sunlight Exposure: Covering the tubers prevents them from turning green and becoming toxic.
To hill your potatoes:
- Wait Until Plants Reach 6-8 Inches: When your potato plants are about 6-8 inches tall, it’s time to hill.
- Mound Soil: Use a hoe or shovel to gently mound soil around the base of the plants, covering the lower leaves but leaving the top leaves exposed.
Step 8: Fertilize and Maintain
Fertilizing your potato plants will provide them with the necessary nutrients for healthy growth:
- Use a Balanced Fertilizer: Apply a balanced fertilizer (such as 10-10-10) according to the package instructions.
- Side-Dress: About 4-6 weeks after planting, consider side-dressing with more fertilizer to promote growth.
- Weed Control: Regularly check for weeds and remove them to reduce competition for nutrients and moisture.
- Pest Management: Monitor your plants for common pests like aphids, potato beetles, and wireworms. Use organic pest control methods as needed.
Step 9: Harvesting Your Potatoes
Potatoes are typically ready to harvest when the plants begin to yellow and die back. This usually occurs about 70-120 days after planting, depending on the variety.
- Signs of Maturity: Look for signs such as wilting leaves, yellowing, and falling over.
- Harvesting Technique: Use a garden fork to gently lift the potatoes from the soil, being careful not to puncture them. Start from the outer edges of the plant and work your way inward.
- Handling Potatoes: After harvesting, allow the potatoes to dry for a few hours on the surface of the soil. This helps to toughen their skin and reduces the risk of rot during storage.
Step 10: Storing Your Potatoes
Proper storage is key to enjoying your harvest throughout the year:
- Curing: Cure the harvested potatoes in a cool, dark, and well-ventilated area for 1-2 weeks to allow their skins to toughen.
- Storage Conditions: Store cured potatoes in a cool, dark place with high humidity, ideally around 45-50°F (7-10°C).
- Check Regularly: Periodically check your stored potatoes for signs of sprouting or rot and remove any affected potatoes to prevent spoilage.
Conclusion
Planting potatoes is a rewarding experience that can yield delicious results, providing you with a steady supply of homegrown produce. By following these steps and paying attention to the needs of your plants, you can enjoy a bountiful harvest of fresh potatoes right from your garden. Whether you choose to grow early or maincrop varieties, your efforts will surely be worthwhile. So grab your gardening tools, prepare your soil, and get ready to enjoy the fruits of your labor!
Happy gardening! Share your potato-growing journey using #PotatoPlanting #HomeGrown #VegetableGarden #GardeningJoy!