
Roses, often dubbed as the queen of flowers, are a staple in gardens worldwide. Their vibrant colors, enchanting fragrance, and delicate petals make them one of the most beloved plants to grow. However, acquiring multiple rose bushes can be costly. Fortunately, there is an easy and cost-effective way to multiply roses: propagating them through cuttings. This method allows you to grow new rose plants from the existing ones, without needing to buy new plants. In this guide, we will walk you through the steps to successfully propagate roses through cuttings, ensuring that you get more blooms for less effort.
Why Propagate Roses from Cuttings?
Before diving into the process, let’s understand why propagating roses through cuttings is such a popular method. Here are the key reasons:
- Cost-Effective: Purchasing rose plants can add up, especially if you’re trying to create a rose garden. Propagating from cuttings allows you to grow as many roses as you want without the added cost.
- Preserve Desired Traits: When you propagate a rose from a cutting, the new plant is genetically identical to the parent plant. This means that if you have a rose with a unique color or scent that you love, you can preserve those traits in the new plants.
- Increased Variety: With cuttings, you can propagate many different rose varieties and create a diverse garden of blooms.
- Simple Process: While the idea of propagating plants may seem daunting, growing roses from cuttings is relatively simple, and with the right steps, it’s highly successful.
The Basics of Propagating Roses from Cuttings
Roses can be propagated in several ways, but using cuttings is one of the most accessible and effective methods. By following a simple step-by-step process, you can ensure that your rose cuttings take root and thrive into strong, blooming bushes. Here’s a detailed guide to help you along the way:
Step 1: Choose the Right Time for Taking Cuttings
Timing plays a crucial role in the success of propagating roses. The best time to take rose cuttings is during the growing season, typically in late spring or early summer when the plant is actively growing. However, you can also take cuttings in late fall or early winter using dormant stems, which can root in the cooler months.
Step 2: Select a Healthy Rose Stem
When selecting a rose stem for propagation, it’s important to choose a healthy, disease-free stem that is mature but not too old. Look for a stem that has finished blooming and is firm to the touch. It should be a semi-hardwood cutting, which means it’s mature enough to root but still flexible. Avoid selecting stems that are too soft or too woody, as they may not root effectively.
The cutting should be approximately 6-8 inches in length and have at least 3-4 nodes (the small bumps or growth points where leaves sprout). These nodes are essential for the roots to develop.
Step 3: Make the Cut
Use a sharp, clean knife or pruners to take your cutting. Cut the rose stem just below a node at a 45-degree angle. The angled cut increases the surface area, allowing the cutting to take up water more efficiently.
Be sure to make the cut clean and avoid any crushing of the stem, as this could affect the plant’s ability to root.
Step 4: Remove Leaves and Thorns
After cutting the rose stem, remove the leaves from the lower half of the cutting. Be sure to leave at least two or three leaves at the top to help the plant survive while it develops roots. If the stem has thorns, carefully remove them from the lower part of the cutting, as they can interfere with rooting and make handling difficult.
Step 5: Optional: Use Rooting Hormone
While this step is optional, using rooting hormone can increase the chances of successful root development. Rooting hormone is a powdered or gel-based substance that encourages the cutting to develop roots more quickly. Dip the cut end of your rose stem into the rooting hormone, ensuring it is coated well. Shake off any excess powder to avoid clumping.
Step 6: Prepare the Pot and Soil
Choose a small pot with drainage holes to prevent water from accumulating and causing root rot. Fill the pot with a well-draining potting mix, such as a mixture of perlite and peat moss. You want the soil to be light and airy to encourage root growth.
Moisten the soil lightly before planting the cutting, but avoid soaking it. The cutting needs to remain moist, but too much water can cause it to rot.
Step 7: Plant the Cutting
Now it’s time to plant the cutting! Create a hole in the center of the potting mix using a pencil or your finger. Insert the cutting into the hole, ensuring that the bottom node (where the leaves were removed) is buried in the soil. Gently firm the soil around the cutting to hold it in place.
Make sure the cutting is standing upright and not leaning over, as this will encourage the growth of straight, strong stems. If you’re propagating multiple cuttings, space them a few inches apart to avoid overcrowding.
Step 8: Create a Humid Environment
One of the most important factors in successful rose propagation is maintaining a high level of humidity. To create this environment, cover the pot with a clear plastic bag or place it inside a mini greenhouse. The plastic will trap moisture and keep the cutting from drying out.
Ensure the plastic is not touching the leaves of the cutting, as this could cause rot. You can prop the plastic up using small sticks or create a frame to keep it off the cutting.
Step 9: Place the Cutting in a Warm Location
Place your cutting in a warm, bright spot, but avoid direct sunlight, which could scorch the cutting. A location with indirect light is ideal, as it will promote rooting without overwhelming the young plant.
The ideal temperature for rooting is around 65-75°F (18-24°C). Keep the cutting in this environment for several weeks, checking regularly for signs of root development.
Step 10: Water and Care for the Cutting
During the rooting process, it is important to keep the soil lightly moist. Check the moisture level every few days, and water as needed. Be careful not to overwater, as this can cause the cutting to rot.
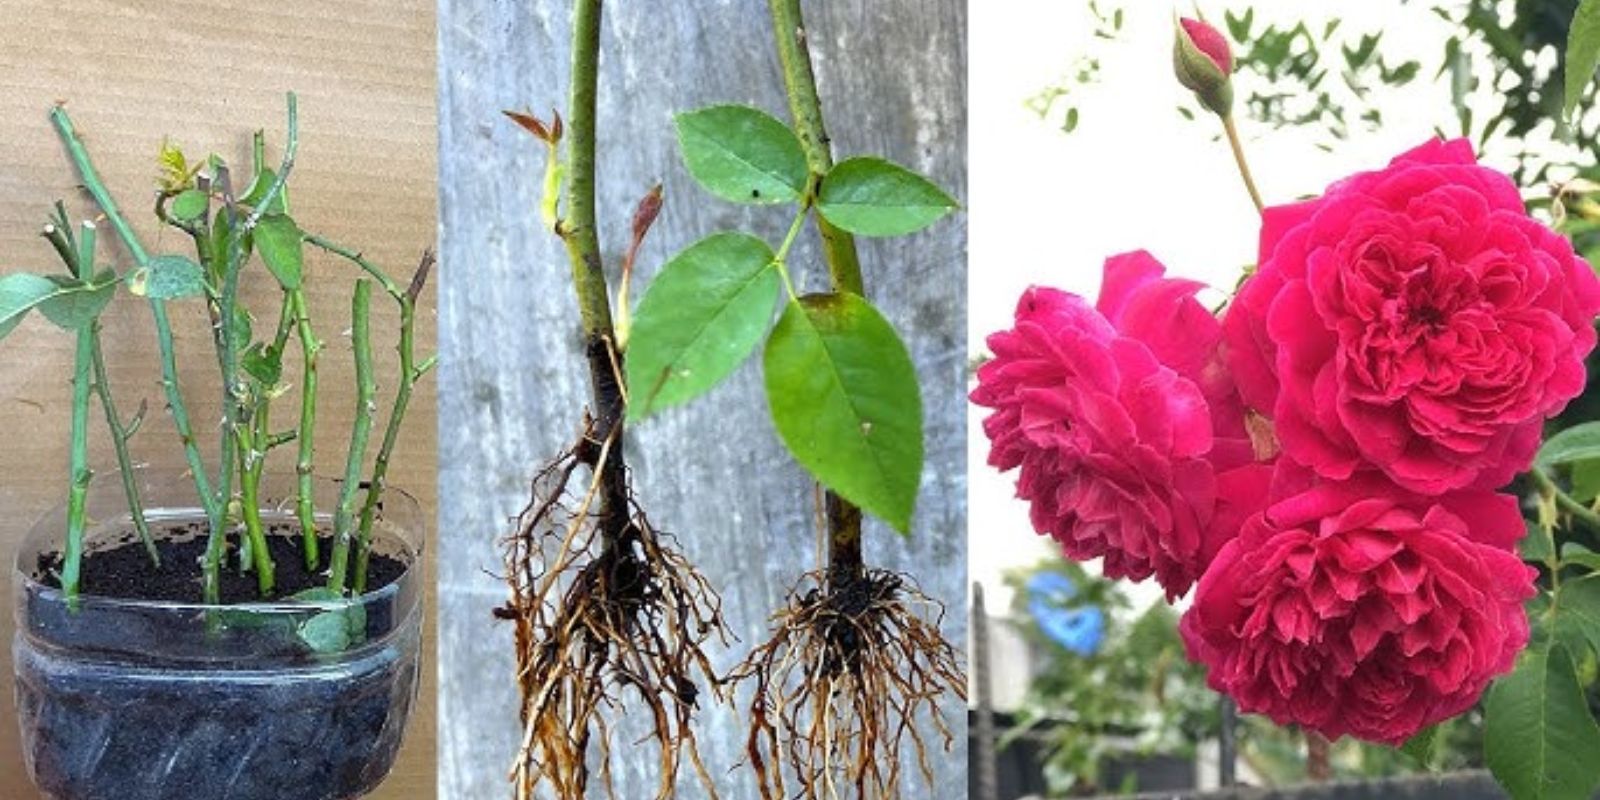
After a few weeks, the cutting should begin to show new growth and roots. You can test this by gently tugging on the cutting. If there’s resistance, the roots have formed. At this point, you can remove the plastic cover.
Step 11: Transplanting the Rooted Cutting
Once the cutting has rooted and new growth appears, it’s time to transplant it into a larger pot or into the garden. If planting in a pot, use a well-draining soil mix, and ensure the new pot is large enough to allow the plant to continue growing.
If transplanting into the garden, wait for the right season (usually spring or fall) to ensure the young plant thrives. Choose a sunny location with well-drained soil, and be sure to give it enough space to grow.
Step 12: Enjoy Your New Rose Plants
After a few months, your propagated roses should be strong, healthy plants that will soon start producing blooms. Regular care, including watering, fertilizing, and pruning, will help them flourish.
Conclusion
Propagating roses through cuttings is an incredibly rewarding experience that allows you to grow more beautiful roses at no extra cost. By following these simple steps, you can successfully propagate roses and enjoy a garden full of vibrant blooms. Not only is it a great way to expand your collection, but it’s also an excellent way to share the beauty of roses with friends and family.
If you’ve never tried propagating roses before, now is the perfect time to give it a go. With patience and the right conditions, you’ll be rewarded with stunning, fragrant roses that brighten your garden year after year.
💬 Have you tried propagating roses from cuttings? Share your tips and successes with us in the comments below! 🌹 #RosePropagation #GardeningTips #GreenThumb #RoseLovers #PlantCare #FlowerPower #DIYGardening #GrowYourOwnGarden #GardenHacks #PlantPropagation #NatureLovers