
Introduction:
Burro’s Tail (Sedum morganianum) is a stunning succulent that is celebrated for its trailing, lush stems and unique, teardrop-shaped leaves. Native to Mexico, this plant is an ideal choice for hanging baskets and containers, where its cascading foliage can truly shine. If you’re a succulent enthusiast or simply looking to expand your plant collection, multiplying Burro’s Tail is a rewarding process. This article will walk you through the steps of propagating this delightful plant, ensuring you achieve successful results and enjoy the satisfaction of growing your own beautiful succulents.
Why Propagate Burro’s Tail?
Propagation is the process of creating new plants from an existing one. For Burro’s Tail, this can be particularly beneficial because:
- Expansion: Propagation allows you to grow multiple plants from one, helping you create lush displays or share with friends.
- Cost-Effective: Growing new plants from cuttings is a budget-friendly way to expand your collection.
- Healthy Plants: Regular propagation can help rejuvenate and maintain the health of the parent plant by encouraging new growth.
Materials You’ll Need:
- Clean Scissors or Shears: To make precise cuts without damaging the plant.
- Small Pots: With drainage holes to prevent waterlogging.
- Well-Draining Soil: Succulent or cactus mix works best.
- Paper Towels: For drying cuttings.
Step-by-Step Guide to Propagating Burro’s Tail
- Prepare Your Supplies Before you start, gather all necessary tools and materials. Clean your scissors or shears with rubbing alcohol to sterilize them and prevent any potential disease transmission. Ensure that your small pots and soil are ready for planting.
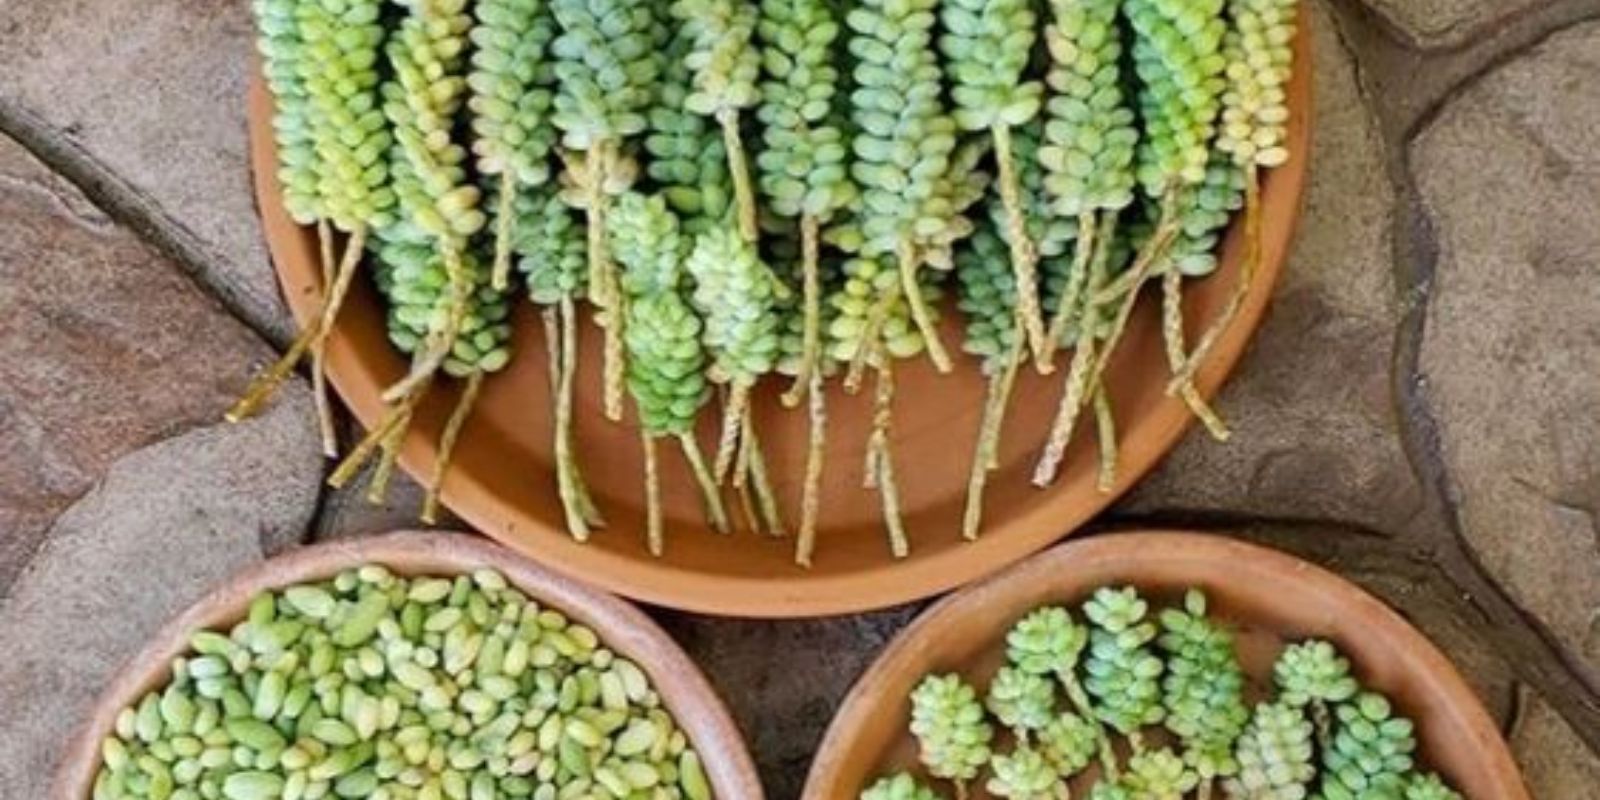
- Taking Cuttings Select healthy, mature stems from your Burro’s Tail plant. Using clean scissors or shears, snip off segments that are at least 3-4 inches long. Each cutting should ideally have a few leaves attached. The best cuttings are those taken from the ends of the stems, as they are more likely to root successfully. Tip: Avoid taking too many cuttings from a single plant to ensure the parent plant remains healthy and vigorous.
- Allowing Cuttings to Dry After taking the cuttings, place them on a paper towel in a dry, shaded area. Allow them to dry and callous over for about 2-3 days. This step is crucial as it helps to prevent rot by letting the cut ends form a protective layer. Why Drying Matters: Freshly cut stems are susceptible to rot if planted immediately, especially in moist soil. Drying the cuttings reduces the risk of fungal infections and encourages successful rooting.
- Planting the Cuttings Once the cut ends have calloused, it’s time to plant them. Fill your small pots with well-draining succulent soil, such as a cactus mix or a blend of potting soil and sand. Make small holes in the soil with a stick or pencil, then insert the dried cuttings into these holes, ensuring that the cut ends are buried slightly. Arrangement: You can plant multiple cuttings in a single pot if desired, but ensure they are spaced apart to allow for future growth.
- Watering and Placement Lightly water the soil after planting the cuttings, ensuring that the soil is moist but not soggy. Place the pots in a bright, indirect light area. Direct sunlight can be too harsh for young cuttings and may hinder their growth. Watering Tips: Succulent cuttings need minimal water initially. Allow the soil to dry out between waterings to avoid overwatering, which can lead to rot.
- Monitoring and Care Over the next few weeks, observe the cuttings for signs of new growth and root development. New leaves and a firm plant base are good indicators that roots are forming. If you notice any signs of rot or disease, remove the affected cuttings promptly to prevent spreading. Additional Care: Once the cuttings have established a good root system and are showing healthy growth, you can gradually increase the amount of light they receive. This helps them adjust to their new environment and encourages robust growth.
Troubleshooting Common Issues
- Rotting Cuttings: Ensure the soil is well-draining and avoid overwatering. If rot occurs, remove affected cuttings and replant healthy ones.
- Leggy Growth: If cuttings become stretched or leggy, they might not be getting enough light. Increase light exposure gradually, avoiding direct, harsh sunlight.
- Pest Problems: Check regularly for pests such as mealybugs or spider mites. Treat infestations promptly with appropriate insecticides or natural remedies.
Conclusion
Multiplying Burro’s Tail through cuttings is a simple yet highly effective way to expand your succulent collection. By following these steps, you can ensure successful propagation and enjoy the process of growing new, vibrant plants. Whether you’re adding to your own collection or sharing with friends, propagating Burro’s Tail is both fun and rewarding.
Call to Action
Dive into the world of succulent propagation today and watch your Burro’s Tail thrive and multiply! Share your propagation experiences and tips with fellow plant enthusiasts, and inspire others to grow their own stunning succulents. Happy gardening! 🌱💚