
In today’s fast-paced world, maintaining a healthy garden can be a challenge, especially for those who lead busy lives. The good news is that you don’t have to sacrifice your love for plants just because you can’t be there to water them every day. One innovative and eco-friendly solution is to create an auto-watering system using waste plastic bottles. This method not only helps your plants stay hydrated but also contributes to reducing plastic waste. In this article, we will explore the benefits of an auto-watering system, provide a detailed guide on how to create one, and share tips for ensuring its success.
The Importance of Auto-Watering Systems
Water Conservation
Auto-watering systems are designed to provide consistent moisture to plants without wasting water. Traditional watering methods often lead to overwatering or underwatering, but with an auto-watering system, water is delivered slowly and directly to the roots, minimizing evaporation and runoff. This is especially important in regions facing water scarcity.
Time-Saving
For busy individuals or frequent travelers, an auto-watering system can be a lifesaver. By setting up this system, you can ensure that your plants receive the care they need without daily attention. It allows you to enjoy your garden without the stress of remembering to water your plants.
Healthier Plants
Plants thrive when they receive consistent moisture. An auto-watering system helps maintain optimal soil moisture levels, reducing the risk of stress and disease. Consistent watering promotes healthier root systems, leading to more vigorous growth and vibrant foliage.
Materials Needed
Before we dive into the step-by-step guide, let’s gather the materials you will need to create your auto-watering system:
- Empty Plastic Bottle: A 1-liter or 2-liter bottle will work well. Make sure it’s clean and free from labels.
- Scissors or a Knife: For cutting the bottle.
- A Small Piece of Cloth or Sponge (Optional): This can help regulate the flow of water.
- Soil and a Potted Plant: Choose a healthy plant that requires regular watering.
Step-by-Step Guide to Creating Your Auto-Watering System
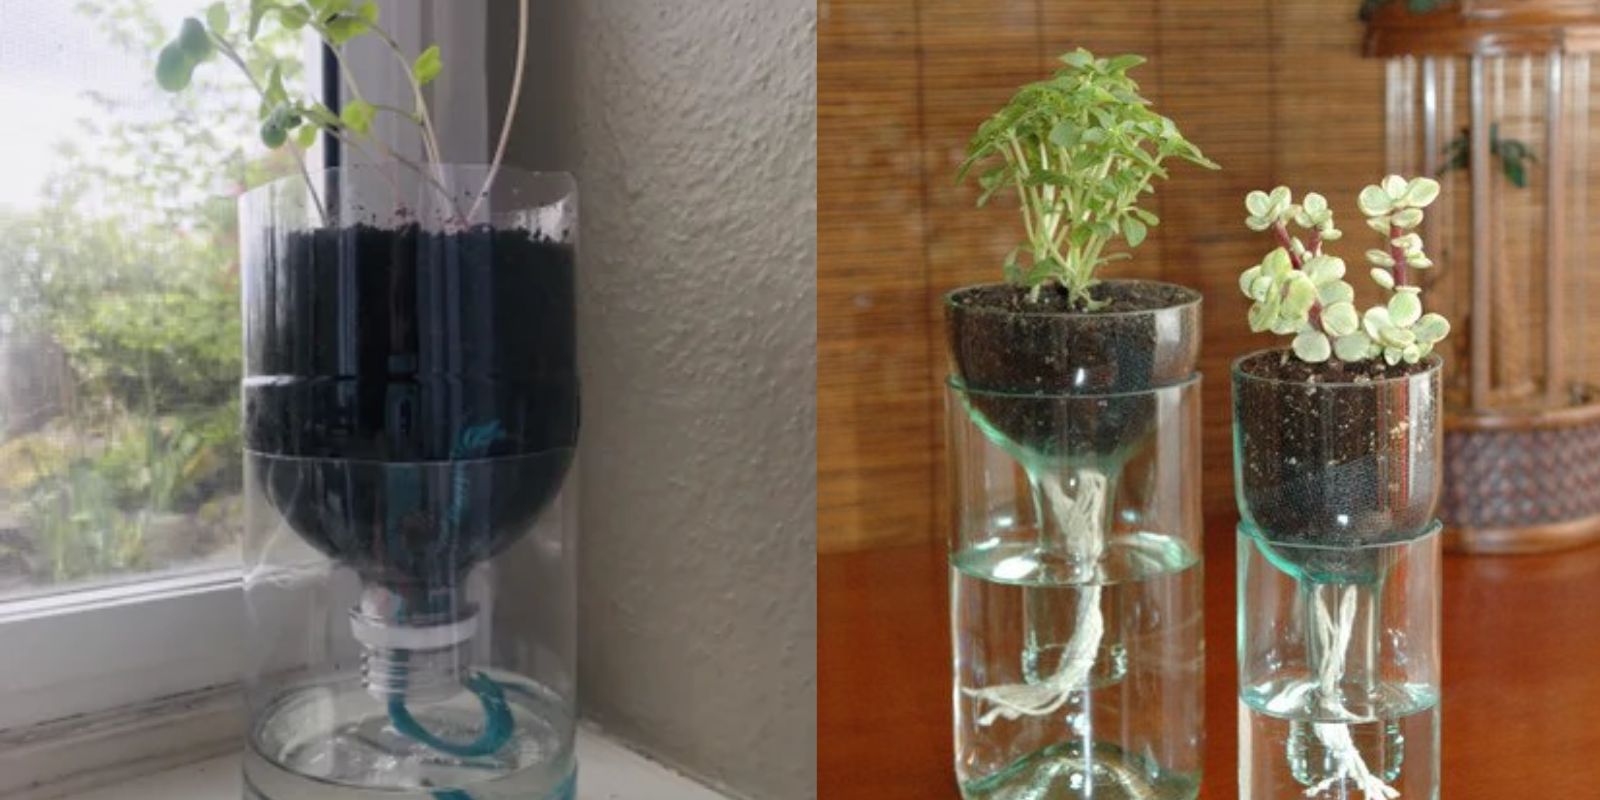
Step 1: Prepare the Bottle
- Clean the Bottle: Rinse the plastic bottle thoroughly to remove any residues. Remove labels to avoid any contamination and ensure the bottle is clear.
- Make a Hole in the Cap: Using scissors or a knife, carefully create a small hole in the center of the bottle cap. The hole should be just big enough to allow water to flow out slowly. If you’re using a cloth or sponge, insert it into the hole to create a more controlled flow of water.
Step 2: Fill the Bottle
- Add Water: Fill the bottle with water, leaving about an inch of space at the top to prevent spillage. If you want to add nutrients, you can dilute liquid fertilizer in the water before filling the bottle.
Step 3: Insert the Bottle
- Inverted Position: Invert the bottle and gently bury it into the soil of your potted plant. The cap should be buried in the soil, with the neck of the bottle slightly above the soil surface. This ensures that water can flow directly into the root zone.
Step 4: Check Moisture Levels
- Monitor Soil Moisture: For the first few days, check the moisture levels of the soil to ensure the system is functioning properly. If the soil is too dry, consider enlarging the hole in the cap to allow more water to flow.
Step 5: Maintenance and Adjustments
- Refill the Bottle: Regularly check the water level in the bottle and refill it as needed. Depending on the plant’s water requirements and environmental conditions, you may need to refill the bottle every few days or weekly.
- Inspect the System: Occasionally inspect the bottle and soil for any blockages or issues. Make sure that the bottle is not leaking and that water is flowing properly.
Additional Tips for Success
- Choose the Right Plants: This auto-watering system works best for plants that prefer consistently moist soil, such as herbs, vegetables, and certain houseplants. Avoid using it for plants that require dry conditions, like succulents or cacti.
- Use Multiple Bottles: If you have several plants that require watering, consider creating multiple auto-watering systems. This ensures that each plant receives the appropriate amount of water.
- Positioning Matters: Place your plants in a location that receives adequate sunlight. However, ensure that the auto-watering bottles are not exposed to direct sunlight for extended periods, as this can cause water to heat up and negatively affect the plants.
- Experiment with Different Bottle Sizes: You can use various bottle sizes depending on the plant’s water needs. Larger bottles will hold more water and require less frequent refilling.
- Repurpose Other Containers: While plastic bottles are the most common choice, you can experiment with other containers, such as yogurt cups or even glass jars, to create similar watering systems.
- Consider Adding Mulch: Adding a layer of mulch around the base of your plants can help retain soil moisture and reduce evaporation, working in conjunction with your auto-watering system.
Conclusion
Creating an auto-watering system using waste plastic bottles is a simple, effective, and environmentally friendly way to ensure your plants receive consistent moisture. This system not only conserves water but also saves you time and effort, allowing you to enjoy your garden without worry. By following the steps outlined in this article, you can create a successful watering solution that keeps your plants healthy and thriving.
With the added benefit of repurposing plastic waste, this project reflects a commitment to sustainability and responsible gardening. So why not give it a try? Set up your auto-watering system today, and share your success with others! Let’s inspire more gardeners to embrace eco-friendly practices and cultivate beautiful, healthy plants.
🌱💦 Join the gardening revolution! Share your creations and tips using hashtags like #AutoWatering #EcoFriendlyGardening #GardenHacks #SustainableGardening. Together, we can make a difference!