
Introduction
Wattle fencing is an ancient technique that dates back to the Bronze Age. This method, which involves weaving branches around stakes, was traditionally used for fencing and building structures. Today, it can be adapted to create beautiful and functional raised garden beds. A wattle raised garden bed not only adds a rustic charm to your garden but also uses natural, sustainable materials. This guide will take you through the process step by step, helping you build a durable and attractive garden bed that will be the envy of your neighborhood.
Benefits of Wattle Raised Garden Beds
- Sustainability: Using natural materials reduces the environmental impact.
- Aesthetic Appeal: Wattle beds add a rustic and charming look to any garden.
- Cost-Effective: Many materials can be sourced from your garden or nearby areas.
- Durability: Properly constructed wattle beds can last for several years.
- Customization: Easily shape and size the bed to fit your garden’s needs.
Materials and Tools Needed
- Flexible Branches: Willow, hazel, or other pliable woods work best. You’ll need a good number of these to weave your walls.
- Wooden Stakes: These will form the frame of your bed. Ensure they are sturdy and long enough to be driven into the ground and still provide support.
- Garden Twine: To secure the branches in place.
- Pruning Shears: For cutting branches to size.
- Hammer or Mallet: For driving stakes into the ground.
- Soil and Compost: To fill your raised bed once it’s constructed.
- Measuring Tape: To ensure your bed is the desired size.
Steps to Build a Wattle Raised Garden Bed
1. Gather Materials
First, gather all the materials you will need. Collect plenty of flexible branches; the fresher they are, the easier they will be to work with. You can prune these from your own garden or ask a neighbor if they have extra branches from their trees.
2. Prepare the Site
Choose a level area for your raised bed. Clear the site of any grass, weeds, or debris. This will give you a clean slate to work on and ensure your bed sits evenly.
3. Install Stakes
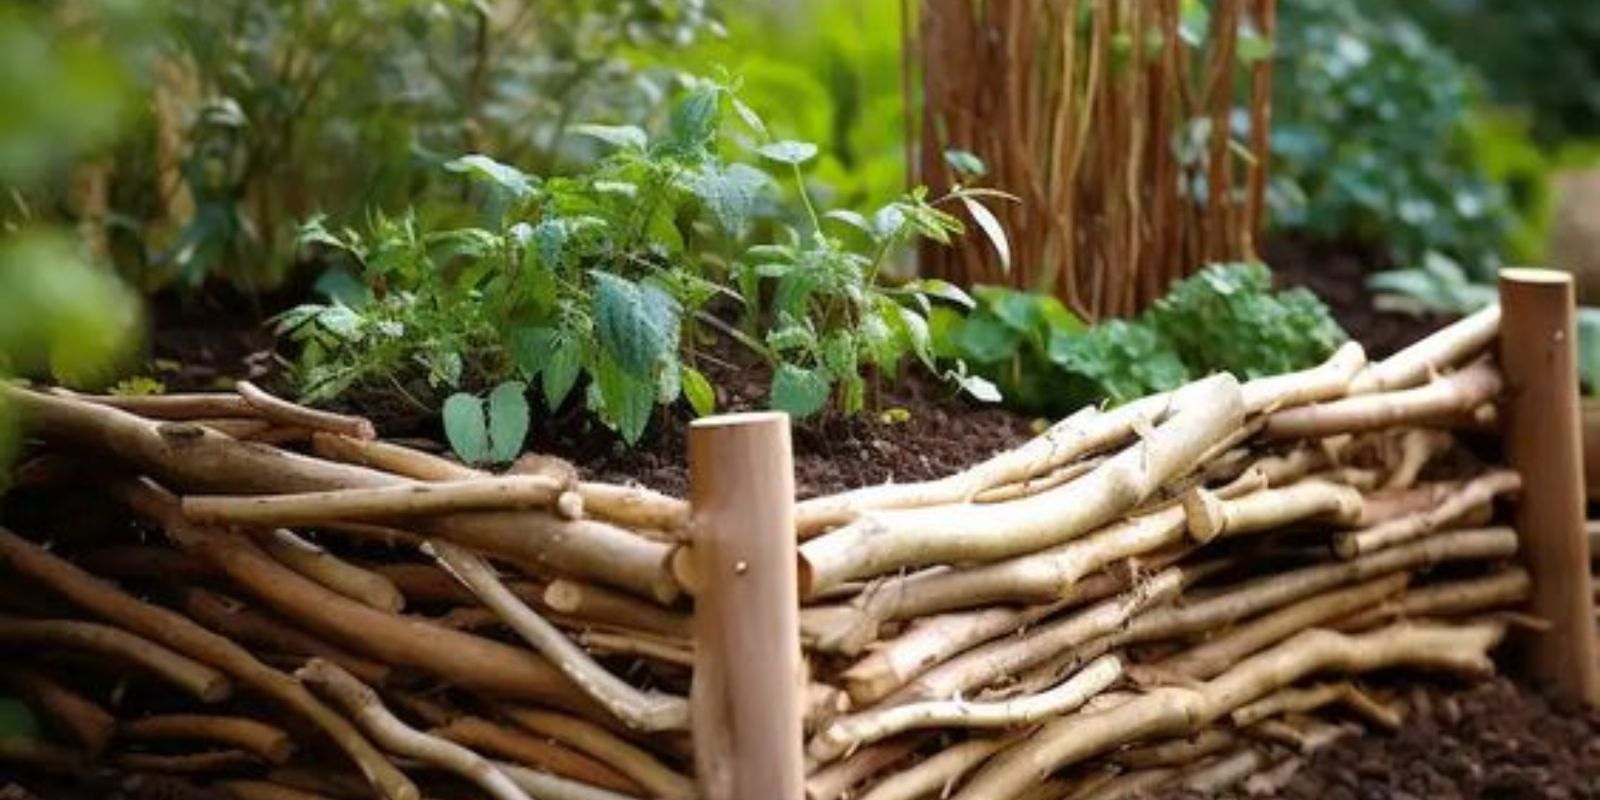
Using your measuring tape, mark the corners and sides of your desired bed shape. Typically, rectangular or square beds are easiest to construct. Drive the wooden stakes into the ground at your marked points. Space them about 12 inches apart around the perimeter. Ensure that the stakes are secure and upright, as they will need to support the weight of the woven branches and soil.
4. Weave Branches
Begin weaving your branches in and out of the stakes. Start at the bottom and work your way up, alternating the direction of each branch. This alternating pattern creates a strong and stable wall. As you add more layers, gently press them down to keep the weave tight and compact. Trim any branches that are too long with your pruning shears.
5. Secure the Weave
Once your wall has reached the desired height, use garden twine to tie the ends of the branches to the stakes. This ensures that the structure stays in place and doesn’t unravel. You can also weave smaller twigs into any gaps to make the wall more solid.
6. Fill the Bed
With your wattle walls complete, it’s time to fill the bed. Start by adding a layer of coarse material, such as small branches or straw, to improve drainage. Then, add a mixture of soil and compost, filling the bed to just below the top of the wattle wall. Rake the soil smooth and water it lightly to settle it.
Planting in Your Wattle Raised Garden Bed
Now that your bed is ready, it’s time to plant! Consider the following tips to make the most of your new garden bed:
- Choose the Right Plants: Depending on the size and depth of your bed, select plants that will thrive in the space provided. Vegetables, herbs, and flowers are all excellent choices.
- Companion Planting: Arrange plants in a way that they benefit each other. For instance, planting marigolds alongside vegetables can help repel pests.
- Seasonal Planting: Plan your planting schedule to take advantage of each growing season. Rotate crops to maintain soil health.
- Mulching: Add a layer of mulch to retain moisture, suppress weeds, and add nutrients to the soil as it breaks down.
- Watering: Ensure your plants receive adequate water, especially in the early stages after planting. Raised beds tend to dry out faster than ground-level gardens.
Maintaining Your Wattle Raised Garden Bed
Maintaining your wattle raised garden bed ensures its longevity and productivity:
- Regular Inspections: Check for any loose or damaged branches and repair them promptly.
- Soil Health: Add compost or organic matter regularly to keep the soil fertile.
- Weeding: Keep weeds under control to prevent them from competing with your plants for nutrients and water.
- Pruning: Trim any overgrown plants to maintain air circulation and reduce disease risk.
Conclusion
Building a wattle raised garden bed is a rewarding project that combines traditional craftsmanship with modern gardening needs. The process is straightforward and utilizes natural, sustainable materials that are often readily available. Not only does a wattle bed provide a practical solution for growing plants, but it also adds an aesthetically pleasing element to your garden. By following the steps outlined in this guide, you can create a beautiful, functional, and eco-friendly garden bed that will enhance your outdoor space for years to come. So grab your materials and start building a wattle raised garden bed that will be the pride of your garden!