
Gardening has become an increasingly popular hobby for many, and creating a raised garden bed can enhance the experience by improving plant growth and organization. Among the various methods available, the wattle raised garden bed stands out for its rustic aesthetic and eco-friendly construction. This article will guide you through the process of making a wattle raised garden bed, discussing its benefits, materials, and step-by-step instructions. By the end, you’ll have the knowledge needed to create your very own charming garden space.
What is a Wattle Raised Garden Bed?
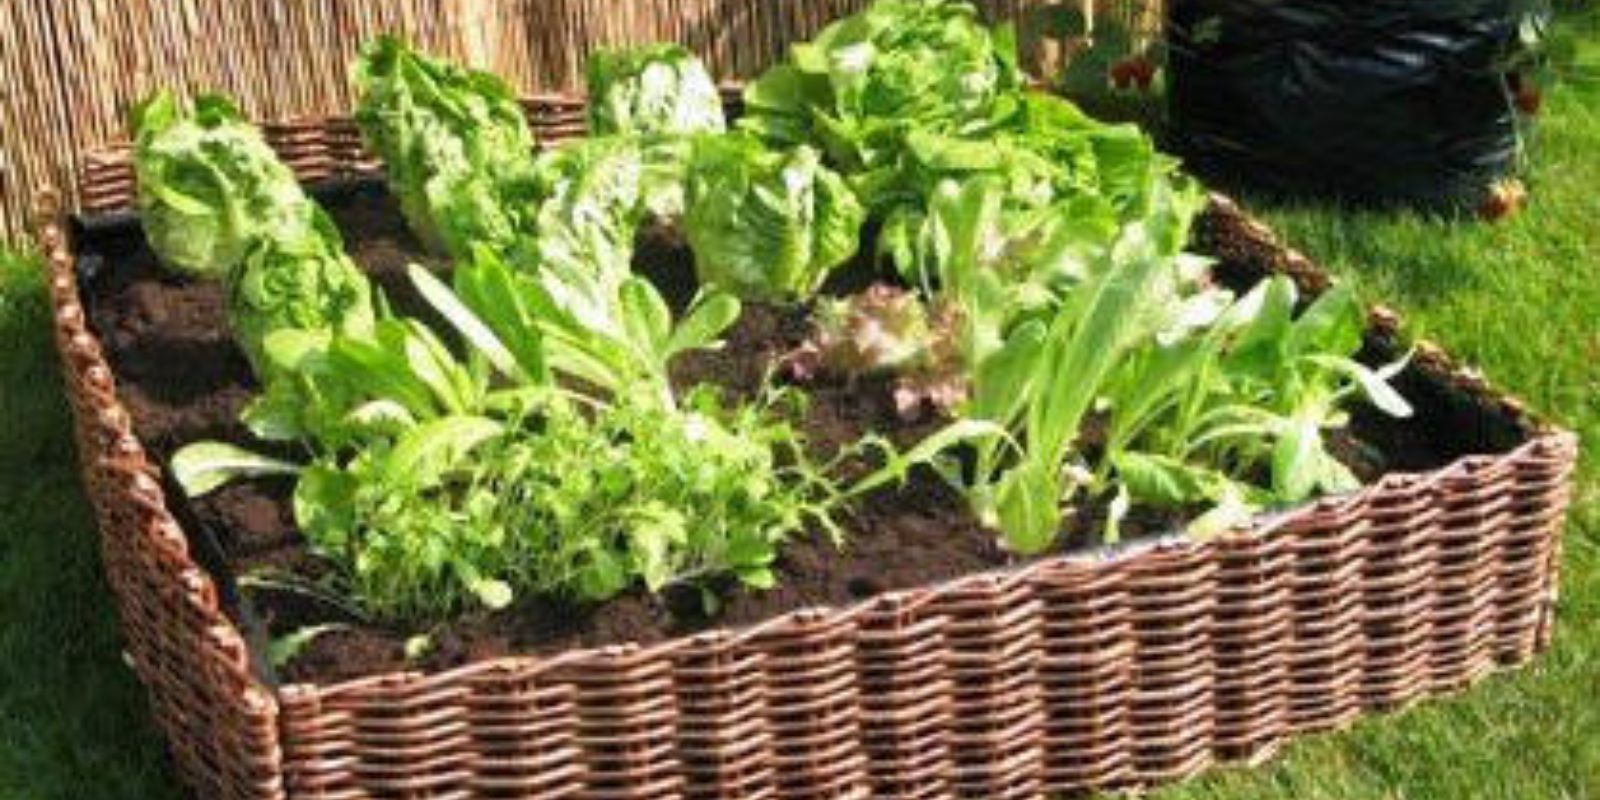
A wattle raised garden bed is a type of garden structure made by weaving flexible branches or twigs (often from willow or hazel) into a frame that serves as the walls of the bed. The word “wattle” refers to the traditional technique of weaving branches to create a fence or enclosure. This method has been used for centuries and adds a unique touch to any garden, providing both functionality and beauty.
Benefits of Wattle Raised Garden Beds
- Sustainability: Using natural materials like branches or twigs is environmentally friendly, reducing waste and promoting sustainability in gardening practices.
- Aesthetics: The rustic look of wattle structures adds charm to your garden, creating a visually appealing space that blends with nature.
- Soil Health: Raised beds improve drainage and allow for better soil aeration, promoting healthy root development.
- Space-Saving: Wattle raised beds can be constructed in various sizes, making them suitable for small gardens, patios, or urban environments.
- Versatility: You can grow a variety of plants, from vegetables and herbs to flowers, in wattle raised beds, providing flexibility in your gardening choices.
Materials Needed
Before you start building your wattle raised garden bed, gather the following materials:
- Flexible branches or twigs: Willow, hazel, or other pliable woods work best.
- Sturdy corner posts: These can be made from untreated wood or recycled materials such as wooden pallets.
- Wire or twine: To secure the woven branches in place.
- Garden soil and compost: For filling your raised bed.
- Tools: A saw, shovel, garden gloves, and a mallet (if needed) for driving the posts into the ground.
Step-by-Step Instructions
Step 1: Choose a Location
Select a sunny spot in your yard or garden that receives at least 6-8 hours of sunlight daily. Ensure the area is flat and has good drainage. Clear the area of grass, weeds, and debris to prepare for construction.
Step 2: Prepare the Corner Posts
Decide on the dimensions of your raised garden bed. A typical size is 4 feet by 8 feet, but you can adjust the dimensions based on your available space. Cut your sturdy corner posts to the desired height (12-24 inches is standard).
Step 3: Mark the Outline
Use stakes or string to outline the area where your raised bed will be located. This will help ensure that your structure is straight and in line with your garden design.
Step 4: Install the Corner Posts
Using a mallet or hammer, drive the corner posts into the ground at each marked corner. Ensure that the posts are securely anchored and at a uniform height.
Step 5: Prepare the Wattle Material
While the corner posts are being installed, gather your flexible branches or twigs. Cut them to lengths that will allow them to fit between the corner posts. Aim for branches that are about 2-3 feet long for a standard height raised bed.
Step 6: Weave the Wattle
Start weaving the branches horizontally between the vertical corner posts. Begin at the base and work your way up, ensuring that each branch fits snugly against the others. Alternate the placement of branches to create a sturdy structure, and continue weaving until you reach the desired height.
Step 7: Secure the Wattle
Once the weaving is complete, use wire or twine to secure the branches in place. Wrap the wire or twine around the posts and the woven branches, tying them tightly to ensure stability. This will help prevent the wattle from collapsing over time.
Step 8: Fill the Raised Bed
With your wattle structure complete, it’s time to fill the bed with soil. Use a mix of quality garden soil and compost to provide essential nutrients for your plants. Fill the bed to the desired level, leaving a few inches of space at the top for watering.
Step 9: Choose Your Plants
Now comes the fun part—choosing what to plant in your wattle raised garden bed! Consider growing a mix of vegetables, herbs, and flowers to create a diverse garden. Some popular options include tomatoes, peppers, lettuce, basil, and marigolds.
Step 10: Plant Your Seeds or Seedlings
Once you’ve chosen your plants, follow the planting instructions for each variety. Space the plants according to their requirements, ensuring they have enough room to grow. If planting seeds, refer to the seed packet for depth and spacing guidelines.
Step 11: Water and Maintain
After planting, water your garden bed thoroughly. Monitor the moisture levels in the soil, watering as needed to keep the plants healthy. Additionally, check for weeds and pests regularly to ensure a thriving garden.
Tips for Success
- Choose the Right Plants: Consider your climate and growing conditions when selecting plants. Some plants thrive in warm weather, while others prefer cooler temperatures.
- Rotate Crops: To maintain soil health and reduce pest problems, practice crop rotation by changing the plants you grow in the bed each season.
- Mulch: Adding a layer of mulch on top of the soil can help retain moisture, suppress weeds, and maintain a consistent temperature for the plants.
- Compost: Incorporate compost into your soil mix or as a top dressing to provide additional nutrients throughout the growing season.
Conclusion
Building a wattle raised garden bed is a rewarding and sustainable project that enhances both your gardening experience and your outdoor space. With a little effort and creativity, you can create a charming and functional garden bed that will serve as a home for your plants while adding character to your garden.
Now that you know how to create a wattle raised garden bed, why not give it a try? Share your experiences, tips, or questions below, and let’s inspire each other in our gardening journeys!
#WattleGarden #RaisedGardenBed #EcoFriendlyGardening #GardenDIY #SustainableLiving #GardeningCommunity