
Introduction:
A rotating irrigation system made from plastic bottles is an inexpensive and sustainable way to water your garden. For just a few cents, you can create a DIY watering system that ensures even water distribution, helping your plants thrive.
Steps:
- Gather Materials: You’ll need a plastic bottle, a nail or drill, string or wire, and a garden hose.
- Create Holes: Poke small holes around the bottle to allow water to spray out.
- Secure the Bottle: Attach the bottle to a stick or pole using string or wire.
- Connect the Hose: Attach the bottle to your garden hose and turn on the water.
- Rotate and Water: The bottle will rotate as the water flows, evenly watering your garden.
Call to Action:
Have you ever tried building your own irrigation system? Share your tips and experiences with us! 🌱💧
Article:
Title: “How to Make a Rotating Irrigation System Using Plastic Bottles – 10 Cents Is Enough”
In today’s gardening world, innovation meets sustainability with DIY projects that save money and reduce waste. One such project is creating a rotating irrigation system using plastic bottles. This simple and cost-effective method allows you to water your garden efficiently for just a few cents, while also repurposing materials that might otherwise end up in the trash.
1. The Importance of Efficient Irrigation
Water is a vital resource for any garden, but traditional irrigation systems can be expensive and sometimes wasteful. An efficient irrigation system ensures that your plants receive the water they need without unnecessary waste. By building a rotating irrigation system with plastic bottles, you can achieve even water distribution across your garden, helping your plants to thrive while conserving water.
Why Choose a Rotating Irrigation System?
- Cost-Effective: With just a few inexpensive materials, you can create an effective irrigation system for less than 10 cents.
- Eco-Friendly: This DIY project reuses plastic bottles, reducing waste and promoting sustainability.
- Customizable: You can easily adjust the system to suit the size and needs of your garden.
2. Materials Needed for the Project
Before you begin, gather the following materials:
Materials List:
- Plastic Bottle (1-2 liters): A sturdy plastic bottle that can withstand water pressure.
- Nail or Drill: For creating holes in the bottle.
- String or Wire: To secure the bottle to a support.
- Garden Hose: To supply water to the system.
- Stick or Pole: To hold the bottle and allow it to rotate.
3. Step-by-Step Guide to Building Your Irrigation System
Once you have your materials ready, follow these steps to construct your rotating irrigation system.
Step 1: Prepare the Plastic Bottle
- Clean the Bottle: Start by cleaning the plastic bottle to remove any residue or contaminants. A clean bottle ensures that your plants receive clean water.
- Create Water Holes: Using a nail or drill, poke small holes around the sides of the bottle. These holes will allow water to spray out, creating the rotating effect.
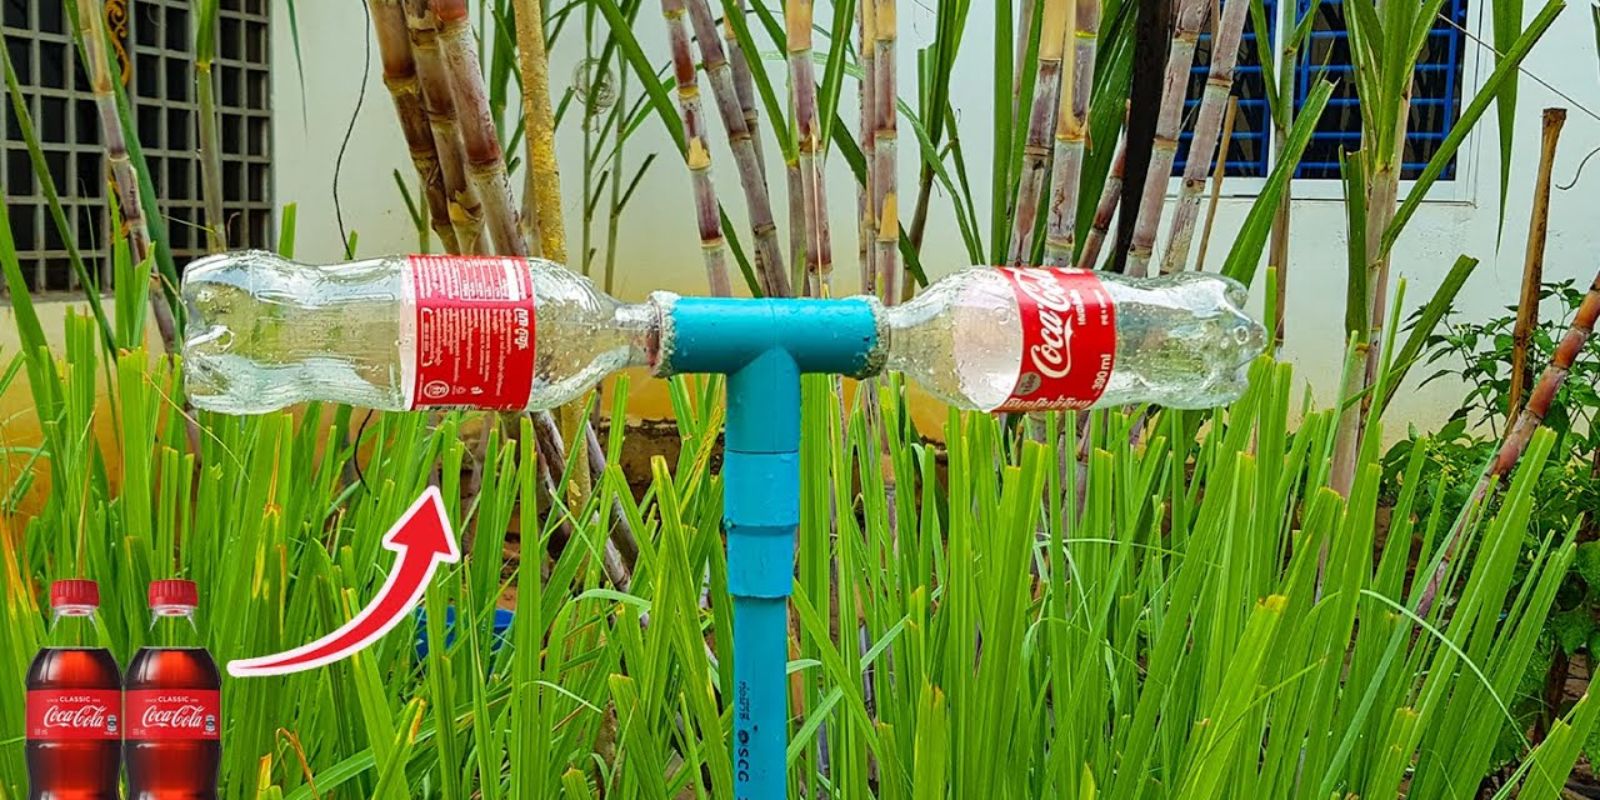
Step 2: Attach the Bottle to a Support
- Secure the Bottle: Use string or wire to attach the bottle securely to a stick or pole. Position the bottle horizontally with the cap facing down.
- Allow for Rotation: Make sure the bottle can rotate freely on the support when water pressure is applied.
Step 3: Connect the Garden Hose
- Attach the Hose: If the bottle has a cap, you can create a hole in it to fit the garden hose. Alternatively, remove the cap and insert the hose directly into the bottle.
- Check for Leaks: Turn on the water to ensure there are no leaks at the connection point. If necessary, secure the hose with waterproof tape.
Step 4: Test the System
- Turn on the Water: Slowly turn on the water and observe the system. The water pressure should cause the bottle to spin, distributing water evenly across your garden.
- Adjust as Needed: If the bottle isn’t rotating, check the positioning or adjust the size and number of holes.
4. Benefits of a Rotating Irrigation System
Building your own rotating irrigation system offers several benefits that make it an ideal choice for gardeners.
Cost Savings
Creating an irrigation system for just a few cents is a major financial win. Traditional irrigation systems can be costly to install and maintain, but this DIY approach offers a budget-friendly alternative.
Environmental Impact
Repurposing plastic bottles for irrigation helps reduce plastic waste, contributing to a more sustainable environment. This project demonstrates how small changes in our daily habits can have a positive impact on the planet.
Customization and Flexibility
This system can be tailored to fit any garden size. You can adjust the number of holes, the size of the bottle, and the water pressure to meet the specific needs of your garden, making it a versatile tool for any gardener.
Water Conservation
The rotating irrigation system ensures that water is evenly distributed across your garden, reducing waste and ensuring that every plant receives adequate hydration. This is especially important in areas where water is scarce or expensive.
5. Troubleshooting Common Issues
While the DIY rotating irrigation system is straightforward, you may encounter some challenges. Here are a few common issues and how to address them:
Issue: The Bottle Doesn’t Rotate
- Solution: Ensure the bottle is mounted securely and can spin freely. Adjust the string or wire if necessary and check that the holes are not too large, which could reduce the water pressure.
Issue: Low Water Pressure
- Solution: If the water pressure is too low to rotate the bottle, reduce the number of holes or increase their size slightly. You can also elevate the bottle to increase pressure.
Issue: Uneven Water Distribution
- Solution: Make sure the holes are evenly spaced around the bottle. Adjust the position of the bottle or the water pressure to achieve more uniform coverage.
6. Conclusion
Creating a rotating irrigation system using plastic bottles is an easy, cost-effective way to keep your garden hydrated while contributing to environmental sustainability. With just a few materials and a little time, you can build a functional and efficient watering system that benefits both your garden and the planet. Whether you’re new to gardening or an experienced green thumb, this project is a rewarding way to enhance your garden’s health.
Call to Action:
Have you tried building your own DIY irrigation system? We’d love to hear about your experience and any tips you might have. Share your thoughts and join the conversation! 🌿💧