
Worm castings, also known as vermicompost, are one of the most powerful natural fertilizers you can use in your garden. They are rich in essential nutrients that plants need to thrive, and they help improve soil structure and promote healthy root development. If you have a worm bin or composting system at home, learning how to harvest worm castings efficiently can provide you with a steady supply of this organic gold.
In this article, we will explore how to harvest worm castings the easy way, breaking down the process into manageable steps that even beginners can follow. Whether you’re new to worm composting or looking to refine your harvesting technique, this guide will walk you through everything you need to know to collect worm castings with ease.
What Are Worm Castings?
Before we dive into the harvesting process, it’s essential to understand what worm castings are and why they are so beneficial for your garden.
Worm castings are the end product of the digestive process of worms, primarily red wigglers, which consume organic matter such as food scraps and plant debris. As they process this material, they break it down into highly fertile, nutrient-rich castings. These castings are packed with beneficial microorganisms, micronutrients, and enzymes that can dramatically improve soil health and promote plant growth.
When applied to soil, worm castings enhance water retention, aeration, and drainage. They also provide a slow-release form of nitrogen, phosphorus, and potassium, making them an excellent organic fertilizer for your garden.
Why Harvest Worm Castings?
There are several reasons why you might want to harvest worm castings:
- Improved Soil Fertility: Worm castings are packed with nutrients that can greatly improve soil health and fertility. They provide a balanced, slow-release fertilizer for your plants.
- Better Plant Growth: The high levels of beneficial microorganisms in worm castings can help plants grow stronger and healthier by boosting their natural defense mechanisms and improving nutrient uptake.
- Sustainable Gardening: By using worm castings, you’re recycling organic waste into valuable soil amendments, reducing landfill waste, and embracing sustainable gardening practices.
- Cost-Effective Fertilizer: Growing your own worm castings means you won’t need to buy expensive fertilizers. It’s an environmentally friendly and cost-effective way to keep your garden flourishing.
Steps to Harvest Worm Castings the Easy Way
Harvesting worm castings doesn’t have to be a difficult or messy task. With a little patience and the right technique, you can collect the castings efficiently. Here are the step-by-step instructions on how to do it the easy way.
Step 1: Prepare Your Harvesting Area
The first step in harvesting worm castings is to set up a clean, dry surface where you can easily collect the castings. It’s best to use a tarp, large tray, or shallow container to catch the castings and prevent them from spilling onto the ground. You’ll also want a sieve or mesh screen to filter out any large chunks from the castings.
Make sure your tools are clean, as any leftover compost or organic matter from previous harvests could affect the quality of your worm castings.
Step 2: Separate the Worms from the Castings
The most critical part of harvesting worm castings is separating the worms from the finished castings. There are several methods to do this, each with its pros and cons. Here are a few common techniques:
Method 1: The Light Method
This is the simplest method and works well if your worm bin is large or if you’re dealing with a deep layer of castings. Here’s how to use the light method:
- Move the Bedding: Gently push aside the top layer of bedding in your worm bin to expose the finished castings beneath.
- Shine Light on the Bin: Worms are sensitive to light and will naturally burrow deeper into the bedding when exposed to light. Shine a light over the surface of the bin and wait for about 30 minutes. The worms will begin to move away from the light.
- Collect the Castings: Once the worms have burrowed deeper into the bedding, use your hands or a scoop to collect the finished castings from the surface.
Method 2: The Baking Tray Method
If you have a smaller bin or want to speed up the process, you can use the baking tray method. This method is especially useful for those who don’t want to wait too long for the worms to migrate downward.
- Prepare the Castings: Remove a portion of the finished worm castings from your bin and place them onto a clean tray or container.
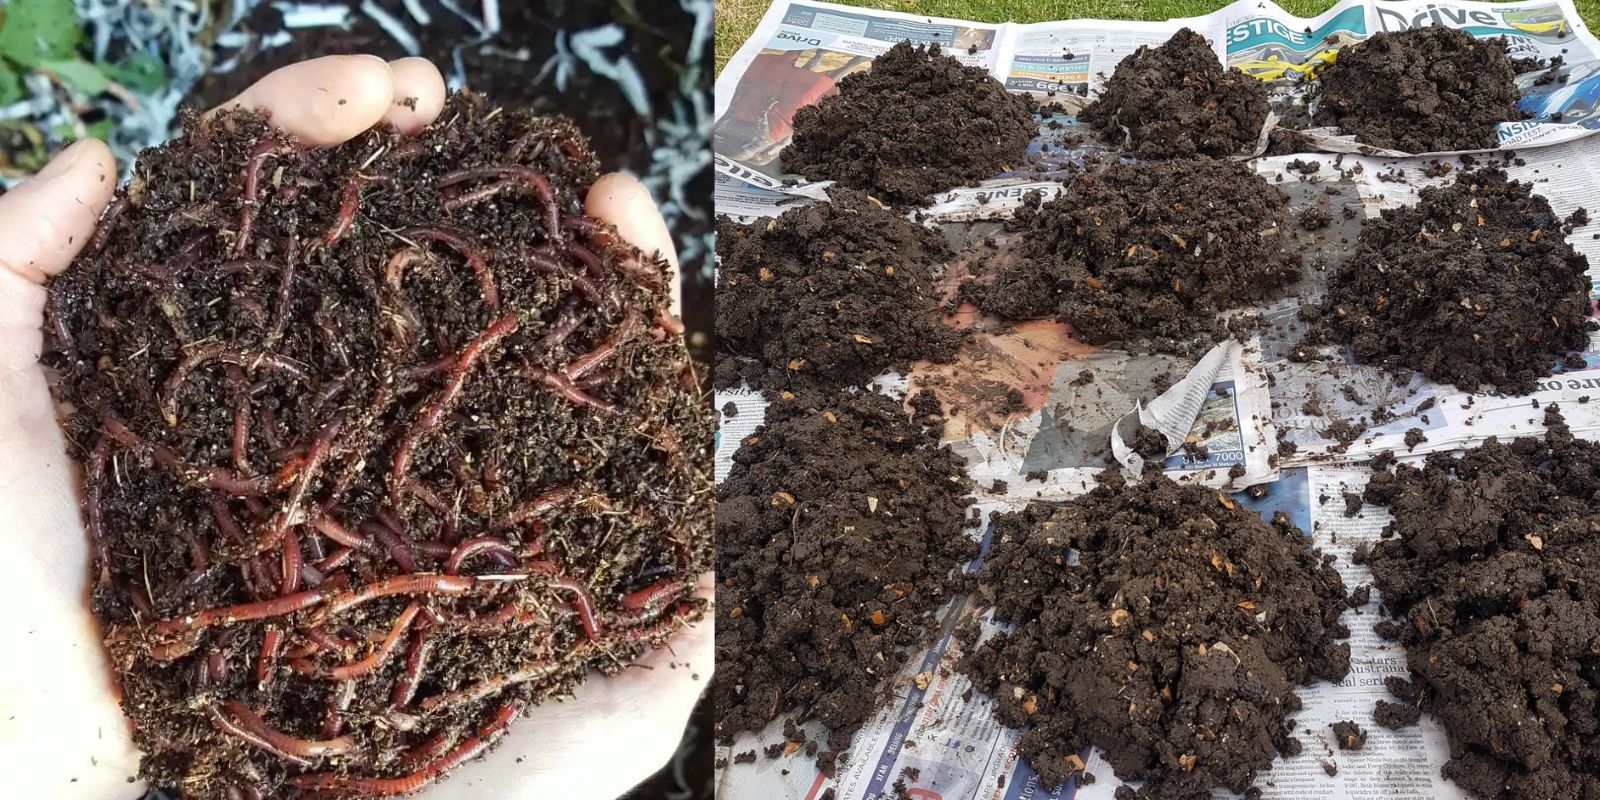
- Create a Mound: Form the castings into a mound on the tray, leaving the center higher than the edges.
- Wait for Migration: Over a few hours, the worms will naturally migrate from the mound toward the edges of the tray. Simply scoop out the castings from the edges, where the worms are least likely to be.
Method 3: The Separation Bin Method
For this method, you’ll need to create a separate bin or container for the worms to migrate into. It works best if you’re harvesting a significant amount of castings.
- Prepare the New Bin: Add fresh bedding and food to a new, empty bin. Make sure it has proper ventilation and drainage.
- Move the Worms: Gently transfer the worms from the original bin into the new bin with fresh bedding. Leave the castings behind.
- Wait for Migration: The worms will naturally move to the new bin over the next 1-2 weeks, leaving the castings behind in the original bin. Once most of the worms have moved, you can harvest the castings.
Step 3: Collect the Castings
Once you’ve successfully separated the worms from the castings, it’s time to collect the valuable fertilizer. Use a small shovel, scoop, or your hands to gently collect the castings and place them into a container or storage bag.
If you’re concerned about larger particles or debris in the castings, you can sift them using a mesh screen or sieve. This will leave you with fine, nutrient-rich castings that are perfect for your garden.
Step 4: Store the Worm Castings
Once you’ve harvested your worm castings, it’s essential to store them properly to maintain their quality and effectiveness. Keep the castings in an airtight container or a plastic bag to prevent moisture loss. They should be stored in a cool, dry place until you’re ready to use them.
If you plan to store the castings for an extended period, you may want to keep them in a shaded area to prevent them from drying out completely.
Tips for Maximizing Your Worm Casting Harvest
- Harvest Regularly: To ensure a continuous supply of worm castings, harvest your worm bin regularly. This will prevent the castings from piling up and make it easier to manage your bin.
- Feed Your Worms Consistently: Keep your worms healthy and happy by feeding them a balanced diet of kitchen scraps, coffee grounds, shredded paper, and other organic waste. A healthy worm population will lead to more castings.
- Use the Castings in Your Garden: Apply your worm castings directly to your garden as a natural fertilizer or use them to amend your soil. They can also be added to potting mixes for container plants.
Conclusion
Harvesting worm castings doesn’t have to be difficult or time-consuming. With the right technique and a little patience, you can collect this nutrient-rich fertilizer with ease. Whether you’re using the light method, the baking tray method, or the separation bin method, these simple steps will ensure you get the most out of your worm composting system.
By incorporating worm castings into your gardening routine, you’re not only improving the health of your plants but also contributing to sustainable gardening practices. So, go ahead, get your hands dirty, and start harvesting those valuable castings for your garden today!
#WormComposting #Vermiculture #WormCastings #SustainableGardening #OrganicGardening #DIYComposting #GardenHacks #GreenThumb #SoilHealth #PlantLovers #CompostingCommunity #HealthySoil #EcoFriendlyGardening #DIYGarden