
Introduction
Bringing a piece of the forest into your home by growing your own pine tree from a pinecone is not only a rewarding experience but also a wonderful way to contribute to a greener environment. Pine trees, with their evergreen needles and refreshing scent, symbolize strength and longevity. By following these simple steps, you can start your own mini-forest at home and enjoy the benefits of having a beautiful, oxygen-producing plant in your living space.
Step 1: Explore the Forest and Collect a Pinecone
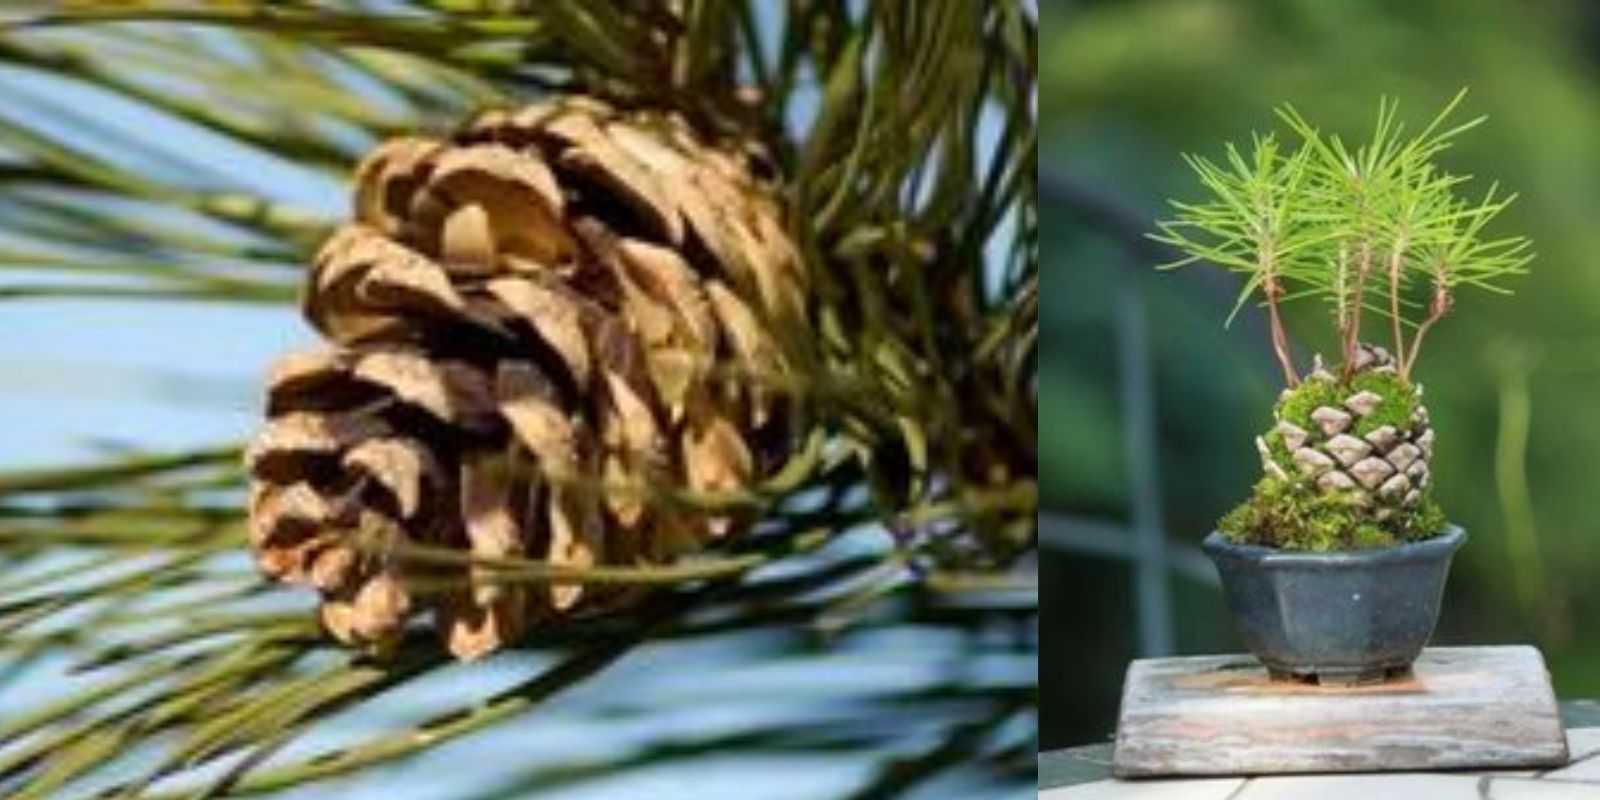
The first step in this exciting journey is to explore the forest and collect a healthy pinecone. Pinecones are the reproductive organs of pine trees, carrying the seeds that can grow into new trees. Here’s how to find and choose the right pinecone:
- Time of Year: The best time to collect pinecones is in the fall when they have matured and released their seeds. Look for pinecones that are fully opened, as closed pinecones may still contain seeds that have not yet matured.
- Location: Choose a pinecone from a healthy tree in a natural forest setting. Avoid collecting pinecones from areas that may be contaminated by pollution or pesticides.
- Condition: Select pinecones that are firm, brown, and free from mold or significant damage. A good pinecone should be dry and have a uniform color.
Step 2: Plant the Pinecone in a Pot
Once you have your pinecone, the next step is to plant it in a pot. This step involves choosing the right pot and soil, as well as planting the pinecone correctly to ensure it has the best chance of sprouting.
- Choosing a Pot: Select a pot with good drainage. Pine trees prefer well-draining soil to prevent root rot. A pot that is at least 6 inches deep will provide enough space for the roots to grow.
- Soil Preparation: Use a mix of potting soil and sand to create a well-draining medium. You can also add some organic compost to provide nutrients for the growing seedling.
- Planting the Pinecone: Place the pinecone in the pot with the pointed end facing upwards. Partially bury the pinecone in the soil, leaving about one-third of it exposed. This allows the seeds to be in contact with the soil while still receiving light and air.
Step 3: Water Moderately
Watering is crucial in the early stages of growth. Too much water can cause the pinecone to rot, while too little can dry out the seeds. Here’s how to water your pinecone properly:
- Frequency: Water the pinecone daily, but do so with moderation. The soil should be kept moist but not soggy.
- Method: Use a watering can with a fine spout to gently water the soil around the pinecone. Avoid pouring water directly onto the pinecone to prevent it from becoming waterlogged.
- Monitoring: Check the soil moisture regularly. If the soil feels dry to the touch, it’s time to water again. If the soil is still damp, wait another day before watering.
Step 4: Watch for Growth
With the right care, you will soon see signs of growth. Patience is key, as it can take several weeks for the seeds to germinate and start sprouting. Here’s what to expect:
- Germination: Initially, you may see tiny green shoots emerging from the pinecone. These are the first signs that the seeds are beginning to germinate.
- Seedling Stage: As the seedlings grow, they will develop into small pine trees with needles and a central stem. This stage requires continued care and attention to ensure healthy growth.
- Light Requirements: Place the pot in a sunny location where the seedlings can receive plenty of indirect sunlight. Pine trees need light to photosynthesize and grow strong.
Step 5: Congratulations!
By following these steps, you have successfully started your own pine tree from a pinecone. This achievement is not only personally rewarding but also beneficial for the environment. Here are a few more tips to help you care for your growing pine tree:
- Transplanting: As the pine tree grows, you may need to transplant it into a larger pot or even into your garden. Choose a location with well-draining soil and plenty of sunlight.
- Ongoing Care: Continue to water the pine tree regularly, but adjust the frequency based on its size and the weather conditions. Fertilize the tree occasionally with a balanced fertilizer to promote healthy growth.
- Pest Control: Keep an eye out for common pests like aphids or spider mites. If you notice any signs of infestation, treat the tree with an appropriate organic pesticide.
Benefits of Growing a Pine Tree
Growing a pine tree from a pinecone offers numerous benefits beyond the satisfaction of nurturing a plant from seed to tree:
- Environmental Impact: Pine trees are excellent at absorbing carbon dioxide and releasing oxygen, improving air quality. By growing a pine tree, you are contributing to a healthier environment.
- Aesthetic Appeal: Pine trees add a natural, evergreen beauty to any space. Whether indoors or outdoors, they create a calming and refreshing atmosphere.
- Educational Experience: This project can be a wonderful educational experience for children and adults alike, teaching patience, responsibility, and the basics of plant biology.
Conclusion
Starting your own pine tree from a pinecone is a fulfilling and environmentally friendly project. By exploring the forest, selecting a healthy pinecone, planting it in the right soil, and providing proper care, you can watch a small tree grow and thrive. This process not only brings a touch of nature into your home but also contributes to oxygen production and a greener planet. So, take a step towards sustainability and enjoy the journey of growing your own pine tree. Happy planting! 🍁